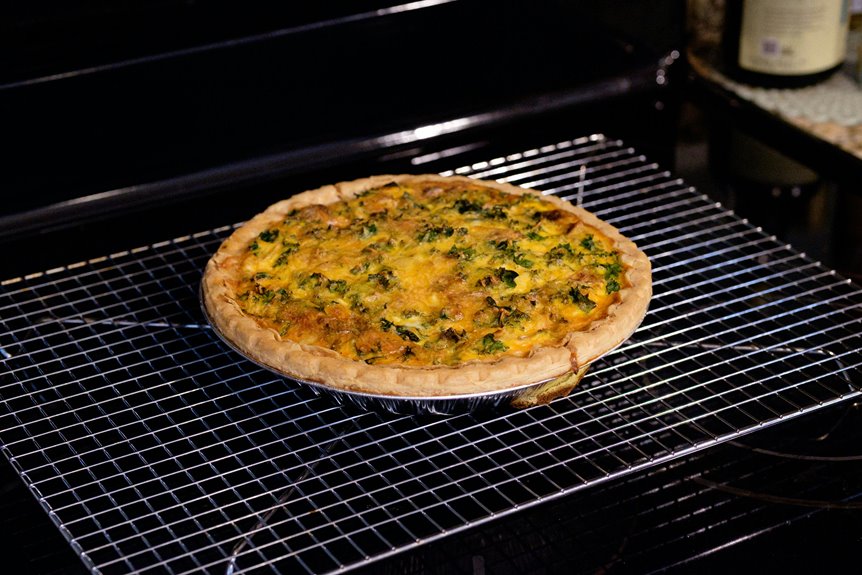
Yes, you can freeze quiche after baking. Let it cool completely first to prevent condensation and ice crystal formation on the surface. Wrap it tightly in plastic wrap, then foil, to avoid freezer burn. You’ll get the best results storing it for two to three months. Freeze it whole or sliced—slices thaw faster and offer portion control. Thaw overnight in your fridge before reheating to preserve crust texture and prevent sogginess. There’s more to know about preventing common freezing problems.
Let It Cool Completely First

Before you freeze your quiche, you’ve got to let it cool completely. This step prevents condensation and ice crystals from forming on the surface, which ruins the texture you’ve worked hard to achieve. When your quiche cools fully, the filling sets properly, creating a firmer structure that resists becoming soggy during freezing and reheating.
Cooling also protects your dish itself. Rapid temperature changes can crack or warp glass and Pyrex containers, so patience here saves you from replacing damaged cookware. A completely cooled quiche wraps more effectively too. You’ll seal plastic wrap and foil tightly without trapping steam, which prevents unwanted moisture buildup.
Taking time for thorough cooling supports better reheating results later, preserving both flavor and structure. You’re investing a few hours now for significantly improved outcomes when you eventually serve your quiche.
How to Wrap and Store Frozen Quiche
You’ll want to wrap your cooled quiche with at least two layers of protection—start with plastic wrap or Press n Seal, then add aluminum foil or seal it in an airtight freezer bag to prevent freezer burn and condensation damage. Choose a glass pie pan for freezing since it won’t warp, and lay it flat in your freezer rather than standing it upright, which helps it freeze evenly and stay structurally sound. This careful wrapping and storage approach keeps your quiche at peak quality for up to four months.
Wrapping Techniques And Materials
Once your quiche has cooled completely, it’s time to wrap it properly—and this step matters more than you might think. Start by wrapping your quiche tightly in plastic wrap or cling film at least twice. This double layer minimizes air exposure and prevents freezer burn that can damage texture and flavor. After the plastic wraps are secure, add a layer of aluminum foil around the entire package. This creates a protective barrier against moisture and odor absorption from other freezer items.
For maximum protection, place your wrapped quiche in a freezer-safe bag or airtight container. Lay it flat to maintain its shape and prevent cracking. If you’re using a glass pie pan and plan to stack quiches later, glass containers work best for compatibility and durability.
Container Selection For Storage
With your quiche wrapped in multiple protective layers, the final step is choosing the right container to hold everything in place. You’ll want to place your wrapped quiche in a freezer-safe bag or airtight container for optimal freezer storage. Storing it flat prevents warping and helps maintain its original shape during those months in the freezer.
Glass pie pans deserve special mention here. They’re excellent choices because they preserve texture and prevent cracking or uneven cooling. If you’re using a glass pan, you can freeze the quiche directly in it, then wrap it securely before placing it in your storage container.
Always label your container with the date and contents. This tracking system ensures you’ll use your quiche within the recommended four-month window, preventing waste and maintaining quality.
Optimal Freezer Organization Methods
How effectively your frozen quiche maintains its quality depends entirely on your wrapping technique. You’ll want to wrap your cooled quiche twice—first with plastic wrap or Press ‘n Seal, then with aluminum foil. This double barrier prevents moisture loss and freezer burn while blocking air and odors.
Store your wrapped quiche flat in the freezer to prevent warping and ensure even freezing. Label it clearly with the content and date so you’ll know exactly what you’re storing and when. You can freeze your quiche whole or in individual slices. Sliced portions actually freeze more efficiently and reduce waste during reheating, making them practical for busy households.
A glass pie pan designed for freezing minimizes cracking and preserves texture during long-term storage. With proper technique, your frozen quiche stays stable up to four months.
Freeze Whole or Sliced?

When you’re ready to freeze your baked quiche, you’ll face a choice: freeze it whole or slice it first.
Slicing before freezing offers practical advantages. Individual slices thaw faster and give you portion control, so you’re not defrosting an entire quiche when you need just one serving. You’ll also avoid uneven thawing, which can leave some parts warm while others stay frozen.
Whole quiches present challenges. The crust tends to become soggy during thawing, and the uneven temperature distribution compromises texture throughout. However, if you do freeze whole, ensure it’s completely cooled first.
For best results with slices, freeze them individually on a tray before bagging them together. This prevents them from sticking, making it easy to grab what you need. Either way, wrap tightly in freezer-safe packaging and store up to four months.
Flash Freeze Slices to Prevent Sticking

Flash freezing’s your best defense against those stuck-together slices that defeat the whole purpose of portioning your quiche. After cooling completely and slicing into 4–6 portions, arrange slices on a tray with space between each piece. Freeze them individually for about 2 hours until solid. This approach minimizes moisture contact between pieces, which preserves your crust texture during storage.
Once frozen solid, transfer the separated slices into a single bag or airtight container. You’ll keep them from fusing together while maximizing freezer space. This method means you can grab exactly the portions you need without thawing everything at once. Store your slices for up to 4 months using this technique, maintaining both quality and convenience throughout the freezing period.
Should You Thaw Frozen Quiche Before Reheating?

Thawing your frozen quiche before reheating it’s the smarter choice, and here’s why: you’ll get even, thorough warming throughout the entire dish. When you skip thawing and reheat from frozen, the center stays cold while edges overheat, leaving you with an uneven meal and soggy crust.
| Thawing Method | Time Required | Best For |
|---|---|---|
| Overnight fridge | 8-12 hours | Maintaining texture |
| Room temperature | 2-3 hours | Quicker thawing |
| Partial thaw | 1-2 hours | Time-sensitive situations |
| Direct reheating | 0 hours | Last resort only |
| Slow oven thaw | 30-45 minutes | Gentle defrosting |
An overnight fridge thaw prevents condensation buildup that damages your crust. This gradual process maintains both filling consistency and pastry quality. Once thawed completely, use controlled oven or air fryer reheating to restore crispness. You’ll belong to the group enjoying perfectly reheated quiche every time.
Reheating Frozen Quiche: Thawed vs. Straight From Freezer

Should you thaw your quiche first, or can you reheat it straight from the freezer? Thawing overnight in the fridge is your best option. This method promotes even warming throughout your quiche and prevents your crust from becoming soggy due to condensation buildup.
Reheating directly from frozen creates problems. You’ll experience uneven heating, with some portions warming faster than others. Your crust won’t crisp properly either, leaving you disappointed with the texture.
If you’re short on time, try this hybrid approach: microwave your quiche on medium until the center thaws, then finish in an oven or air fryer at 320°F for about ten minutes. Using a preheated baking sheet underneath helps crisp the crust during this final stage. Your thawed quiche deserves this extra attention for optimal results.
Why Frozen Quiche Crust Gets Soggy

When you freeze quiche, you’re trapping water inside the filling, and as it thaws, that moisture releases and migrates downward toward your crust. Ice crystals form throughout the filling during freezing, and when they melt during thawing or reheating, they turn back into liquid water that has nowhere to go but down. This condensation collects against the crust surface, softening it and creating that soggy texture you want to avoid.
Moisture Accumulation During Thawing
Why does your quiche crust turn soggy after freezing and thawing?
When you’re freezing quiche, moisture migrates from the filling to the crust as ice crystals melt during thawing. This process happens naturally. Additionally, condensation forms on your quiche’s surface when it thaws, especially if you wrapped it tightly during freezing. That tight wrapping blocks airflow, trapping moisture against the crust.
The thawing process itself accelerates moisture accumulation. As frozen water in the filling transforms back into liquid, it travels downward through gravity’s pull. Your crust absorbs this moisture, losing its crispness and becoming soft and waterlogged.
Understanding this moisture movement helps you prevent sogginess. Thawing slowly in your refrigerator allows gradual moisture release rather than rapid pooling. This controlled approach preserves your crust’s texture better than room-temperature thawing.
Ice Crystal Formation Process
The moisture problems you’re experiencing stem from what happens at the molecular level when your quiche freezes. During the quiche freezing process, water in your filling and crust transforms into ice crystals. These crystals grow larger when freezing happens slowly or unevenly, and that’s where trouble begins.
Large ice crystals puncture tiny holes throughout your crust structure. When you thaw your quiche later, those crystals melt and release moisture directly into the crust. The result? A soggy bottom that disappoints you every time.
Rapid, even freezing creates smaller crystals that cause less structural damage. This is why properly wrapping your quiche in airtight containers matters significantly. You’re essentially controlling how ice forms, which directly determines your crust’s final texture and your overall satisfaction with the result.
Condensation Against Crust Surface
Right after you pull your quiche from the oven, it’s still releasing steam—and that’s when condensation problems begin. Warm moisture rises and settles on whatever surface it encounters. When you wrap that hot quiche, you’re trapping steam directly against the crust, creating a damp environment that weakens its structure.
Here’s what happens inside your freezer:
- Steam condenses into water droplets on the crust surface
- Ice crystals form from this accumulated moisture, penetrating the pastry
- Upon thawing, the crust absorbs this moisture and becomes soggy
You can prevent this by cooling your quiche completely before wrapping it. This simple step dramatically reduces the surface moisture that would otherwise condense against your crust during freezing. Proper cooling protects the crispy texture you worked hard to achieve, keeping your quiche enjoyable when you reheat it later.
Storage Duration: 2–3 Months Maximum
How long can you actually keep that frozen quiche? You’ll want to consume it within 2–3 months for the best quiche freezing results. Beyond that window, quality deteriorates as ice crystals form and break down the egg and cream structure, affecting both texture and flavor.
Labeling your quiche with the freeze date makes tracking this timeline simple. You’ll avoid the frustration of discovering a forgotten container months later. The 2–3 month window gives you plenty of time to plan meals without rushing through your freezer inventory.
This timeframe applies regardless of your wrapping method or container choice. Even perfectly wrapped quiches gradually lose their appeal over extended storage. Sticking to this guideline ensures you’re serving yourself and your family the best-quality dish possible.
Freeze Quiche Before or After Baking?

When it comes to freezing quiche, you’ve got two solid options, and each one has its own advantages.
You can freeze your quiche after baking, or you can assemble it unbaked and freeze it instead. Here’s what you need to know:
- Freezing after baking requires you to cool the quiche completely, wrap it tightly, and store it for up to 2–3 months. However, you risk ending up with a soggy crust when you thaw and reheat it.
- Freezing unbaked quiche lets you bake it directly from frozen when you’re ready to eat. This approach preserves your crust’s texture better since it bakes fresh.
- Pre-baking your crust before freezing the filled quiche helps prevent sogginess regardless of which method you choose.
Both approaches work. Your choice depends on whether you prioritize convenience or crust quality.
Common Frozen Quiche Problems and Fixes

You’ll likely encounter two main issues when you freeze and thaw quiche: a soggy crust and a watery filling, both caused by moisture that escapes from the filling and settles in the crust during thawing. To prevent these problems, you’ll want to cool your quiche completely before freezing, wrap it tightly in plastic wrap and foil to minimize moisture loss, and thaw it fully at room temperature rather than microwaving it from frozen. When you reheat your thawed quiche on a preheated baking sheet or pizza stone, you’ll draw moisture away from the crust and restore its crispness more effectively than using a standard oven rack.
Soggy Crust Solutions
Why does your frozen quiche’s crust sometimes turn soggy instead of staying crispy? Moisture from the filling migrates during freezing and thawing, weakening your crust texture. You can prevent this problem by implementing proven techniques:
- Blind-bake your crust before adding the filling to create a stronger, more resistant base that resists moisture penetration.
- Brush beaten egg onto the prebaked crust to form a protective moisture barrier between filling and pastry.
- Use a preheated baking stone or sheet when initially baking to promote even crust crispness from the start.
When freezing quiche crusts, pre-freeze on a tray until solid, then wrap tightly to prevent ice crystals. Thaw completely at room temperature or in the fridge before reheating at 300–350°F with foil to restore crispness and eliminate sogginess.
Watery Filling Prevention
Watery filling stems primarily from moisture that vegetables and eggs release during freezing and thawing. You can prevent this common problem by pre-cooking moisture-rich vegetables like spinach and mushrooms before adding them to your quiche filling. This step removes excess liquid before it has a chance to accumulate.
You’ll also want to avoid overcooking the eggs, since heat causes them to release water that settles at the bottom when thawed. A simple solution involves adding a stabilizer, such as cornstarch or flour, to your quiche filling mixture. This absorb excess moisture and keeps your texture firmer after thawing.
These preventive measures work together to maintain your quiche filling’s quality throughout freezing and reheating.
Troubleshooting Common Freezing Problems
Even with careful preparation, freezers can throw curveballs at your quiche. You’ll encounter predictable issues when freezing quiche, but they’re manageable with the right approach.
Even with careful preparation, freezers can throw curveballs at your quiche—but these predictable issues are manageable with the right approach.
- Soggy crust develops when moisture migrates into the pastry during storage, making it lose its crispy texture and appeal.
- Freezer burn occurs from improper wrapping, leaving ice crystals that damage both filling and crust, compromising quality and taste.
- Uneven thawing happens when you skip the room temperature step, causing the center to warm slower than the edges, resulting in cold spots.
Prevent these problems by blind-baking your crust beforehand and applying beaten egg as a moisture barrier. Use glass pie pans on preheated baking sheets, then wrap tightly with press-and-seal plastic wrap twice before adding foil. Always thaw completely at room temperature before reheating to ensure even warming throughout.