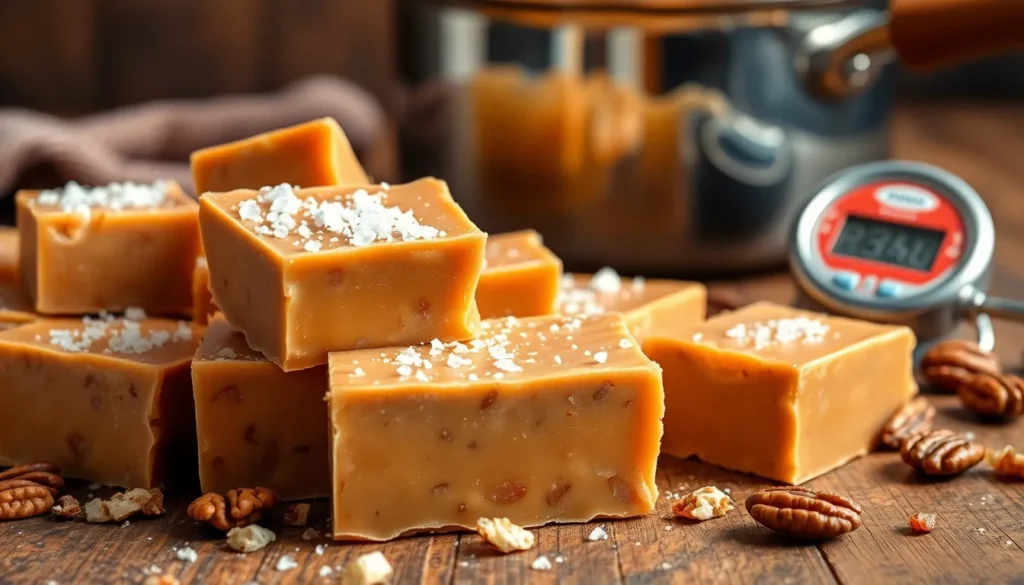
Few treats capture the perfect balance of sweet and salty quite like salted caramel fudge. This irresistible confection combines rich buttery caramel with a hint of sea salt creating a flavor explosion that’s become a modern classic in dessert circles.
We’ve perfected this recipe to deliver that coveted contrast between creamy sweetness and savory depth that makes salted caramel so addictive. The silky smooth texture melts on your tongue while the flaky sea salt crystals provide delightful bursts of flavor that elevate this fudge from ordinary to extraordinary.
Whether you’re preparing homemade gifts for the holidays or simply treating yourself to something special our salted caramel fudge delivers professional bakery quality results right from your own kitchen. With just a handful of ingredients and our foolproof technique you’ll create squares of pure indulgence that rival any gourmet candy shop.
Ingredients
Creating this decadent salted caramel fudge requires carefully selected ingredients that work together to achieve the perfect texture and flavor balance. We’ve organized our ingredient list by component to help streamline your preparation process.

Irresistible Caramel Sugar Topping: Craving a gourmet touch? Sprinkle this caramel sugar topping over ice cream, baked goods, or hot cocoa for a decadent upgrade. Each sprinkle transforms everyday treats into indulgent masterpieces.

This habit-forming flavor combines creamy caramel with the perfect hint of salt that will have you coming back for more!

Chewy Caramel Delight: Indulge in soft, chewy caramel goodness with Concord Foods Caramel Apple Kit, guaranteed to satisfy your sweet tooth cravings.
For the Fudge Base
- 3 cups white chocolate chips or chopped white chocolate
- 1 can (14 oz) sweetened condensed milk
- 3 tablespoons unsalted butter
- 1 teaspoon vanilla extract
- 1/4 teaspoon salt
For the Salted Caramel Layer
- 1 cup granulated sugar
- 6 tablespoons unsalted butter, cubed
- 1/2 cup heavy cream, room temperature
- 1 teaspoon vanilla extract
- 1 teaspoon flaky sea salt, plus extra for sprinkling
For Topping
- 1/2 teaspoon flaky sea salt for finishing
- Optional: 1/4 cup toasted chopped pecans or walnuts
Equipment Needed

Creating perfect salted caramel fudge requires the right tools to achieve professional results. We recommend gathering essential equipment before starting to ensure smooth preparation and optimal texture.

ACCURATE FAST READINGS (No More Burned Candy) --- Our candy deep fry thermometer provides instant and accurate temperature readings within seconds. Its advanced technology ensures precise measurements, allowing you to monitor the temperature of your food with confidence.


Pot Clip Design for Safer Operation: This candy thermometer digital with clip can be fixed to the pot so you can free your hands to focus on the cooking, and protect your hands from the hot
Essential Kitchen Tools
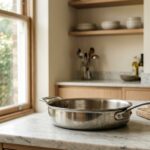
A heavy-bottomed saucepan serves as our primary vessel for cooking the caramel layer. Digital candy thermometer becomes crucial for monitoring temperature accuracy during caramel preparation. We need a sturdy wooden spoon or heat-resistant silicone spatula for constant stirring without scratching cookware.
Sharp knife allows precise cutting of finished fudge into uniform squares. Measuring cups and spoons ensure accurate ingredient ratios for consistent results. We suggest using an 8×8 inch square baking pan lined with parchment paper for easy removal.
Professional Equipment Options
Commercial fudge makers benefit from specialized equipment like the Savage Bros Firemixer-14 fudge making machine. This versatile unit handles heating and mixing functions for fudge, caramel, and toffee production. Candy cookers and stoves from Savage Bros provide precise temperature control for sugar mixture heating.
Candy depositors streamline the process by pouring fudge mixture into molds or onto surfaces with consistent distribution. These tools particularly benefit high-volume production or frequent fudge making.
Specialized Caramel Equipment
Dedicated caramel making equipment includes caramel kettles or cookers for scratch preparation. These tools maintain steady temperatures and prevent scorching during the delicate caramel cooking process. Professional molds create uniform shapes and professional presentation.
Recommended Suppliers
Calico Cottage offers comprehensive ingredients and equipment selections for fudge makers. Their wide range supports both amateur and professional confection creators with quality tools and supplies.
Having proper equipment transforms fudge making from challenging to enjoyable while guaranteeing consistent professional quality results.
Instructions

Creating perfect salted caramel fudge requires precise timing and temperature control. We’ll walk you through each step to achieve that coveted balance of rich caramel and creamy fudge texture.

[100% HEALTHY & UNBLEACHED]: Made from 100% natural wood pulp, Tikxlafe parchment paper is completely unbleached, non-toxic, and BPA-free. These natural brown sheets ensure your family’s food stays safe and healthy, without any harmful chemicals leaching into your meals.

SAFE & HEALTHY MATERIALS: Our 8x8 parchment paper squares are made of 100% natural wood pulp, no fluorescents, completely non-toxic and meets food safety standards. White parchment paper is heat-resistant up to 450°F, perfect for any baking or cooking need

NO MORE HASSLES – Tired of parchment that curls or burns? Choose Baker’s Signature precut, unbleached sheets. They won't curl, stick, or burn. Ideal for bread, pastries, cookies, cakes, and more. Ensure a seamless baking experience, guaranteed!
Prep the Pan
Grease an 8-inch square pan thoroughly with butter or cooking spray to prevent sticking. Line the pan with parchment paper, allowing extra paper to hang over the edges for easy removal later. This double protection ensures our fudge releases cleanly from the pan once set. For larger batches, we recommend using a 9×13-inch pan with the same preparation method.
Make the Caramel Layer
We’ll combine sweetened condensed milk, brown sugar, butter, and golden syrup in a heavy-bottomed saucepan for the simple method. Heat the mixture over low heat until the sugar completely dissolves, stirring constantly to prevent burning. Increase heat to medium and continue cooking until the mixture simmers and thickens to a rich caramel consistency.
For a more complex flavor profile, mix granulated sugar, butter, and evaporated milk in a large saucepan over medium heat. Add caramel bits during cooking to intensify the caramel flavor. Monitor the temperature carefully, aiming for the softball stage at 116°C for optimal texture.
Prepare the Fudge Base
Gather sweetened condensed milk, brown sugar, milk, butter, and salt for our rich caramel fudge base. These ingredients create the foundation for our creamy texture and deep caramel flavor. Add vanilla extract to enhance the overall taste profile and marshmallow fluff for extra smoothness if desired.
Different types of brown sugar will produce varying caramel intensities, so experiment with light or dark brown sugar based on your preference. The salt content should be balanced to complement rather than overpower the sweet caramel notes.
Combine and Set
Remove the caramel mixture from heat immediately once it reaches the proper consistency. Add white chocolate or other fudge base ingredients while the mixture is still hot, stirring until completely smooth and well combined. Work quickly during this step as the mixture will begin to set as it cools.
Pour the fudge mixture into our prepared pan, using an offset spatula to smooth the top evenly. Sprinkle flaky sea salt over the surface while the fudge is still warm for proper adhesion. Refrigerate the fudge for several hours or overnight until completely set and firm to the touch.
Directions for Perfect Results

Mastering salted caramel fudge requires attention to exact techniques that ensure consistent results every time. We’ll guide you through the critical steps that separate good fudge from exceptional fudge.

【Eco-Friendly Acacia Wooden Spatula】 Our spatula set is made of natural acacia wood, known for its dense grain and natural resilience, making these cooking utensils crack-resistant, heat-resistant, will not melt due to high temperature like rubber one. Besides, acacia wood is completely biodegradable, using this wooden turner reduces reliance on plastics, helps minimize environmental impact, and ensures safety for both you and the planet.

12" EXTENDED SAFETY DESIGN: Tailored for deep stockpots and Dutch ovens! This 2-piece set of round wooden cooking spoons features a nearly 12-inch extended handle, keeping your hands safely away from hot steam and boiling splatters. Whether deep-frying or simmering large stews, these extra-long wooden mixing spoons provide the perfect protective distance. Safely tackle high-heat tasks with these reliable wood spoons for cooking, your ultimate wooden spoons for cooking
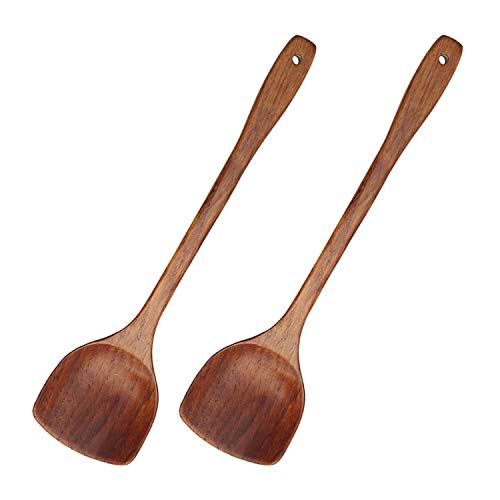
【Wood Spatula for Cooking Pack of 2】:Most wood spatulas in the market are not well polished or constructed of raw material without any safe covering, but our spatulas, burnished and covered at least three times, have incredibly sleek surface and superb handhold feeling. You will definitely find NO dents, small gaps or splinters from our spatulas!
Temperature Tips
Using a candy thermometer proves essential for achieving perfect fudge texture. We recommend heating your sugar mixture to exactly 234°F during the boiling stage to reach the proper consistency. The soft ball test offers an alternative method when you don’t have a thermometer available – simply drop a small amount of the hot mixture into cold water and watch for it to form a soft ball that holds its shape.
Temperature control prevents common fudge failures like graininess or overly soft texture. We suggest monitoring the mixture closely as it approaches the target temperature since sugar can quickly move from perfect to overcooked. Removing the pan from heat immediately upon reaching 234°F ensures optimal results.
Layering Technique
Sprinkling sea salt on top of the fudge before it sets creates the signature salty-sweet contrast that makes this treat irresistible. We apply the salt while the surface remains slightly warm but not hot enough to dissolve the crystals completely. This timing preserves the delightful texture contrast between smooth fudge and crunchy salt.
Even distribution across the surface ensures every bite delivers the perfect balance of flavors. We recommend using flaky sea salt rather than table salt for superior texture and visual appeal. The larger crystals provide satisfying bursts of saltiness that complement the rich caramel base.
Setting Time
Allowing fudge to cool and set in the refrigerator for at least 2 hours ensures proper firmness. We often extend this time to overnight for best results, particularly when making larger batches. The extended cooling period allows the fudge to develop its characteristic smooth texture.
Beating the mixture after it cools to room temperature creates firmer fudge with a more traditional texture. We continue beating until the mixture becomes matte and loses its glossy appearance. This technique transforms the fudge from creamy to firm while maintaining its rich flavor profile.
Proper pan preparation with parchment paper prevents sticking and makes removal effortless. We store finished fudge in an airtight container in the refrigerator for up to two weeks, ensuring it maintains its perfect texture and flavor throughout storage.
Storage Instructions

Once we’ve crafted our perfect salted caramel fudge, proper storage ensures we can savor every piece at its peak quality. The way we store our homemade confection directly impacts its texture, flavor, and shelf life.

Maldon Sea Salt Flakes 125g

Salted caramel sauce for desserts, ice cream, shakes, specialty coffee drinks

GOURMET SEA SALT FLAKES: This premium finishing salt is made from natural sea water of the Mediterranean off the coast of Cyprus, with no anti-caking agents or fillers.
Room Temperature Storage
We can keep our salted caramel fudge fresh at room temperature for 1 to 2 weeks when stored correctly. Place the cut fudge pieces in an airtight container and store them in a cool, dry location away from direct sunlight and heat sources. Kitchen counters near stoves or windows should be avoided as temperature fluctuations can affect the fudge’s consistency.
Refrigerator Storage
For extended freshness, we recommend refrigerator storage which extends our fudge’s life to 2 to 3 weeks. Transfer the fudge pieces to an airtight container to prevent them from drying out and absorbing unwanted refrigerator odors. We suggest wrapping each piece individually in cling film or wax paper for extra protection against moisture and flavor contamination.
Freezer Storage
Long term storage becomes possible when we freeze our salted caramel fudge for up to 3 months. Use a freezer-friendly airtight container to maintain optimal freshness and prevent freezer burn. Allow frozen fudge to thaw at room temperature for 15 to 20 minutes before serving to restore its ideal texture.
| Storage Method | Duration | Container Type | Special Instructions |
|---|---|---|---|
| Room Temperature | 1-2 weeks | Airtight container | Cool, dry place away from heat |
| Refrigerator | 2-3 weeks | Airtight container | Individual wrapping recommended |
| Freezer | Up to 3 months | Freezer-safe airtight container | Thaw 15-20 minutes before serving |
Essential Storage Tips
Always use clean utensils when handling our fudge to prevent contamination. Regular inspection helps us identify any signs of spoilage including odd smells, mold formation, or unexpected texture changes. These simple practices ensure our salted caramel fudge maintains its delicious quality throughout its storage period.
Serving Suggestions

We’ve discovered that salted caramel fudge pairs beautifully with various beverages and accompaniments that enhance its rich flavors. Strong coffee or espresso creates a sophisticated contrast that balances the sweetness while highlighting the caramel notes. This pairing works exceptionally well for after-dinner treats or sophisticated gatherings.
For wine enthusiasts, we recommend serving our salted caramel fudge alongside a fruity red wine. The wine’s natural tannins complement both the sweet caramel and salty elements, creating a harmonious flavor profile that elevates the entire tasting experience.
Vanilla-based desserts make excellent companions to salted caramel fudge. We often serve small squares alongside vanilla ice cream or vanilla cake to balance the intense flavors. This combination allows each element to shine while creating a cohesive dessert experience.
During colder months, we love incorporating salted caramel fudge into hot chocolate preparations. Adding pieces to hot chocolate on a stick creates a delightful wintertime treat that slowly melts and infuses the drink with rich caramel flavors.
Our salted caramel fudge becomes the star of holiday gatherings. We’ve found it particularly popular during Thanksgiving, Christmas, and Valentine’s Day celebrations due to its decadent appeal and luxurious presentation.
Presentation Enhancement Tips:
- Drizzle additional caramel sauce over individual pieces before serving for an elegant touch
- Sprinkle coarse sea salt or chopped nuts on top for added textural contrast
- Use the fudge as a topping for ice cream or cheesecakes
- Incorporate pieces as filling for cakes and pastries
These serving suggestions transform our homemade salted caramel fudge from a simple confection into a versatile dessert component that enhances any occasion.
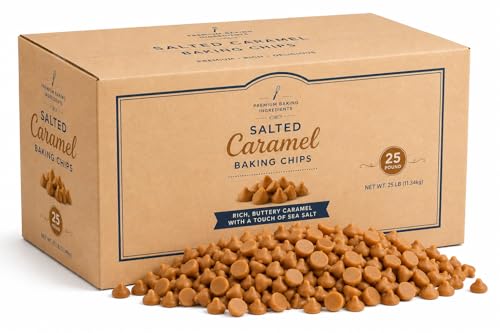
BULK COMMERCIAL SIZE – Large 25 lb supply ideal for bakeries, restaurants, ice cream shops, and foodservice operations.


Irresistible Caramel Sugar Topping: Craving a gourmet touch? Sprinkle this caramel sugar topping over ice cream, baked goods, or hot cocoa for a decadent upgrade. Each sprinkle transforms everyday treats into indulgent masterpieces.
Troubleshooting Tips

Even experienced bakers encounter challenges when making salted caramel fudge. We’ve compiled answers to the most common issues to help you achieve perfect results every time.

MASTER CONFECTIONS & DEEP FRYING: Measures temperatures from 100°F to 400°F, covering all essential cooking stages including Thread, Soft Ball, Hard Crack, and deep-frying ranges, ensuring perfectly crispy fried foods and glossy, delicious candies every time.

【2026 New Stainless Steel Candy Thermometer】The food grade stainless-steel casing provides strength and corrosion resistance, insulated handled does not retain heat, providing durability and safety; The plastic protective sheath of glass thermometer can protect the thermometer from breaking, also easy to store.

MULTI-PURPOSE: 12 inch stainless steel thermometer with pot clip can directly and accurately measure the oil pan, deep frying, barbecue temperature control.
Fixing Grainy Fudge
Grainy texture develops when sugar crystals form during the cooking process. We recommend swirling the pan instead of stirring to prevent crystallization. Use a wet pastry brush to wipe down sugar crystals that form on the sides of the pan during cooking.
Temperature control plays a crucial role in preventing graininess. Always use a candy thermometer to ensure your mixture reaches between 234°F and 239°F for optimal texture. Heavy-bottomed pots distribute heat evenly and reduce the risk of sugar burning or crystallizing.
Avoid stirring once the sugar begins to dissolve. Instead allow the mixture to cook undisturbed until it reaches the proper temperature. If your fudge has already turned grainy you can remelt it and cook it again while following proper temperature guidelines.
Caramel Layer Issues
Caramel layer separation occurs when ingredients aren’t properly incorporated before cooking. We ensure all components are thoroughly combined at room temperature before heating. This prevents the caramel from breaking or separating during the cooking process.
Uneven heating can cause the caramel to develop a bitter taste. Use a heavy-bottomed saucepan and maintain consistent medium heat throughout the cooking process. Stir gently and continuously to prevent hot spots that can burn the sugar.
Soft or runny caramel results from insufficient cooking time or temperature. The mixture must reach at least 235°F to achieve proper consistency. If your caramel layer remains too soft you can return it to the heat and cook for additional time until it reaches the correct temperature.
We recommend testing caramel consistency by dropping a small amount into cold water. Properly cooked caramel will form a soft ball that holds its shape. This method provides reliable results when a thermometer isn’t available.
Make-Ahead Instructions

Planning ahead transforms our salted caramel fudge into the perfect stress-free dessert for entertaining or gift-giving. We can prepare this decadent treat completely in advance and store it properly to maintain its rich flavor and creamy texture.
Our fudge benefits from extended cooling time which allows the flavors to meld beautifully. After pouring the combined caramel and fudge mixture into our prepared pan we should allow it to cool at room temperature for at least 30 minutes before transferring to the refrigerator. The cooling process takes approximately 2 hours for standard batches though larger portions may require up to 4 hours to achieve the ideal firm texture.
We recommend making our salted caramel fudge up to one week before serving when stored at room temperature in an airtight container. For longer storage periods we can refrigerate the finished fudge for 2 to 3 weeks or freeze it for up to 3 months without compromising quality. The key lies in proper wrapping techniques that prevent moisture absorption and maintain the fudge’s signature texture.
Cutting and portioning can be completed several days in advance. We should use a sharp knife warmed under hot water and dried between cuts to achieve clean edges. Individual pieces wrapped in parchment paper or stored in separate compartments prevent sticking and make serving effortless during gatherings.
Temperature considerations play a crucial role in our make ahead strategy. Fudge stored in the refrigerator should be brought to room temperature 15 to 20 minutes before serving to restore its ideal consistency. This brief warming period ensures our guests experience the full depth of the salted caramel flavors and the smooth mouthfeel we worked to achieve.
![Katbite 200 Pcs Parchment Paper, 8 x 8 Inch Unbleached Baking Paper, Oil Resistant & Easy Clean, Non-Stick Precut Parchment Paper Sheets for Baking Square, Cooking, Air Fryer [Balance Series]](https://m.media-amazon.com/images/I/41bbkFyU2yL._SL500_.jpg)
Pre-Cut & Ready to Use: 200 parchment paper sheets, perfectly sized for 8x8-inch (20x20cm) pans – each pre-cut parchment paper sheet lies flat and ready to use, eliminating the hassle of cutting rolled parchment. No wasted paper means faster, more convenient baking.

Food-Grade Non-Stick Liners: 8x4 inch loaf pan liners are BPA/PFAs-free, made of natural brown parchment. Greaseproof & non-stick, they ensure easy release for toast, cakes, banana bread—keeping your bread pan clean.

Perfect Size - 8x12 inches of 120 count unbleached parchment paper, which is about 20.3x30.5cm, not only is it pre-cut baking paper, but also it can give you a lot of help in baking! Baking paper sheets are great for retaining your moisture and flavor.
Conclusion
We’ve walked you through everything you need to create this irresistible treat that perfectly balances sweet indulgence with sophisticated flavor. With proper technique and the right ingredients you’ll have a confection that rivals any premium candy shop.
The beauty of homemade salted caramel fudge lies in its versatility and impressive results. Whether you’re planning ahead for special occasions or satisfying a sudden craving this recipe delivers consistent success every time.
Remember that patience during the cooling process and attention to temperature control are your keys to achieving that perfect creamy texture. With these skills mastered you’ll find yourself returning to this recipe again and again creating memorable treats that friends and family will treasure.

Premium Natural Wood — Our wooden spatula and pancake spatula for cooking are made from 100% natural teak wood, ensuring a safe surface for daily use. Each wooden spatula for cooking is smooth, durable, and gentle on cookware, showcasing the natural wood for an elegant kitchen touch.

Versatile Tool: This skinny wooden spurtle is perfect for mixing sourdough starters, spreading condiments, and handling dough or salads.

【Versatile Kitchen Spatula】Crafted from premium natural teak wood, this sturdy tool resists breaking and is ideal for heavy mixing tasks like bread dough and sourdough starter.
Frequently Asked Questions

PREMIUM QUALITY - Our soft, crunchy sea salt flakes contain the perfect balance of natural minerals, offering a fresh intensity and clean taste to enhance any dish. The 570g mid-sized catering tub is ideal for kitchens with a little more space.

PREMIUM QUALITY - Our soft, crunchy sea salt flakes contain the perfect balance of natural minerals, offering a fresh intensity and clean taste to enhance any dish. The 250g box is the perfect size for home cooks and domestic kitchens.

Hand-Harvested Salt: Our non-iodized grain sea salt for baking and finishing is hand-harvested and develops on the surface of seawater, ensuring each grain retains its purity and delivers an authentic, unrefined sea salt flavor to your dishes
What makes salted caramel fudge different from regular fudge?
Salted caramel fudge combines the rich sweetness of traditional fudge with a sophisticated salty-sweet flavor profile. The addition of sea salt and caramel creates a modern twist on classic fudge, offering bursts of flavor that make it more complex and addictive than regular varieties.
What ingredients do I need to make salted caramel fudge?
You’ll need white chocolate chips, sweetened condensed milk, unsalted butter, vanilla extract, and salt for the fudge base. For the caramel layer, gather granulated sugar, cubed butter, heavy cream, vanilla extract, and flaky sea salt. Optional additions include toasted nuts for extra texture.
What equipment is essential for making perfect salted caramel fudge?
Essential equipment includes a heavy-bottomed saucepan, digital candy thermometer, wooden spoon or heat-resistant spatula, sharp knife, measuring tools, and an 8×8 inch baking pan lined with parchment paper. A candy thermometer is crucial for achieving the perfect 234°F temperature.
How long does it take for salted caramel fudge to set?
Allow the fudge to cool at room temperature for 30 minutes, then refrigerate for 2-4 hours until firm. Larger batches may require extended cooling time. The fudge should be completely set before cutting to ensure clean edges and proper texture.
How should I store salted caramel fudge?
Store at room temperature for 1-2 weeks, refrigerate for 2-3 weeks, or freeze for up to 3 months in airtight containers. Use clean utensils when handling, wrap individual pieces for protection, and inspect regularly for spoilage to maintain quality.
Can I make salted caramel fudge ahead of time?
Yes, you can prepare salted caramel fudge up to a week in advance. Store it properly in airtight containers and bring refrigerated fudge to room temperature before serving to enhance flavor and texture. This makes it perfect for entertaining or gift-giving.
What are the best serving suggestions for salted caramel fudge?
Pair with strong coffee or espresso, fruity red wine, or vanilla desserts like ice cream. Use as a topping for cheesecakes, incorporate into hot chocolate, or present with caramel drizzle and coarse sea salt for elegant occasions.
How do I troubleshoot common fudge-making problems?
Avoid stirring once sugar begins dissolving to prevent graininess. Use a candy thermometer to maintain proper temperature. For caramel separation, ensure all ingredients are well combined before cooking. Test consistency by dropping mixture into cold water to check for proper texture.