There’s something undeniably magical about red velvet cupcakes that makes them irresistible at every gathering. These vibrant crimson treats combine the perfect balance of subtle chocolate flavor with tangy cream cheese frosting creating a dessert that’s both visually stunning and absolutely delicious.
Originally popularized in the American South during the 1920s, red velvet has become a beloved classic that never goes out of style. The secret lies in the unique combination of cocoa powder buttermilk and a hint of vinegar that creates that distinctive tender crumb and signature flavor we all crave.
We’ve perfected this homemade red velvet cupcake recipe to deliver bakery-quality results right from your kitchen. Whether you’re planning a special celebration or simply want to treat yourself to something extraordinary these cupcakes will exceed your expectations and leave everyone asking for the recipe.
Ingredients
We’ve carefully selected each ingredient to create the perfect balance of flavors and textures that make these red velvet cupcakes truly exceptional. Our recipe uses precise measurements to ensure consistent bakery-quality results every time.
For the Cupcakes
- 1¼ cups all-purpose flour
- 1 cup granulated sugar
- 1 teaspoon baking soda
- 1 teaspoon cocoa powder
- 1 teaspoon salt
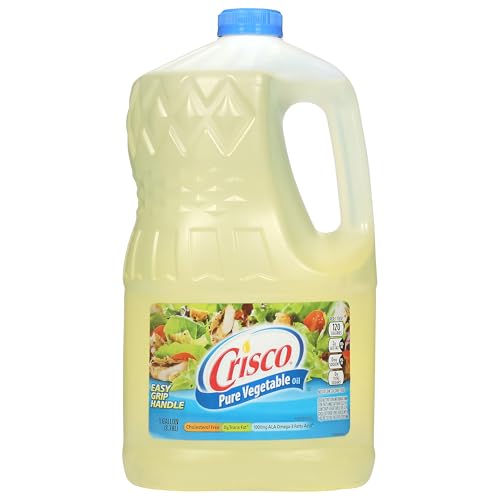
- 1 cup vegetable oil
- ½ cup buttermilk at room temperature
- 2 large eggs at room temperature
- 2 tablespoons red food coloring
- 1 teaspoon white vinegar
- 1 teaspoon vanilla extract
For the Cream Cheese Frosting
- 8 oz cream cheese softened to room temperature
- ½ cup unsalted butter softened to room temperature
- 4 cups powdered sugar sifted
- 1 teaspoon vanilla extract
- ¼ teaspoon salt
Equipment Needed
Making perfect red velvet cupcakes requires the right tools to achieve professional results. We’ve compiled essential equipment that will make your baking process smooth and ensure consistent outcomes every time.
Stand Mixer or Hand Mixer serves as the foundation of our baking arsenal. This tool efficiently combines ingredients and creates the light fluffy texture that makes red velvet cupcakes so appealing. Electric mixers provide the power needed to properly cream butter and sugar while incorporating air into the batter.
12-Cup Muffin/Cupcake Pan forms the structure for our cupcakes during baking. Standard size muffin pans ensure even heat distribution and create uniform cupcakes that bake consistently. Heavy gauge metal pans work best for achieving golden bottoms and proper rise.
Cupcake Liners prevent sticking and make removal effortless while adding visual appeal. Paper liners also help maintain moisture in the finished cupcakes and make serving cleaner. Choose quality liners that won’t peel away from the cupcakes after baking.
Mixing Bowls in various sizes accommodate different stages of preparation. Large bowls provide ample space for combining wet and dry ingredients without spillage. Having multiple bowls allows us to separate ingredients and streamline the mixing process.
Measuring Cups & Spoons ensure accuracy in our recipe execution. Precise measurements directly impact the final texture color and flavor of red velvet cupcakes. Both dry and liquid measuring tools are essential for consistent results.
Whisk helps incorporate dry ingredients thoroughly and prevents lumps in the batter. This tool also assists in combining wet ingredients before adding them to the mixer. A good whisk creates smooth mixtures that translate to tender cupcakes.
Piping Bag and Tip Set elevates the presentation of finished cupcakes with professional looking frosting. While optional these tools allow for creative decorating and portion control when applying cream cheese frosting. Piping creates bakery style swirls that make cupcakes look impressive.
Instructions
Now that we have our ingredients and equipment ready, let’s walk through the step-by-step process to create these stunning red velvet cupcakes. We’ll guide you through each stage to ensure bakery-quality results every time.
Prep
First, we preheat our oven to 350°F (177°C) and line our 12-cup muffin pan with cupcake liners. We gather all our ingredients and allow the butter and cream cheese to come to room temperature for easier mixing. Next, we set up our stand mixer or handheld mixer in a large bowl. We also prepare our measuring cups and spoons for accurate ingredient portions.
Making the Cupcake Batter
We begin by sifting together the all-purpose flour, granulated sugar, unsweetened cocoa powder, baking soda, baking powder, and salt in a large bowl. In our mixer bowl, we cream the butter and sugar together until the mixture becomes light and fluffy, which takes about 3-4 minutes. We add the eggs one at a time, beating well after each addition.
In a separate bowl, we whisk together the buttermilk, red food coloring, vanilla extract, and white vinegar until well combined. We alternate adding the dry ingredients and the wet buttermilk mixture to our creamed butter, beginning and ending with the flour mixture. We mix until just combined, being careful not to overmix the batter as this can result in dense cupcakes.
Baking the Cupcakes
We divide the batter evenly among the prepared cupcake liners, filling each about 2/3 full. The cupcakes go into our preheated 350°F oven for 15 to 20 minutes. We test for doneness by gently touching the tops – they should spring back when lightly pressed. We can also insert a toothpick into the center of a cupcake; it should come out clean or with just a few moist crumbs. Once baked, we remove the cupcakes from the oven and allow them to cool in the pan for 5 minutes before transferring to a wire rack to cool completely.
Making the Cream Cheese Frosting
While our cupcakes cool, we prepare the signature cream cheese frosting. We beat the room temperature cream cheese and unsalted butter together until completely smooth and free of lumps. Gradually, we add the powdered sugar, mixing on low speed initially to prevent a sugar cloud, then increasing to medium speed. We add the vanilla extract and salt, beating until the frosting is light, fluffy, and perfectly smooth.
Assembly and Decorating
Once our cupcakes have cooled completely, we’re ready for the final step. We transfer our cream cheese frosting to a piping bag fitted with our desired tip – a star tip creates beautiful rosettes while a round tip offers classic swirls. We pipe generous amounts of frosting onto each cupcake, starting from the outside edge and working inward. For extra decoration, we can dust with red velvet cake crumbs or add small decorative elements as desired.
Pro Tips for Perfect Red Velvet Cupcakes
Creating exceptional red velvet cupcakes requires attention to several crucial details that make the difference between good and extraordinary results. We’ve gathered these professional techniques to help you achieve bakery-quality cupcakes every time.
Use Room Temperature Ingredients
Bringing eggs, butter, and buttermilk to room temperature before mixing creates a uniform batter texture that bakes evenly. Cold ingredients often cause separation and lead to uneven baking results that can ruin your cupcakes’ texture.
Measure Ingredients Precisely
Accurate measurement of dry ingredients, especially flour, prevents dry or tough cupcakes. We recommend using a digital scale for best results, or employ the scoop and level method to avoid over-measuring flour.
Choose Real Buttermilk
Real buttermilk provides the essential tenderness and moisture that makes red velvet cupcakes special. Substitutes like milk mixed with vinegar or lemon juice alter both flavor and texture, so stick to genuine buttermilk for optimal results.
Add Hot Liquid for Enhanced Flavor
Incorporating hot coffee or hot water helps bloom the cocoa powder, which enhances both its flavor profile and contributes to the signature red color development.
Mix Properly to Avoid Dense Texture
Alternate folding dry ingredients with buttermilk by hand rather than using electric mixers for this step. Overmixing develops gluten and creates dense, tough cupcakes instead of the tender texture we want.
Apply Food Coloring Correctly
Use gel or liquid food coloring according to your recipe’s specifications until you achieve the desired vibrant red color. Start with less and add gradually to reach the perfect shade.
Maintain Sugar Content
Never reduce the sugar content in your recipe, as it contributes significantly to moisture retention and proper texture development in the finished cupcakes.
Bake at Correct Temperature and Time
Maintain the specified temperature of 350°F and check for doneness with a toothpick inserted in the center. Overbaking dries out cupcakes and compromises their signature moist texture.
Cool Properly Before Frosting
Allow cupcakes to cool in the pan for 10 to 15 minutes before transferring to a wire rack. Complete cooling prevents frosting from melting and ensures clean application.
Prepare Smooth Cream Cheese Frosting
Room temperature cream cheese and butter create the smoothest frosting consistency. Pipe or spread frosting generously for the classic red velvet presentation that makes these cupcakes irresistible.
Storage Instructions
Proper storage ensures our red velvet cupcakes maintain their delicious flavor and moist texture for days to come. We’ve developed these guidelines to help you preserve your cupcakes whether they’re frosted or unfrosted.
Unfrosted Cupcakes
Room Temperature Storage: We recommend storing unfrosted red velvet cupcakes in an airtight container at room temperature for up to 1-2 days. This method works best when you plan to frost and serve them within this timeframe.
Freezing for Long-Term Storage: For extended storage we wrap each cupcake individually in plastic wrap before placing them in a freezer-safe container or bag. Our unfrosted cupcakes maintain their quality for up to 2-3 months in the freezer. When ready to serve we thaw them overnight in the refrigerator or at room temperature for 30 minutes to 1 hour.
Frosted Cupcakes
Room Temperature Limitations: We advise against leaving frosted red velvet cupcakes at room temperature for more than one day. The cream cheese frosting requires cooler temperatures to maintain its stability and food safety.
Refrigerated Storage: Our frosted cupcakes stay fresh in an airtight container in the refrigerator for up to 1-4 days. We place them in the container carefully to avoid damaging the frosting during storage.
Freezing Considerations: We generally do not recommend freezing frosted cupcakes as the cream cheese frosting texture may become compromised upon thawing.
Cream Cheese Frosting Storage
Refrigerator Storage: We store leftover cream cheese frosting in an airtight container in the refrigerator for up to one week. This allows us to frost additional cupcakes or use it for other desserts.
Freezer Storage: Our cream cheese frosting freezes well for up to 3 months when stored in a freezer-safe container. We thaw it overnight in the refrigerator and rewhip it before using to restore its smooth consistency.
| Storage Method | Duration | Best For |
|---|---|---|
| Unfrosted at Room Temperature | 1-2 days | Quick consumption |
| Unfrosted Frozen | 2-3 months | Long-term storage |
| Frosted Refrigerated | 1-4 days | Ready-to-eat cupcakes |
| Frosting Refrigerated | 1 week | Future use |
| Frosting Frozen | 3 months | Extended storage |
Make-Ahead Tips
Planning ahead makes red velvet cupcakes even more convenient for special occasions or busy schedules. We can prepare these delicious treats in advance using several tested methods that maintain their signature flavor and texture.
Preparing Cupcakes in Advance
Unfrosted red velvet cupcakes store beautifully for future use. We recommend baking the cupcakes completely and allowing them to cool to room temperature before storage. For short term storage, place the unfrosted cupcakes in an airtight container and keep them at room temperature for up to one day. This method works perfectly when we plan to frost and serve them the following day.
Longer storage requires refrigeration or freezing. We can store unfrosted cupcakes in the refrigerator for up to one week in an airtight container. For extended storage, wrap each cupcake individually in plastic wrap and place them in a freezer safe container. Frozen cupcakes maintain their quality for up to three months.
Make Ahead Frosting Strategy
Cream cheese frosting benefits from advance preparation and actually improves in flavor when made ahead. We can prepare the frosting and store it in an airtight container in the refrigerator for up to three days before use. The flavors meld beautifully during this time, creating an even more delicious result.
Before using refrigerated frosting, we must bring it to room temperature and rewhip it to restore the proper consistency. This process typically takes 30 minutes at room temperature followed by 2 to 3 minutes of mixing.
Storage Timeline for Optimal Results
| Storage Method | Duration | Notes |
|---|---|---|
| Room temperature (unfrosted) | 1 day | Airtight container required |
| Refrigerated (unfrosted) | 1 week | Airtight container required |
| Frozen (unfrosted) | 3 months | Individual wrapping recommended |
| Refrigerated frosting | 3 days | Bring to room temperature before use |
| Frosted cupcakes | 4-5 days | Must be refrigerated |
Assembly Day Strategy
We achieve the best results by frosting cupcakes on the day of serving. Remove frozen cupcakes from the freezer 2 to 3 hours before frosting to allow complete thawing. Refrigerated cupcakes need only 30 minutes to reach room temperature. This approach ensures the frosting adheres properly and creates the most appealing presentation.
Fresh frosting application on the day of serving guarantees optimal taste and texture. The contrast between the moist cupcake and creamy frosting reaches its peak when assembled close to consumption time.
Variations and Flavor Options
Red velvet cupcakes offer endless possibilities for customization while maintaining their signature appeal. We can explore different approaches to suit various occasions and preferences.
Small Batch Adaptations
Small batch red velvet cupcakes work perfectly when we want to avoid leftovers or serve intimate gatherings. These scaled-down versions retain the classic moist texture and tangy cream cheese frosting that makes red velvet so beloved. We maintain the same ingredient ratios while reducing quantities to create just six cupcakes instead of twelve.
Creative Flavor Combinations
Red velvet Oreo cake and strawberry red velvet cake represent exciting twists on the traditional formula. We can incorporate crushed Oreo cookies into our batter or frosting for added texture and chocolate intensity. Strawberry variations work beautifully by adding fresh strawberry puree or freeze-dried strawberry powder to complement the subtle chocolate notes.
Cocoa Powder Adjustments
We can customize the chocolate intensity by adjusting cocoa powder amounts according to personal taste preferences. Increasing cocoa powder creates a more pronounced chocolate flavor while reducing it allows the tangy buttermilk notes to shine through. This flexibility lets us tailor each batch to our exact audience.
| Cocoa Adjustment | Amount | Flavor Profile |
|---|---|---|
| Light chocolate | 1 tablespoon | Subtle, tangy |
| Standard | 2 tablespoons | Balanced |
| Rich chocolate | 3 tablespoons | Intense, decadent |
Cream Cheese Frosting Variations
Full-fat cream cheese produces the richest and most luxurious frosting texture. We can opt for reduced-fat versions when seeking a lighter alternative without sacrificing too much flavor. Vanilla bean paste elevates the frosting with aromatic depth that complements the red velvet base perfectly.
Buttermilk Substitutions
When buttermilk isn’t available we can create an effective substitute using milk combined with lemon juice or vinegar. This mixture maintains the essential tangy flavor and tender crumb texture that defines authentic red velvet cupcakes. We let the mixture sit for five minutes before incorporating it into our batter.
Holiday Themed Presentations
Valentine’s Day red velvet cupcakes shine with romantic decorations like heart-shaped sprinkles or rose-tinted frosting swirls. Christmas versions benefit from festive red and green color schemes or winter-themed piping designs. We can adapt our presentation to match any celebration while keeping the classic flavor profile intact.
Decorating Techniques
Cream cheese icing flowers create stunning visual appeal without requiring advanced piping skills. We use star tips to create rosettes or leaf tips for delicate botanical designs. These professional-looking touches transform simple cupcakes into bakery-worthy desserts that impress guests at any gathering.
Conclusion
We’ve shared everything you need to create stunning red velvet cupcakes that rival any bakery’s offerings. From understanding the perfect ingredient balance to mastering professional frosting techniques these cupcakes are truly achievable for home bakers of all skill levels.
The beauty of this recipe lies in its versatility and make-ahead convenience. Whether you’re planning for a special celebration or simply craving that perfect combination of subtle chocolate and tangy cream cheese you now have all the tools and knowledge to succeed.
These red velvet cupcakes deliver consistent bakery-quality results every time. With proper storage techniques and our pro tips you’ll create desserts that look as impressive as they taste and leave everyone asking for your secret recipe.
Frequently Asked Questions
What makes red velvet cupcakes different from regular chocolate cupcakes?
Red velvet cupcakes have a subtle chocolate flavor rather than rich chocolate taste, combined with tangy buttermilk and a hint of vinegar. The signature red color comes from food coloring, and they’re traditionally paired with cream cheese frosting. The texture is more tender and moist compared to standard chocolate cupcakes.
Can I make red velvet cupcakes without buttermilk?
Yes, you can substitute buttermilk by mixing 1 cup of regular milk with 1 tablespoon of white vinegar or lemon juice. Let it sit for 5 minutes before using. However, real buttermilk provides better moisture, tenderness, and the authentic tangy flavor that makes red velvet cupcakes special.
How should I store red velvet cupcakes?
Unfrosted cupcakes can be stored at room temperature for 1-2 days or frozen for 2-3 months. Frosted cupcakes must be refrigerated and consumed within 1-4 days since cream cheese frosting is perishable. Never leave frosted cupcakes at room temperature for more than one day.
Can I make red velvet cupcakes ahead of time?
Yes, unfrosted cupcakes can be made up to 3 months in advance and frozen. Cream cheese frosting can be prepared 3 days ahead and refrigerated. For best results, frost the cupcakes on the day of serving to ensure optimal taste and texture.
What equipment do I need to make perfect red velvet cupcakes?
Essential equipment includes a stand or hand mixer, 12-cup muffin pan, cupcake liners, mixing bowls in various sizes, accurate measuring cups and spoons, a whisk, and a piping bag with tips for professional-looking frosting. These tools ensure consistent results and smooth baking process.
Why do my red velvet cupcakes turn out dense?
Dense cupcakes usually result from overmixing the batter, using cold ingredients, or incorrect measurements. Mix just until ingredients are combined, ensure all ingredients are at room temperature, and measure precisely. Overmixing develops gluten, creating a tough texture instead of the desired tender crumb.
How long do red velvet cupcakes need to cool before frosting?
Allow cupcakes to cool completely for at least 30-45 minutes before frosting. Warm cupcakes will melt the cream cheese frosting, causing it to slide off or become runny. Proper cooling ensures the frosting maintains its shape and creates a professional appearance.
Can I reduce the amount of red food coloring?
Yes, you can adjust the food coloring to your preference. The cupcakes will still taste the same with less coloring, but they’ll have a more subtle pink or brownish-red color. The traditional vibrant red appearance requires the full amount of food coloring specified in the recipe.


