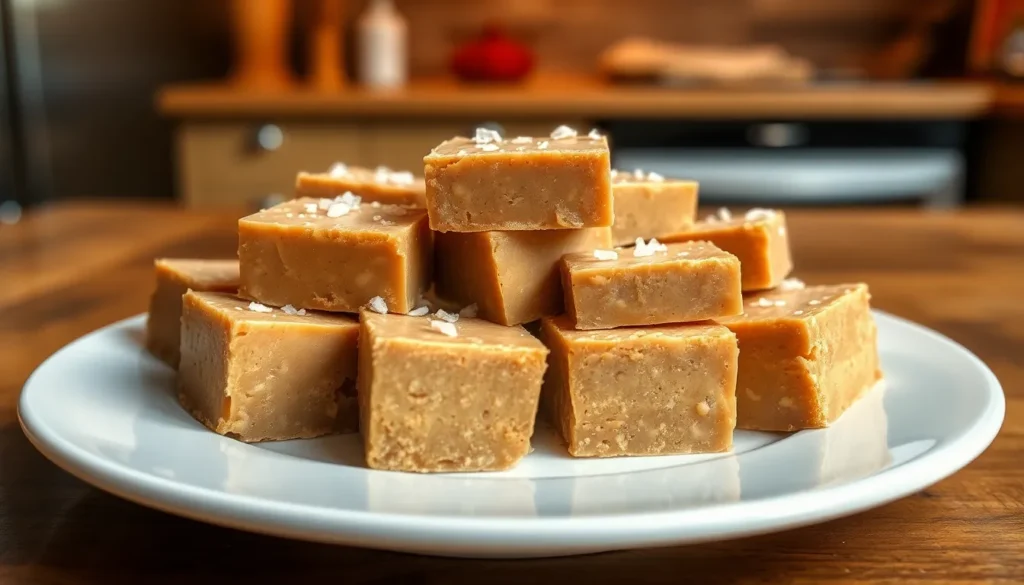
We’ve all been there – craving something sweet that combines the rich comfort of peanut butter with the indulgent satisfaction of homemade candy. Peanut butter fudge delivers exactly that perfect combination, transforming simple pantry staples into an irresistible treat that’ll have everyone asking for your secret.
This classic American confection gained popularity during the 1800s when fudge-making became a beloved social activity. What makes peanut butter fudge special isn’t just its creamy texture or that perfect balance of sweet and nutty flavors – it’s how surprisingly simple it is to make at home.
With just a few ingredients and minimal prep time, you’ll create squares of pure bliss that rival any candy shop creation. Whether you’re planning holiday gifts or simply treating yourself to something special, this foolproof recipe guarantees smooth, melt-in-your-mouth results every single time.
Equipment Needed
Making perfect peanut butter fudge requires the right tools to ensure smooth preparation and professional results. We recommend gathering these essential items before starting your fudge-making adventure.
Essential Equipment:
- Heavy-bottomed saucepan – Prevents scorching and ensures even heat distribution
- Wooden spoon or heat-resistant silicone spatula – For stirring without scratching cookware
- Candy thermometer – Monitors temperature accurately for proper consistency
- 8×8 inch baking pan – Standard size for optimal fudge thickness
- Parchment paper or aluminum foil – Lines pan for easy removal
- Measuring cups and spoons – Ensures precise ingredient ratios
- Fine-mesh strainer – Removes any lumps from powdered sugar if needed
Optional but Helpful Tools:
- Stand mixer or hand mixer – Speeds up the mixing process for ultra-smooth texture
- Offset spatula – Creates perfectly smooth fudge surface
- Sharp knife – Cuts clean squares once set
- Cutting board – Provides stable surface for slicing
We find that using a heavy-bottomed saucepan makes the biggest difference in preventing burnt spots that can ruin the entire batch. The candy thermometer eliminates guesswork and ensures your fudge reaches the perfect soft-ball stage every time.
Lining your pan with parchment paper creates convenient handles for lifting the finished fudge out cleanly. This simple step saves time during cleanup and prevents any sticking issues that might damage your beautiful squares.


Original Recipe Fudge for Over 40 Years

Made with 90% premium peanuts
Ingredients
 1")
We’ve carefully selected each ingredient to create the perfect balance of creamy sweetness and rich peanut butter flavor. Our recipe uses simple pantry staples that work together to produce that signature fudgy texture we all love.

【2026 New Stainless Steel Candy Thermometer】The food grade stainless-steel casing provides strength and corrosion resistance, insulated handled does not retain heat, providing durability and safety; The plastic protective sheath of glass thermometer can protect the thermometer from breaking, also easy to store.

ACCURATE FAST READINGS (No More Burned Candy) --- Our candy deep fry thermometer provides instant and accurate temperature readings within seconds. Its advanced technology ensures precise measurements, allowing you to monitor the temperature of your food with confidence.

Pot Clip Design for Safer Operation: This candy thermometer digital with clip can be fixed to the pot so you can free your hands to focus on the cooking, and protect your hands from the hot
For the Fudge Base
- 1 to 1.75 cups peanut butter (creamy or crunchy based on preference)
- 1/2 to 1.25 cups butter (unsalted recommended)
- 3 to 4.5 cups sugar (granulated and powdered sugar combination)
- 1/2 to 2/3 cup milk or evaporated milk
- 1 to 1.5 teaspoons vanilla extract
- 1 jar (7 oz.) marshmallow creme (optional for extra creaminess)
- Pinch of salt (optional to enhance flavors)
For Optional Toppings
- Chopped nuts (almonds or walnuts for added texture)
- Chocolate chips (for melting and drizzling on top)
- Sea salt (for sprinkling to create sweet and salty contrast)
| Ingredient Category | Quantity Range | Purpose |
|---|---|---|
| Peanut Butter | 1-1.75 cups | Primary flavor base |
| Butter | 0.5-1.25 cups | Richness and texture |
| Sugar | 3-4.5 cups | Sweetness and structure |
| Milk | 0.5-0.67 cups | Binding and smoothness |
Instructions
 2")
Now that we have our equipment ready and ingredients measured, let’s walk through the simple process of creating our rich and creamy peanut butter fudge. These straightforward steps will guide us to perfect results every time.

SAFE & HEALTHY MATERIALS: Our unbleached parchment paper is made of 100% natural wood pulp, no fluorescents, completely non-toxic and meets food safety standards. Brown 8x8 parchment paper squares are heat-resistant up to 450°F, perfect for any baking or cooking need

NO MORE HASSLES – Tired of parchment that curls or burns? Choose Baker’s Signature precut, unbleached sheets. They won't curl, stick, or burn. Ideal for bread, pastries, cookies, cakes, and more. Ensure a seamless baking experience, guaranteed!

Precut Parchment Paper Sheets: 100 sheets of 8x8 inch square baking paper, standard size, this parchment sheets can be used directly, no cutting required, saving you time and effort in the kitchen
Prep the Pan
We start by selecting our 8×8 inch baking pan for the perfect fudge thickness. Line the pan with parchment paper, leaving some overhang on the sides to create easy lifting handles later. Lightly butter the parchment paper to prevent any sticking and ensure smooth removal. This preparation step saves us from frustration when it’s time to cut our finished fudge.
Make the Fudge Mixture
We begin by combining the butter and peanut butter in our heavy-bottomed saucepan over medium heat. Stir the mixture constantly with our wooden spoon until both ingredients melt completely and blend together smoothly. Add the milk and sugar to the melted peanut butter mixture, stirring continuously to prevent any scorching. Bring the mixture to a rolling boil while stirring, then attach our candy thermometer to monitor the temperature. Cook the mixture until it reaches the soft ball stage at 238°F, which typically takes 3-5 minutes of active stirring. Remove the saucepan from heat immediately once we reach this temperature. Quickly stir in the vanilla extract and marshmallow creme if using, beating the mixture vigorously until it begins to lose its glossy appearance and thickens slightly.
Pour and Set
We pour the hot fudge mixture into our prepared pan, working quickly before it begins to set. Use our offset spatula to spread the mixture evenly across the entire surface, reaching all corners of the pan. Tap the pan gently on the counter to release any air bubbles and create a smooth top surface. Press plastic wrap directly onto the surface of the fudge to prevent a skin from forming during cooling. Refrigerate the fudge for at least 1 hour until it feels firm to the touch and holds its shape when pressed gently.
Cut and Serve
We lift the fudge from the pan using the parchment paper overhang, placing it on a cutting board. Remove the plastic wrap and use a sharp knife to cut the fudge into 1-inch squares, wiping the blade clean between cuts for neat edges. Arrange the cut pieces on a serving plate or store them in an airtight container. Our homemade peanut butter fudge stays fresh at room temperature for up to 1 week, in the refrigerator for up to 1 month, or frozen for longer storage.
Storage Instructions
 3")
Proper storage keeps your homemade peanut butter fudge fresh and maintains its perfect texture for days or even months. We recommend choosing the storage method that best fits your timeline and consumption plans.

𝐓𝐎𝐏 𝐌𝐀𝐓𝐄𝐑𝐈𝐀𝐋: Tri-ply bonded construction consists of double stainless steel encapsulating an aluminum core; it conducts heat much more evenly than a single-layer stainless steel pot; much better than aluminum and non-stick pots in terms of food safety; very thick and durable, can serve for a very long time; heat source: induction, gas, electric, ceramic; please note that due to the heavy materials used, this saucepan weighs 3.8 pounds, so it is not a lightweight product

SAFE & STURDY: 2 qt saucepan’s body is made of food grade pure stainless steel and the lid is made of sturdy glass, Without any toxic coating or other chemical substances leaching into the food, Feel solid when holding the saucepan, Healthy and sturdy for a long-lasting service life

Premium 18/10 Stainless Steel: DEAYOU butter warmer pan is made of high-end food-grade 18/10 (304) stainless steel. The perfectly flat induction heavy bottom allows the small saucepan to work on induction, gas or electric stoves. Has classic looks and professional performance, can heat quickly and spreads heat evenly
Room Temperature Storage
Store your peanut butter fudge at room temperature in an airtight container when planning to enjoy it within the next few days. The fudge maintains its ideal texture and flavor during this short period. We suggest consuming room temperature stored fudge within 1 to 7 days for optimal quality. Beyond this timeframe the fudge begins to soften and may lose its appealing consistency.
Refrigerated Storage
Refrigeration extends the freshness of your peanut butter fudge significantly. Place the cut squares in an airtight container and store in the refrigerator for longer lasting results. This method preserves the fudge’s texture and prevents it from becoming overly soft. We find refrigerated storage maintains quality for 1 to 3 weeks depending on your exact recipe and ingredients used.
Freezer Storage
Long term storage requires freezing your peanut butter fudge properly. Wrap the chilled fudge pieces individually in plastic wrap before placing them in a freezer storage bag. This double protection prevents freezer burn and maintains the fudge’s original flavor profile. Frozen peanut butter fudge stays fresh for up to 2 months when stored correctly.
Thaw frozen fudge in the refrigerator for 2 to 4 hours before serving. This gradual thawing process preserves the texture and prevents condensation from affecting the surface quality.
Storage Best Practices
Layer your fudge squares between sheets of wax paper to prevent sticking when storing multiple pieces together. Keep all stored fudge in cool dry places away from direct sunlight and heat sources. These conditions help maintain the structural integrity and prevent unwanted melting or texture changes.
| Storage Method | Duration | Container Requirements |
|---|---|---|
| Room Temperature | 1-7 days | Airtight container |
| Refrigerator | 1-3 weeks | Airtight container |
| Freezer | 2 months | Plastic wrap + freezer bag |
Use whole milk in your original recipe for the best storage results. Low fat or dairy free substitutes may affect how well the fudge maintains its quality during storage periods.
Recipe Variations
 4")
Our classic peanut butter fudge serves as the perfect foundation for creative adaptations. These three popular variations transform the basic recipe into exciting new flavors and textures.
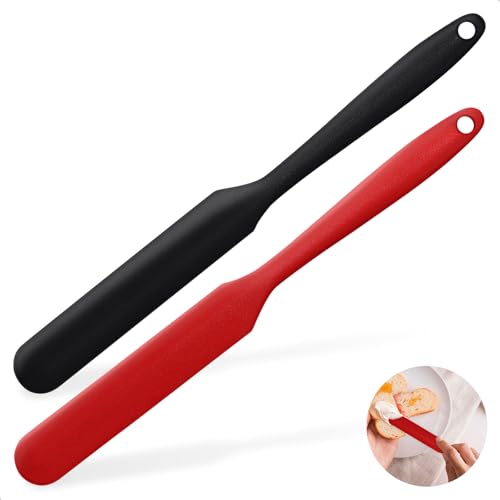
【SAFE KITCHEN UTENSILS】We care about the health of you & your family! The silicone jar spatulas heat resistant set is made of 100% primium BPA-Free food grade silicone material, resistant to high temperatures up to 600 °F. A must have Kitchen Utensil Sets for cooking, baking, mixing, scrapping, all in ONE SET!

MULTI PURPOSE DESIGN: This mini scoop and spread tool for kitchen meal prep scoops spreads scrapes and slices with silicone and nylon ends making it ideal as a jelly spreader or condiment spreader

【High cost-effectiveness】Silicone-stainless steel combo ensures durability & tear-resistance. Ideal for kitchen tasks (mixing, scraping, containers), beauty uses (mask application, waxing), & acts as spatulas for kitchen, baking, or jar scraper.
Chocolate Swirl Peanut Butter Fudge
We create this stunning marbled effect by combining our peanut butter fudge base with melted chocolate. Prepare the basic fudge recipe according to our instructions and pour half into the prepared pan. Melt 4 ounces of your preferred chocolate—dark chocolate delivers bold intensity while milk chocolate offers sweet balance and white chocolate provides creamy richness.
Drop spoonfuls of melted chocolate over the fudge base and add the remaining peanut butter mixture on top. Use a knife to swirl the chocolate through both layers creating beautiful marble patterns. The contrast between chocolate and peanut butter creates visual appeal and complex flavor profiles that satisfy different taste preferences.
Crunchy Peanut Butter Fudge
We enhance texture and flavor by incorporating chopped nuts into our fudge mixture. Add 3/4 cup of chopped nuts—peanuts complement the existing peanut butter while almonds walnuts or hazelnuts introduce new flavor dimensions. Stir the nuts into the fudge mixture just before pouring it into the prepared pan.
Raw nuts provide natural crunch while caramelized nuts deliver deeper sweetness and enhanced nutty flavors. Toast nuts in a dry skillet over medium heat for 3-5 minutes before adding them to achieve caramelized results. The added texture creates satisfying contrast against the smooth creamy fudge base.
White Chocolate Peanut Butter Fudge
We substitute white chocolate chips for regular chocolate to create a sweeter creamier variation. Replace any chocolate called for in mix-ins with 6 ounces of white chocolate chips or chopped white chocolate. The white chocolate melts into the warm fudge mixture creating ultra-smooth consistency.
This variation produces notably sweeter results compared to our classic recipe while maintaining the signature peanut butter flavor. White chocolate pairs exceptionally well with additional toppings like chopped macadamia nuts or a light sprinkle of sea salt that balances the increased sweetness.
Tips for Perfect Peanut Butter Fudge
 5")
Mastering peanut butter fudge requires attention to several key techniques that transform simple ingredients into velvety smooth confection. We’ve gathered essential tips that ensure consistent results every time you make this beloved treat.

PEANUT BUTTER CHOCOLATE FLAVOR: Creamy peanut butter fudge blended with rich chocolate fudge for a smooth, balanced sweet and nutty combination.

PEANUT BUTTER FLAVOR: Smooth and creamy peanut butter fudge made with a rich vanilla base and blended with generous peanut butter for a classic, indulgent taste.

Traditional Family Recipes/Kosher
Choose the Right Sugar Type
Powdered sugar creates the smoothest texture in peanut butter fudge. We recommend using powdered sugar instead of granulated sugar because it dissolves completely and prevents the gritty texture that can ruin an otherwise perfect batch. This fine consistency blends seamlessly with peanut butter and creates that signature creamy mouthfeel.
Monitor Temperature Carefully
Temperature control makes the difference between perfect fudge and a disappointing batch. We suggest removing the mixture from heat immediately once it reaches the boiling point to prevent burning. Overheating causes the fudge to become hard and brittle rather than maintaining its desired soft texture.
Select Proper Stirring Tools
Using the right utensil prevents sticking and ensures smooth mixing throughout the cooking process. We prefer a flat bottomed spoon or heat resistant spatula because these tools distribute heat evenly and prevent the mixture from adhering to the pan bottom. Wooden spoons work exceptionally well for this purpose.
Allow Adequate Setting Time
Proper setting time varies depending on your chosen recipe and environmental conditions. We recommend allowing fudge to set at room temperature for recipes that don’t require refrigeration. For recipes containing dairy ingredients like evaporated milk or butter, refrigeration speeds the setting process and creates a firmer final texture.
| Setting Method | Time Required | Best For |
|---|---|---|
| Room Temperature | 2-4 hours | Quick recipes with powdered sugar |
| Refrigeration | 1-2 hours | Traditional recipes with dairy |
| Freezer | 30-45 minutes | When you need fast results |
Add Flavor Enhancements
Experimenting with additional ingredients creates unique variations while maintaining the classic peanut butter foundation. We suggest incorporating chocolate chips, chopped nuts, or warming spices like cinnamon during the final mixing stage. These additions provide textural contrast and complementary flavors that elevate the basic recipe.
Perfect Your Timing for Gift Giving
Peanut butter fudge serves as an ideal holiday treat and thoughtful homemade gift. We find that making fudge 1-2 days before gifting allows flavors to meld while maintaining optimal freshness. The stable nature of properly made fudge makes it perfect for sharing during festive seasons.
Conclusion
We’ve explored everything you need to create perfect peanut butter fudge from the comfort of your kitchen. This timeless treat brings together simple ingredients and straightforward techniques to deliver professional-quality results every time.
The beauty of homemade peanut butter fudge lies in its versatility and convenience. Whether you’re preparing holiday gifts or satisfying your own sweet tooth we’ve shown you how achievable this confection truly is.
With proper storage techniques and creative variations at your fingertips you’re equipped to make fudge that’ll impress family and friends alike. The combination of rich peanut butter flavor and that signature fudgy texture makes this recipe a keeper that you’ll return to again and again.

MASTER CONFECTIONS & DEEP FRYING: Measures temperatures from 100°F to 400°F, covering all essential cooking stages including Thread, Soft Ball, Hard Crack, and deep-frying ranges, ensuring perfectly crispy fried foods and glossy, delicious candies every time.
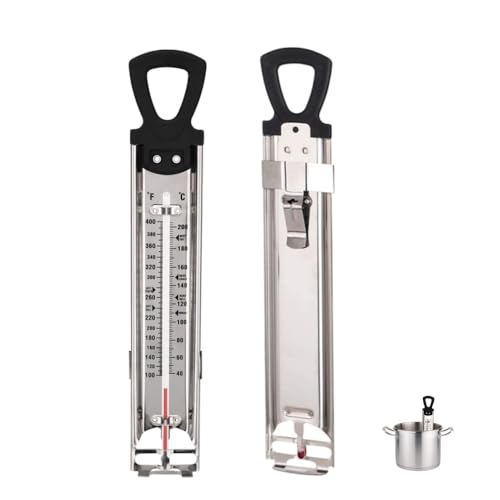
🌡️✅ PRECISION YOU CAN TRUST, RESULTS YOU CAN TASTE!-Master the science of sugar with crystal-clear dual-scale readings (40°C–200°C / 100°F–400°F). From delicate syrups to hard-crack toffee, our large, boldface dial delivers instant, accurate temperatures—so you can create flawless candies, caramels, and chocolates with confidence, batch after batch!

EASY TO READ: It is easy to read the temperatures with the bright blue food-safe spirit.
Frequently Asked Questions

[100% HEALTHY & UNBLEACHED]: Made from 100% natural wood pulp, Tikxlafe parchment paper is completely unbleached, non-toxic, and BPA-free. These natural brown sheets ensure your family’s food stays safe and healthy, without any harmful chemicals leaching into your meals.

SAFE & HEALTHY MATERIALS: Our 8x8 parchment paper squares are made of 100% natural wood pulp, no fluorescents, completely non-toxic and meets food safety standards. White parchment paper is heat-resistant up to 450°F, perfect for any baking or cooking need

PREMIUM QUALITY: Our parchment paper circles are designed with food grade paper, non toxic, 100% safe. Heat resistance up to 446 degree F (230 ℃) , perfect for toaster oven, tortilla press, round cake pan, cheesecake pan, air fryer and so on.
What ingredients do I need to make peanut butter fudge?
The essential ingredients include peanut butter, butter, sugar, milk, and vanilla extract. Optional ingredients like marshmallow creme add extra creaminess, while toppings such as chopped nuts, chocolate chips, or sea salt can enhance flavor and texture. Use whole milk for best results, as it helps achieve the proper consistency and storage quality.
What equipment is necessary for making peanut butter fudge?
You’ll need a heavy-bottomed saucepan, wooden spoon or heat-resistant spatula, candy thermometer, and an 8×8 inch baking pan. Line the pan with parchment paper for easy removal. Optional tools include a stand mixer for ultra-smooth texture and an offset spatula for professional presentation.
How long does homemade peanut butter fudge last?
At room temperature in an airtight container, fudge stays fresh for 1-7 days. Refrigerated storage extends freshness to 1-3 weeks, while properly frozen fudge lasts up to 2 months. Wrap pieces individually and layer between wax paper to prevent sticking and maintain quality.
What temperature should I cook the fudge mixture to?
Cook the mixture to the soft ball stage at 238°F using a candy thermometer. This temperature ensures the fudge will set properly with the right texture. Monitoring temperature carefully prevents burning and guarantees consistent results every time you make the recipe.
Can I make variations of the basic peanut butter fudge recipe?
Yes! Popular variations include Chocolate Swirl Peanut Butter Fudge, Crunchy Peanut Butter Fudge with nuts, and White Chocolate Peanut Butter Fudge. You can also experiment with flavor enhancements like chocolate chips, spices, or different types of nuts to create your own unique combinations.
How long should I let the fudge set before cutting?
Allow the fudge to set completely in the refrigerator until firm, typically 2-4 hours depending on thickness. The setting time may vary based on environmental conditions and recipe variations. For best results, make fudge 1-2 days before serving to ensure optimal flavor melding and texture.