

We all know that feeling when our sweet tooth demands something extraordinary – and that’s exactly where our cookies and cream fudge comes to the rescue. This heavenly treat combines the rich creaminess of classic fudge with chunks of everyone’s favorite chocolate sandwich cookies for a dessert that’s pure indulgence.
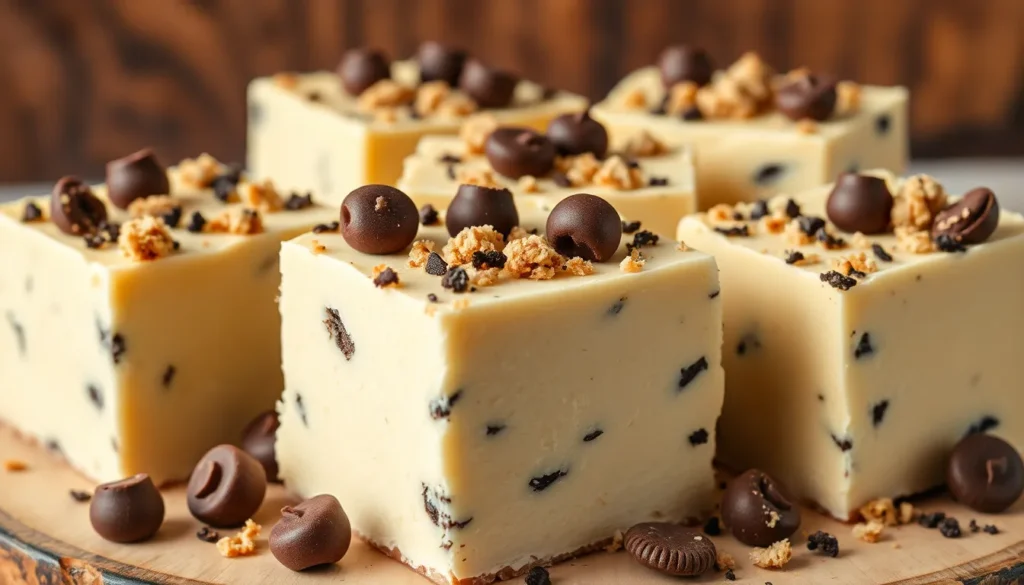
What makes this recipe absolutely irresistible is how it transforms simple ingredients into something that looks like it came from a high-end candy shop. The contrast between the smooth white chocolate base and those distinctive cookie pieces creates both visual appeal and an incredible texture that’ll have everyone asking for your secret.
We’ve perfected this no-fail recipe that requires no candy thermometer and comes together in just minutes. Whether you’re planning a holiday gift exchange or simply treating yourself to something special, this cookies and cream fudge delivers professional results every single time.
Ingredients
Creating our luxurious cookies and cream fudge requires carefully selected ingredients that work together to achieve the perfect balance of sweetness and texture. We’ve organized these components into three essential categories to streamline your preparation process.
For the White Chocolate Base
- 3 cups white chocolate chips
- 1 can (14 oz) sweetened condensed milk
- 2 tablespoons unsalted butter
- 1 teaspoon pure vanilla extract
- 1/4 teaspoon salt
For the Cookie Layer
- 20 chocolate sandwich cookies (such as Oreos)
- 2 tablespoons heavy cream
- 1 tablespoon unsalted butter
For the Topping
- 8 chocolate sandwich cookies, roughly chopped
- 2 tablespoons mini chocolate chips
- 1 tablespoon cookie crumbs for dusting
Equipment Needed

Creating perfect cookies and cream fudge requires the right tools to ensure professional results. We recommend gathering these essential pieces of equipment before starting our recipe to streamline the process and achieve consistent outcomes.
Essential Kitchen Tools
Heavy-bottomed saucepan serves as our foundation for melting ingredients evenly without hot spots that could burn the delicate chocolate mixture. The thick base distributes heat uniformly and prevents scorching during the melting process.
Candy thermometer helps us monitor temperature precisely when working with chocolate and condensed milk. This tool ensures our mixture reaches the optimal consistency for smooth, creamy fudge that sets properly.
Sturdy wooden spoon provides the durability needed for stirring thick fudge mixtures without breaking or warping. The wooden material won’t conduct heat like metal spoons, keeping our hands comfortable during extended stirring periods.
Baking pan lined with parchment paper creates the perfect mold for shaping our fudge while allowing easy removal once set. We recommend using an 8×8 or 9×9 inch pan for ideal thickness and portion sizing.
Measuring and Preparation Tools
Measuring cups and spoons ensure accuracy in ingredient ratios, which is crucial for achieving the perfect texture and flavor balance in our cookies and cream fudge.
Food scale offers precise portion control and ingredient measurement, particularly important when working with chocolate chips and cookie pieces. This tool helps maintain consistency across multiple batches.
Commercial Production Considerations
For those interested in larger scale production, Sweet Selections Fudge Machines feature digital controls and efficient design suitable for both small and large operations. These specialized machines simplify the fudge making process while reducing cleanup time significantly. Industrial scale alternatives can produce up to 600 pounds of fudge per batch with automated systems for increased efficiency.
Instructions

Follow these step-by-step instructions to create perfect cookies and cream fudge every time. We’ll walk you through each stage to ensure your fudge sets properly and delivers that irresistible combination of creamy texture and cookie crunch.
Prep the Pan
Line an 8×8 or 9×9 inch square baking pan with foil or parchment paper, leaving a 2-inch overhang on all sides for easy removal. We recommend using parchment paper for the cleanest release. Lightly spray the lined pan with cooking spray to prevent any sticking. Set the prepared pan aside while you make the fudge base.
Make the Fudge Base
Combine white chocolate chips, sweetened condensed milk, and butter in a heavy-bottomed saucepan over low heat. Stir continuously with a wooden spoon until the mixture melts completely and becomes smooth, which typically takes 3-5 minutes. Remove from heat and immediately stir in vanilla extract and salt until well incorporated. For microwave method, heat the mixture at 50% power in 30-second intervals, stirring between each interval until smooth.
Add the Cookies
Crush three-quarters of the chocolate sandwich cookies into chunky pieces, reserving the remaining quarter for topping. We prefer pieces about the size of small pebbles for the best texture contrast. Gently fold the crushed cookies into the warm fudge base using a rubber spatula, ensuring even distribution throughout the mixture. Be careful not to overmix, as this can break down the cookie pieces too much.
Create the Layers
Pour the fudge mixture into the prepared pan, spreading it evenly with an offset spatula. Crush the reserved cookies into smaller pieces and sprinkle them generously over the surface. Gently press the cookie pieces into the top layer to ensure they adhere properly. Some recipes benefit from a light swirling motion to create an attractive marbled pattern on the surface.
Chill and Set
Refrigerate the fudge for 1-3 hours until completely firm and set. We find that 2 hours provides the optimal firmness for clean cutting. Once set, lift the fudge from the pan using the parchment paper overhang and transfer to a cutting board. Cut into 1-inch squares using a sharp knife, wiping the blade clean between cuts for neat edges. Store in an airtight container at room temperature for up to one week or freeze for longer storage.
Directions for Perfect Results

Creating flawless cookies and cream fudge requires attention to exact techniques that ensure consistent results. We’ll share our proven methods for achieving the perfect texture and flavor every time.
Temperature Tips
Proper temperature control makes the difference between smooth, creamy fudge and a grainy disappointment. We recommend using the microwave method at 70% power to prevent burning the delicate white chocolate base. This gentler approach allows the chocolate to melt evenly without scorching.
The stovetop method requires low heat throughout the melting process. We keep our heavy-bottomed saucepan on the lowest setting and stir constantly to prevent the mixture from sticking or developing hot spots. Our candy thermometer helps monitor the temperature, ensuring we never exceed the optimal melting range.
Chilling plays a crucial role in achieving the perfect set. We refrigerate our fudge for at least 2 to 3 hours before cutting, though overnight chilling produces the best results. The extended cooling time allows the fudge to firm up completely while maintaining its creamy interior.
Layering Technique
Strategic layering creates visual appeal and ensures every bite contains the perfect cookie to fudge ratio. We pour our base fudge mixture into the prepared pan first, spreading it evenly with an offset spatula to eliminate air bubbles.
The top layer requires careful cookie placement for maximum impact. We sprinkle crushed cookies across the surface while the fudge remains slightly warm, allowing them to adhere naturally. Gentle pressing with the back of a spoon embeds the cookies without breaking them further.
Our technique involves varying the cookie sizes in the top layer. Larger chunks provide texture contrast while smaller crumbs fill gaps and create a cohesive appearance. This approach delivers both visual interest and consistent flavor distribution throughout each square.
Storage Guidelines
Proper storage maintains the fudge’s quality and extends its shelf life significantly. We store our finished fudge in an airtight container in the refrigerator for up to one week, separating layers with parchment paper to prevent sticking.
| Storage Method | Duration | Temperature |
|---|---|---|
| Refrigerated | Up to 1 week | 35-40°F |
| Frozen | Up to 3 months | 0°F |
| Room Temperature | 2-3 days | Below 70°F |
Freezing offers the longest storage option for our cookies and cream fudge. We wrap individual pieces in plastic wrap before placing them in freezer bags, removing as much air as possible. This method preserves both texture and flavor for up to three months.
Room temperature storage works for short periods during cooler weather. We avoid leaving the fudge out during warm months since the white chocolate base softens quickly above 70°F. Our airtight containers prevent moisture absorption that could compromise the fudge’s smooth texture.
Make-Ahead Instructions

We recommend preparing cookies and cream fudge a day in advance for optimal flavor development and texture. The advance preparation allows the flavors to meld beautifully while creating the perfect firm consistency that makes cutting easier.
Advance Preparation Timeline
| Timeline | Task | Storage Method |
|---|---|---|
| 2-3 days ahead | Prepare complete fudge | Refrigerate covered |
| 1 week ahead | Make fudge base only | Refrigerate in airtight container |
| 2 months ahead | Complete fudge preparation | Freeze wrapped in foil |
Day-Before Preparation
We suggest making the entire batch 24 hours before serving to achieve the ideal texture. Prepare the fudge according to our standard instructions and allow it to chill overnight in the refrigerator. This extended chilling time creates a firmer consistency that cuts cleanly into perfect squares.
Store the prepared fudge in the refrigerator covered with plastic wrap or aluminum foil. The overnight rest period enhances the cookies and cream flavors while ensuring each piece holds its shape when served.
Extended Storage Options
For longer advance preparation we recommend wrapping individual pieces in cling film before placing them in an airtight container. This method prevents the fudge from absorbing refrigerator odors while maintaining its creamy texture.
Freezing offers the ultimate make-ahead solution for busy schedules. Wrap the entire batch in cling film followed by aluminum foil for maximum protection. Frozen cookies and cream fudge maintains its quality for up to two months when properly stored.
Thawing Instructions
We advise transferring frozen fudge to the refrigerator 4 to 6 hours before serving. This gradual thawing process preserves the smooth texture and prevents condensation from forming on the surface. Room temperature thawing works for immediate serving but may create slight texture changes in the final product.
Serving Suggestions

We recommend cutting our cookies and cream fudge into perfect squares for elegant presentation and easy serving. Using a sharp knife warmed under hot water creates clean cuts through the firm fudge without cracking or crumbling the cookie pieces.
Our favorite serving size measures approximately 1-inch squares, which provides the ideal balance of rich white chocolate and crunchy cookie texture without overwhelming guests. These portions work beautifully for parties, holiday gatherings, or gift-giving occasions.
We enhance the visual appeal by arranging the fudge squares on decorative plates or in gift boxes lined with parchment paper. Dusting the tops lightly with cookie crumbs adds an extra layer of texture and reinforces the cookies and cream theme.
For special occasions, we create an impressive dessert platter by pairing our fudge with complementary treats. Fresh berries, vanilla wafers, or additional chocolate sandwich cookies make excellent accompaniments that highlight the fudge’s creamy sweetness.
We often garnish individual pieces with crushed cookie bits or mini chocolate chips pressed gently into the surface before the fudge sets completely. This technique creates a professional bakery appearance while adding delightful texture contrast.
Room temperature serving brings out the optimal flavor profile in our cookies and cream fudge. We remove the pieces from refrigeration about 15-20 minutes before serving to allow the fudge to soften slightly while maintaining its shape.
For holiday entertaining, we arrange the squares in decorative tins or on tiered serving stands alongside other homemade confections. The black and white contrast of the cookies against the creamy white fudge creates stunning visual impact on any dessert table.
We package individual pieces in small paper cups or mini cupcake liners for buffet-style serving, making it easy for guests to enjoy without utensils. This presentation method also helps maintain the fudge’s shape and prevents fingerprints on the smooth surface.
Conclusion
We’ve shown you how to create this irresistible cookies and cream fudge that’ll become your go-to dessert for any occasion. The beauty of this recipe lies in its simplicity – you don’t need specialized equipment or advanced candy-making skills to achieve professional results.
Whether you’re making it for holiday gifts or treating yourself to something special this fudge delivers on both flavor and presentation. The combination of creamy white chocolate and crunchy cookie pieces creates a texture that’s simply addictive.
With proper storage techniques and make-ahead options you can always have this delightful treat ready when cravings strike. Give this recipe a try and watch as it becomes a favorite in your dessert repertoire.
Frequently Asked Questions
How long does cookies and cream fudge take to set?
The fudge needs to chill for at least 2-3 hours to firm up properly, but overnight chilling is recommended for best results. This extended chilling time ensures the fudge reaches the perfect texture and makes it easier to cut into clean squares.
Do I need a candy thermometer to make this fudge?
No, this recipe doesn’t require a candy thermometer. The fudge is made using simple melting techniques with either microwave at 70% power or low stovetop heat, making it beginner-friendly and accessible to home bakers.
How should I store cookies and cream fudge?
Store the fudge in the refrigerator for up to one week in an airtight container. For longer storage, wrap individual pieces in cling film and freeze for up to three months. Keep at room temperature only during cooler weather for short periods.
Can I make cookies and cream fudge ahead of time?
Yes, this fudge is perfect for make-ahead preparation. You can make it 2-3 days in advance and refrigerate, or prepare just the fudge base up to a week ahead. The flavor and texture actually improve after overnight chilling.
What’s the best way to cut fudge cleanly?
Use a sharp knife warmed under hot water for clean cuts. Cut the fudge into 1-inch squares for elegant presentation. Wipe the knife clean between cuts and rewarm as needed to maintain smooth, professional-looking edges.
What ingredients do I need for cookies and cream fudge?
You’ll need white chocolate chips, sweetened condensed milk, unsalted butter, vanilla extract, salt, chocolate sandwich cookies, heavy cream, mini chocolate chips, and cookie crumbs. The ingredients are organized into three categories: base, cookie layer, and toppings.
How do I prevent the white chocolate from seizing when melting?
Melt the white chocolate at 70% power in the microwave or use low heat on the stovetop. Stir gently and avoid overheating. Adding the sweetened condensed milk and butter helps create a smooth, stable mixture that won’t seize.
Can I freeze cookies and cream fudge?
Yes, the fudge freezes well for up to three months. Wrap individual pieces in cling film and store in airtight containers. Thaw gradually in the refrigerator to maintain the best texture and prevent condensation from affecting the fudge.


