

Nothing beats the perfect combination of rich coffee and creamy ice cream on a hot summer day. We’ve discovered that making coffee ice cream at home isn’t just incredibly rewarding – it’s surprisingly simple and allows you to control every flavor note from bold espresso to subtle vanilla undertones.
Coffee ice cream transforms ordinary dessert moments into extraordinary experiences. Whether you’re craving that intense caffeine kick or seeking a sophisticated after-dinner treat we’ve got recipes that’ll satisfy every coffee lover’s dream. From classic vanilla bean bases infused with freshly brewed espresso to innovative cold brew variations that pack serious flavor punch.
Our collection of foolproof coffee ice cream recipes will turn your kitchen into an artisanal ice cream parlor. We’ll show you techniques that professional ice cream makers use plus shortcuts that work perfectly with standard home equipment. Get ready to impress friends and family with scoops of pure coffee bliss that rival any premium ice cream shop.
Equipment Needed
Creating professional-quality coffee ice cream at home requires the right tools to achieve that perfect creamy texture and rich flavor we all crave. We’ve compiled the essential equipment you’ll need to transform your kitchen into an ice cream parlor.
Ice Cream Maker
An ice cream maker forms the foundation of our coffee ice cream adventure. Churning machines come in three main varieties that cater to different budgets and production needs.
| Ice Cream Maker Type | Price Range | Capacity | Freezing Time |
|---|---|---|---|
| Bowl-freeze models | $30-80 | 1-2 quarts | 20-30 minutes |
| Compressor units | $150-400 | 1.5-2 quarts | 25-40 minutes |
| Manual churns | $40-120 | 4-6 quarts | 30-45 minutes |
Bowl-freeze models require overnight freezing before use but deliver excellent results for home cooks. Compressor units offer convenience with built-in freezing capabilities that eliminate pre-planning. Manual churns provide larger batches perfect for entertaining groups.
Mixing Equipment
Quality mixing tools ensure smooth integration of coffee flavors throughout our ice cream base. We recommend using a heavy-bottomed saucepan for heating cream without scorching. Whisks with multiple tines incorporate air effectively while preventing lumps from forming.
Digital kitchen scales provide precise measurements that professional ice cream makers rely on for consistent results. Measuring cups work adequately but scales guarantee accuracy when portioning cream, sugar, and coffee components.
Coffee Preparation Tools
Extracting maximum coffee flavor requires proper brewing equipment customized to ice cream making. French press coffee makers produce bold concentrated brews that won’t dilute our ice cream base. Espresso machines create intense shots perfect for robust coffee ice cream varieties.
Coffee grinders allow us to control bean freshness and grind size for optimal flavor extraction. Burr grinders deliver consistent particle sizes while blade grinders offer budget-friendly alternatives for occasional use.
Storage and Serving Essentials
Airtight containers preserve our finished ice cream’s texture and prevent freezer burn during storage. We prefer containers with tight-fitting lids that hold 1-2 quart portions for easy serving.
Ice cream scoops with release mechanisms create perfect portions while preventing hand fatigue during serving. Sturdy serving bowls that can withstand freezer temperatures make presentation effortless when entertaining guests.
Ingredients
 1")
We’ve organized our coffee ice cream ingredients by recipe type to help you choose the perfect option for your skill level and desired texture. Each recipe delivers rich coffee flavor with varying techniques and ingredient requirements.
For Classic Coffee Ice Cream
This traditional custard base creates the richest and creamiest coffee ice cream texture. We recommend using high quality ingredients for the best results.
- 2 cups half and half
- 1 cup granulated sugar
- ¼ teaspoon sea salt
- 4 egg yolks
- 1 cup heavy cream
- 1 to 1½ tablespoons instant coffee
- 1 teaspoon pure vanilla extract
For No-Churn Coffee Ice Cream
Our simplest recipe requires only three ingredients and no special equipment. This method produces excellent results for beginners or those without an ice cream maker.
- 1¼ cups heavy or double cream
- ⅓ cup sweetened condensed milk
- 2 tablespoons instant coffee
For Espresso Gelato
Authentic Italian gelato delivers a denser texture and more intense coffee flavor than traditional ice cream. We use whole milk as the base for this Mediterranean style treat.
- Whole milk
- Granulated sugar
- Fresh espresso
- Egg yolks (optional for extra richness)
For Coffee Bean Ice Cream
This method infuses whole coffee beans directly into the milk for the most authentic coffee flavor. We steep the beans to extract maximum taste without bitterness.
- 1½ cups whole milk
- 1½ cups whole coffee beans
- ¾ cup sugar
- Pinch of salt
- Heavy cream for chilling
Optional Mix-ins and Toppings
These additions transform basic coffee ice cream into gourmet desserts. We suggest adding mix-ins during the final minutes of churning for even distribution.
Nuts:
- Almonds
- Walnuts
Chocolate:
- Chocolate chips
- Chocolate shavings
Sauces:
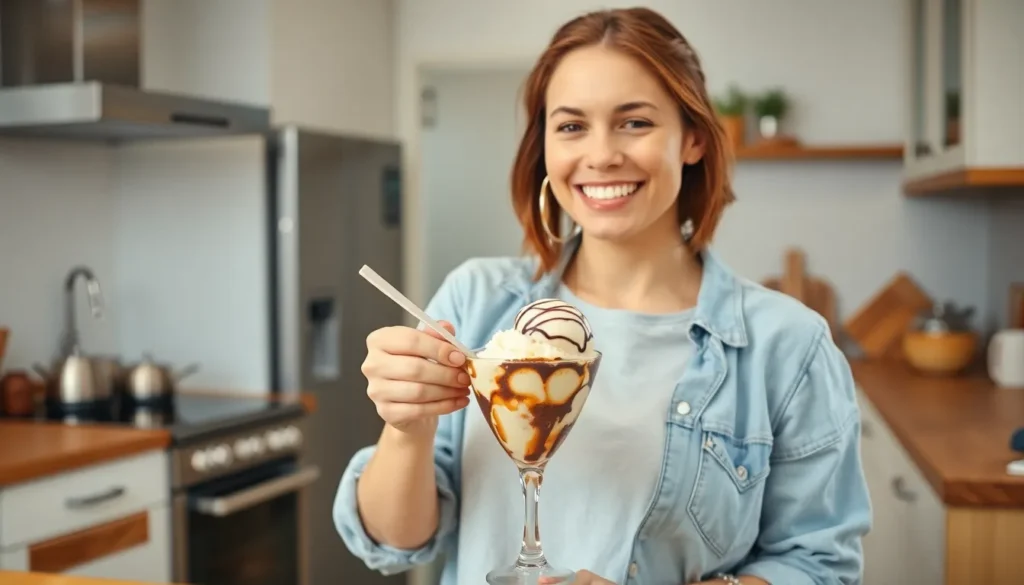
- Caramel sauce
- Whipped cream
Instructions
 2")
Our step-by-step instructions transform simple ingredients into rich and creamy coffee ice cream using time-tested techniques. Each method delivers professional results that rival premium ice cream shops.
Classic Coffee Ice Cream Method
We begin by warming 2 cups half and half with 1 cup granulated sugar and ¼ teaspoon sea salt in a heavy-bottomed saucepan over medium heat. Stir the mixture until the sugar completely dissolves and the liquid steams gently.
Next we prepare the custard base by whisking 4 egg yolks in a separate bowl. Slowly pour ½ cup of the warm milk mixture into the yolks while whisking constantly to prevent curdling. This process tempers the eggs and creates a smooth foundation.
Pour the tempered egg mixture back into the saucepan with the remaining warm milk. Add 1 to 1½ tablespoons instant coffee and cook over medium-low heat while stirring continuously. The custard reaches proper consistency when it coats the back of a spoon and registers 170°F on a digital thermometer.
We strain the hot custard through a fine-mesh sieve into a bowl containing 1 cup heavy cream. This step removes any lumps and ensures silky smooth texture. Stir in 1 teaspoon vanilla extract and mix thoroughly.
Cool the mixture rapidly by placing the bowl over an ice bath and stirring occasionally. Once cooled to room temperature we cover and refrigerate for at least 4 hours or overnight. This chilling period allows flavors to develop and creates the ideal consistency for churning.
Finally we churn the chilled mixture in our ice cream maker according to manufacturer instructions. Most machines require 20-25 minutes of churning time. Transfer the soft ice cream to an airtight container and freeze for 4-6 hours until firm enough to scoop.
| Recipe Element | Time Required | Temperature |
|---|---|---|
| Custard cooking | 8-10 minutes | 170°F |
| Initial cooling | 30 minutes | Room temperature |
| Chilling time | 4+ hours | Refrigerated |
| Churning time | 20-25 minutes | Machine dependent |
| Final freezing | 4-6 hours | Frozen solid |
No-Churn Coffee Ice Cream Method
 3")
We’ve perfected this streamlined approach that eliminates the need for an ice cream maker while delivering professional quality results. This method relies on whipped cream and sweetened condensed milk to create a luxuriously smooth texture without churning.
Prep the Coffee
We start by dissolving 2 tablespoons of instant coffee in 2 tablespoons of hot water to create a concentrated coffee base. This mixture needs to cool completely before incorporating into our cream mixture to prevent melting the whipped cream. The instant coffee provides bold flavor without adding excess liquid that could affect the final texture.
Set the coffee mixture aside for approximately 10 minutes to reach room temperature. We recommend using high quality instant coffee or instant espresso powder for the most robust flavor profile.
Whip the Cream
We whip 2 cups of chilled heavy cream until stiff peaks form using either a hand mixer or stand mixer. The cream should hold its shape when the beaters are lifted and appear glossy and thick. This process typically takes 3 to 5 minutes with an electric mixer.
Chilled cream whips more effectively than room temperature cream. We ensure our bowl and beaters are also cold by placing them in the refrigerator for 15 minutes before beginning. Over whipping can cause the cream to separate so we stop immediately when stiff peaks form.
Combine and Freeze
We gently fold the 14 oz can of sweetened condensed milk into the whipped cream using a rubber spatula. Next we add 1 teaspoon of vanilla extract and the cooled coffee mixture. We fold these ingredients together using gentle motions to maintain the airy texture of the whipped cream.
The mixture gets transferred to a freezer safe container and covered tightly with plastic wrap or a lid. We freeze the ice cream for at least 6 hours though overnight freezing produces the best scoopable texture. For added flavor complexity we can fold in chopped chocolate or nuts before freezing.
| Freezing Time | Texture Result |
|---|---|
| 2-4 hours | Soft serve consistency |
| 6 hours | Firm but scoopable |
| Overnight | Optimal texture |
Espresso Gelato Method
 4")
Authentic espresso gelato delivers a more intense coffee flavor with a denser texture compared to traditional ice cream. This Italian method creates a sophisticated dessert that showcases the pure essence of espresso.
Brew the Espresso
We start by preparing a shot of freshly brewed espresso using an espresso machine or strong coffee substitute. The key lies in allowing the espresso to chill completely before incorporating it into our custard base.
For those without an espresso machine, we can create an effective substitute by dissolving 1 tablespoon of instant coffee in 1 tablespoon of water. This concentrated mixture provides the bold coffee flavor essential for authentic gelato taste.
Create the Custard Base
We combine milk and cream in a heavy-bottomed saucepan and heat the mixture gently until small bubbles form around the edges. In a separate bowl, we whisk together egg yolks and sugar until the mixture becomes light and frothy.
The tempering process requires careful attention as we gradually add small amounts of the hot milk mixture to the yolks while whisking constantly. We return this combined mixture to the pan and cook over low heat, stirring continuously until the custard thickens enough to coat the back of a spoon.
Straining the custard through a fine sieve removes any solid pieces and ensures our gelato base remains perfectly smooth. We then stir the chilled espresso into this finished custard base and refrigerate the mixture for at least 4 hours or overnight to develop the flavors.
Churn and Freeze
We process the chilled mixture in our ice cream maker according to the manufacturer’s instructions until it reaches the characteristic gelato consistency. Gelato typically contains less butterfat than traditional ice cream, resulting in a lighter and smoother texture.
Once churning completes, we transfer the gelato to an airtight container and freeze until firm. The coffee flavor intensity can be adjusted by varying the number of espresso shots or the amount of instant coffee used in our recipe.
| Freezing Timeline | Texture Result |
|---|---|
| 2-3 hours | Soft serve consistency |
| 4-6 hours | Firm but scoopable |
| Overnight | Optimal gelato texture |
Coffee Bean Ice Cream Method
 5")
We achieve the most authentic coffee flavor by using whole coffee beans to infuse our ice cream base. This traditional technique delivers rich coffee notes that instant coffee simply cannot match.
Steep the Coffee Beans
We begin by combining 1 1/2 cups whole milk with 1 1/2 cups whole coffee beans in a heavy-bottomed saucepan. Heat the mixture gently over medium-low heat until small bubbles form around the edges, then remove from heat immediately. The beans will release their oils and aromatics as they steep, creating an intensely flavored base.
Allow the coffee bean mixture to steep for several hours at room temperature, or transfer to the refrigerator to steep overnight. The longer steeping time develops deeper coffee flavors that will shine through in our finished ice cream. We recommend a minimum of 4 hours for optimal flavor extraction, though overnight steeping produces the most robust results.
Make the Ice Cream Base
We strain the coffee-infused milk through a fine-mesh sieve to remove all coffee beans, pressing gently to extract maximum flavor. Discard the used beans and return the flavored milk to our saucepan.
Add 3/4 cup granulated sugar, 1/2 cup heavy cream, and a pinch of salt to the coffee-infused milk. Whisk the mixture vigorously until the sugar completely dissolves, creating a smooth base. The salt enhances the coffee flavors while the cream adds richness and body to our ice cream.
Heat the mixture gently while stirring constantly until it reaches 170°F on a digital thermometer. Remove from heat and add vanilla extract if desired, though many prefer the pure coffee flavor without additional aromatics.
Strain and Churn
We strain the entire mixture through a fine-mesh sieve once more to ensure our base is completely smooth and free of any lumps. Transfer the strained mixture to a bowl and cover with plastic wrap, pressing it directly onto the surface to prevent a skin from forming.
Chill the base in the refrigerator for at least 4 hours or overnight until it reaches 40°F or below. This cooling period allows flavors to meld and ensures optimal churning conditions.
Pour the chilled mixture into our ice cream maker and churn according to manufacturer instructions, typically 20-40 minutes until the ice cream reaches a soft-serve consistency. The churning time varies depending on our machine type and desired texture.
Transfer the soft ice cream to an airtight container and freeze for at least 2 hours before serving for firm scoops, or enjoy immediately for a softer texture. Our coffee bean ice cream will maintain optimal quality for up to one week when stored properly.
Storage Tips
 6")
Proper storage determines how long your homemade coffee ice cream maintains its creamy texture and bold flavor. We recommend following these essential techniques to preserve the quality of your frozen dessert for up to 2-3 months.
Choose the Right Container
Airtight plastic or metal containers provide the best protection for your coffee ice cream. These materials prevent air exposure that causes unwanted ice crystals and freezer burn. Cardboard or paper containers fail to offer adequate protection and should be avoided entirely.
Create an Air Barrier
Press plastic wrap or wax paper directly onto the surface of your ice cream before sealing the container lid. This extra layer minimizes air contact and helps maintain the smooth texture we worked hard to achieve during the churning process.
Freeze Quickly and Efficiently
Transfer your freshly churned coffee ice cream to the freezer immediately after preparation. Quick freezing prevents large ice crystals from forming and preserves the creamy consistency that makes homemade ice cream so appealing.
Maintain Consistent Temperature
Keep your freezer at 0°F (-18°C) or colder to preserve optimal ice cream quality. Store containers at the back of the freezer where temperatures remain most stable. Avoid placing ice cream near the door where temperature fluctuations can compromise texture and flavor.
Monitor for Quality Changes
Regular quality checks help ensure your coffee ice cream remains at its best. Look for signs of spoilage such as off-flavors or excessive ice crystal formation. These indicators suggest the ice cream has passed its peak quality and should be consumed soon or discarded.
| Storage Factor | Recommendation | Duration |
|---|---|---|
| Container Type | Airtight plastic or metal | 2-3 months |
| Freezer Temperature | 0°F (-18°C) or colder | Consistent |
| Storage Location | Back of freezer | Away from door |
| Quality Check | Weekly inspection | For spoilage signs |
Following these storage guidelines ensures every scoop of your homemade coffee ice cream delivers the same rich flavor and smooth texture you created on day one.
Serving Suggestions
 7")
Transforming our homemade coffee ice cream into an extraordinary dessert experience requires thoughtful presentation and complementary flavors. We can elevate every scoop with creative garnishes and strategic pairings that enhance the rich coffee notes.
Garnish Ideas
Cocoa powder creates an elegant dusting that intensifies the chocolate undertones in our coffee ice cream. We sprinkle it lightly over individual scoops for a sophisticated cafe-style presentation. Cinnamon adds warmth and complexity while complementing the coffee’s natural earthiness.
Whipped cream transforms a simple scoop into an indulgent sundae experience. We dollop freshly whipped cream on top and finish with chocolate chips for textural contrast. Chopped nuts provide satisfying crunch that pairs beautifully with the smooth ice cream base.
Coffee beans work as both garnish and flavor enhancer when we place a few whole beans on each serving. This presentation technique signals the dessert’s primary flavor while adding visual appeal. Chocolate shavings or curls create restaurant-quality plating that impresses guests at dinner parties.
Pairing Recommendations
Coffee cake creates the perfect flavor harmony when we use our coffee ice cream as filling between two slices. This combination doubles down on coffee flavors while providing textural variety between the moist cake and creamy ice cream. The pairing works exceptionally well for afternoon gatherings or brunch desserts.
Tiramisu becomes even more decadent when we serve our coffee ice cream alongside this classic Italian dessert. The similar flavor profiles complement each other while offering different textures and temperatures. We recommend serving both at the same meal for coffee lovers who want maximum indulgence.
Espresso and cappuccino enhance the coffee ice cream experience through temperature contrast. Hot coffee beverages warm the palate between cool ice cream bites while reinforcing the coffee theme throughout the dessert course. This pairing works particularly well after heavy meals when guests appreciate lighter dessert portions.
Caramelized bananas provide natural sweetness that balances coffee’s slight bitterness. We prepare the bananas with butter and brown sugar then serve them warm over cold ice cream scoops. This combination creates a sophisticated dessert that showcases both fruit and coffee flavors without overwhelming either component.
Make-Ahead Instructions
 8")
Planning ahead transforms coffee ice cream making from a time-sensitive process into a leisurely kitchen experience. We recommend preparing your coffee ice cream up to three days before serving to allow flavors to fully develop and achieve optimal texture.
Custard Base Preparation
Start your custard-based coffee ice cream up to 24 hours in advance. We heat half and half with sugar and salt until the mixture reaches 165°F (74°C) before tempering the egg yolks. The instant coffee incorporates best when the mixture maintains this temperature range. After straining and cooling the custard base completely, refrigerate overnight to allow the coffee flavors to intensify and the mixture to reach the ideal consistency for churning.
No-Churn Method Timeline
Our no-churn coffee ice cream benefits from extended freezing time for superior texture. Begin this method at least 8 hours before serving. The concentrated coffee base requires 30 minutes to cool completely before folding into the whipped cream mixture. We suggest preparing the coffee concentrate in the morning and assembling the ice cream in the evening for next-day serving.
| Method | Prep Time | Advance Timeline | Optimal Serving Time |
|---|---|---|---|
| Custard Base | 2-3 hours | 24 hours ahead | Day 2-3 |
| No-Churn | 30 minutes | 8-12 hours ahead | Day 1-2 |
| Espresso Gelato | 3-4 hours | 18-24 hours ahead | Day 2 |
| Coffee Bean | 4-5 hours | 24-48 hours ahead | Day 3 |
Espresso Gelato Advance Planning
Espresso gelato requires careful timing for maximum flavor development. We recommend brewing the espresso or preparing the instant coffee substitute at least 18 hours before serving. The custard base benefits from overnight chilling as the intense coffee flavors meld with the cream and egg mixture. This extended resting period creates the dense texture characteristic of authentic gelato.
Coffee Bean Infusion Strategy
Coffee bean ice cream offers the most flexibility for advance preparation. We steep whole coffee beans in milk for 2-4 hours to extract maximum flavor without bitterness. The strained mixture can rest in the refrigerator for up to 48 hours before churning. This extended infusion period allows the subtle coffee notes to develop fully while maintaining the smooth texture essential for premium ice cream.
Churning and Freezing Schedule
Schedule your churning process based on your ice cream maker’s requirements. Bowl-freeze models need 24 hours of freezer time before use. We churn all coffee ice cream varieties for 20-25 minutes until they reach soft-serve consistency. Transfer immediately to pre-chilled containers and freeze for at least 4 hours before serving. The ice cream reaches optimal scooping texture after 6-8 hours of freezing time.
Troubleshooting Common Issues
 9")
We understand that creating perfect coffee ice cream can present challenges even for experienced home cooks. The most common problems have straightforward answers once we identify their root causes.
Icy Texture Problems occur when ice crystals form during the churning process. Over-churning often causes this issue as extended mixing times allow large ice crystals to develop. We recommend churning for shorter periods and transferring the ice cream to the freezer immediately after achieving the desired consistency. Temperature fluctuations in your freezer can also contribute to ice crystal formation.
Soft Ice Cream Consistency typically results from insufficient freezing time or inadequate fat content. We suggest allowing at least 6 hours for proper firming in the freezer. Adding more heavy cream to your base mixture improves texture by increasing the fat content which creates a smoother mouthfeel. Check that your freezer maintains 0°F (-18°C) or colder for optimal results.
Sandy Texture Issues develop when sugar fails to dissolve completely in the base mixture. We always ensure sugar dissolves fully before beginning the cooling process. Heating the milk and sugar mixture to 162°F (72°C) helps achieve complete dissolution. Stirring continuously during the heating process prevents sugar from settling at the bottom of the pan.
Weak Coffee Flavor can disappoint coffee enthusiasts expecting bold taste. We address this by increasing the coffee concentration rather than adding more liquid coffee which can affect texture. Using instant coffee powder or creating a concentrated espresso base provides stronger flavor without compromising the ice cream’s consistency.
Separation or Curdling happens when egg-based custards reach temperatures that are too high too quickly. We prevent this by tempering egg yolks gradually with small amounts of hot milk mixture. Constant stirring and maintaining temperatures below 180°F (82°C) keeps the custard smooth and prevents protein coagulation.
| Common Issue | Primary Cause | Solution Time |
|---|---|---|
| Icy Texture | Over-churning | 20-30 minutes churning max |
| Soft Consistency | Insufficient freezing | 6+ hours freezing time |
| Sandy Texture | Undissolved sugar | Heat to 162°F before cooling |
| Weak Flavor | Low coffee concentration | Double instant coffee amount |
| Curdling | Overheated eggs | Keep below 180°F during cooking |
Recipe Variations
 10")
Now that we’ve mastered the fundamental techniques, let’s explore exciting variations that transform our basic coffee ice cream into gourmet desserts. These creative combinations offer unique flavor profiles while maintaining the rich coffee foundation we love.
Mocha Coffee Ice Cream
We combine the boldness of coffee with rich chocolate to create this double-layered taste sensation. Add 2 tablespoons of unsweetened cocoa powder to your base mixture before cooking, whisking thoroughly to eliminate any lumps. The cocoa integrates seamlessly with the coffee flavors during the heating process.
After churning your ice cream, we recommend swirling in ½ cup of mini chocolate chips during the final 2 minutes of churning. This addition provides delightful texture contrast and bursts of chocolate flavor in every bite. Store-bought or homemade chocolate chips work equally well for this variation.
For an extra indulgent touch, drizzle melted dark chocolate into the churned ice cream before final freezing. The chocolate will create beautiful ribbons throughout the finished product.
Salted Caramel Coffee Ice Cream
We elevate our coffee ice cream with homemade salted caramel that perfectly balances sweet and salty elements. Begin by preparing caramel sauce using ½ cup sugar, ¼ cup heavy cream, and 2 tablespoons butter in a heavy-bottomed saucepan. Cook the sugar over medium heat until it reaches a deep amber color, then carefully whisk in the cream and butter.
Remove the caramel from heat and stir in ½ teaspoon of sea salt. Allow the mixture to cool completely before incorporating it into your ice cream. We suggest layering the cooled caramel sauce into your prepared coffee ice cream during the final freezing stages.
Alternatively, swirl the caramel through the ice cream after churning but before transferring to your storage container. The salt enhances the sweetness while complementing the coffee’s natural bitterness beautifully.
Vietnamese Coffee Ice Cream
We create this intensely flavored variation by using sweetened condensed milk as our primary sweetener instead of regular sugar. Replace the standard sugar in your base recipe with ¾ cup of sweetened condensed milk for authentic Vietnamese coffee flavor.
Brew strong coffee using 3 tablespoons of ground coffee with ½ cup hot water, or substitute 2 tablespoons of instant Vietnamese coffee dissolved in ¼ cup warm water. Mix the concentrated coffee directly with the sweetened condensed milk until fully combined.
For no-churn methods, fold the coffee and condensed milk mixture into freshly whipped cream. The condensed milk provides natural sweetness and creates an incredibly creamy texture reminiscent of traditional Vietnamese iced coffee. This variation requires no additional sugar and delivers rich, cafe-quality results with minimal effort.
Conclusion
We’ve equipped you with everything needed to create exceptional coffee ice cream at home. From essential equipment and ingredient selections to step-by-step methods and troubleshooting answers we’ve covered all the bases for your success.
The beauty of homemade coffee ice cream lies in its versatility. Whether you choose the classic custard method no-churn technique or adventurous variations like Vietnamese coffee or salted caramel you’ll achieve professional-quality results that surpass store-bought options.
Remember that proper storage and presentation elevate your creation from good to extraordinary. With these techniques and recipes you’re ready to impress guests or simply enjoy a premium dessert whenever the craving strikes. Your journey to coffee ice cream mastery starts now.
Frequently Asked Questions
What equipment do I need to make coffee ice cream at home?
You’ll need an ice cream maker (bowl-freeze, compressor, or manual churn), heavy-bottomed saucepan, digital kitchen scale, and mixing tools. For coffee preparation, use a French press or espresso machine for optimal flavor extraction. Don’t forget airtight containers for storage and a quality ice cream scoop with release mechanism for serving.
Can I make coffee ice cream without an ice cream maker?
Yes! The no-churn method uses whipped cream and sweetened condensed milk to create smooth, creamy coffee ice cream. Simply prepare a concentrated coffee base, whip cream to stiff peaks, fold ingredients together gently, and freeze for at least 6 hours. This method delivers professional-quality results without special equipment.
How long does homemade coffee ice cream last in the freezer?
Properly stored homemade coffee ice cream maintains optimal quality for 2-3 months. Use airtight plastic or metal containers, create an air barrier with plastic wrap, and store at the back of your freezer at 0°F (-18°C) or colder. Regular quality checks ensure the best flavor and texture.
Why is my coffee ice cream icy or grainy?
Icy texture usually results from over-churning or improper freezing. Limit churning time and freeze quickly to prevent large ice crystals. Grainy texture occurs when sugar doesn’t fully dissolve. Ensure complete dissolution during the heating process and maintain proper temperatures throughout preparation for smooth, creamy results.
How can I make my coffee ice cream taste stronger?
Use concentrated coffee or espresso instead of regular coffee. For the coffee bean method, steep whole beans in warm milk for deeper flavor infusion. You can also add instant coffee or espresso powder to intensify the taste. The espresso gelato method provides the most intense coffee flavor and denser texture.
What are the best toppings and pairings for coffee ice cream?
Enhance your coffee ice cream with cocoa powder, cinnamon, whipped cream, or chocolate shavings as garnishes. Perfect pairings include coffee cake, tiramisu, fresh espresso, and caramelized bananas. These combinations create harmonious flavors that elevate your homemade dessert into an extraordinary treat perfect for entertaining.


