
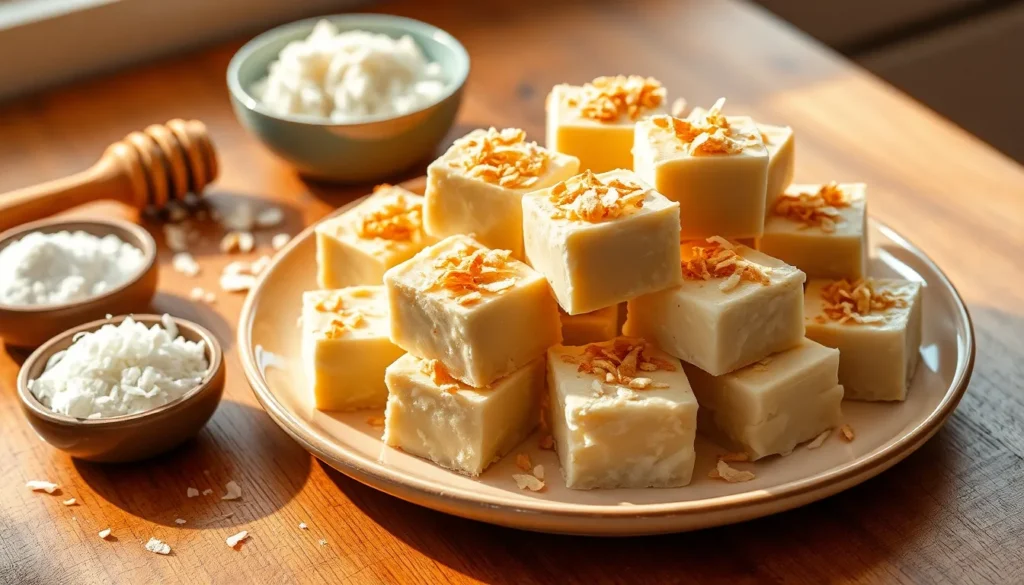
Nothing beats the rich tropical sweetness of homemade coconut fudge that melts in your mouth with every bite. This beloved confection combines the creamy texture of traditional fudge with the exotic flavor of coconut that’ll transport you straight to paradise.
We’ve perfected this foolproof recipe that delivers silky smooth results every single time. Unlike complicated candy-making techniques that require precise temperatures and timing our coconut fudge comes together effortlessly with just a few simple ingredients you probably already have in your pantry.
Whether you’re planning a special celebration or simply craving something indulgent this coconut fudge satisfies every sweet tooth craving. The best part? You’ll have rich creamy squares ready to enjoy in under 30 minutes with minimal cleanup required.
Ingredients
Creating our coconut fudge requires just a handful of simple ingredients that combine to deliver maximum tropical flavor. We’ve organized everything you need into essential base ingredients and optional mix-ins for customization.
For the Coconut Fudge Base
- 3 cups powdered sugar, sifted
- 1/2 cup coconut oil, melted
- 1/2 cup coconut cream or full-fat coconut milk
- 1 cup unsweetened shredded coconut
- 1 teaspoon vanilla extract
- 1/4 teaspoon salt
- 2 tablespoons honey or maple syrup
For Optional Mix-ins
- 1/2 cup mini chocolate chips
- 1/3 cup chopped macadamia nuts
- 1/4 cup dried pineapple pieces, chopped
- 2 tablespoons toasted coconut flakes
- 1/4 cup chopped almonds or pecans
- 1 teaspoon lime zest
- 2 tablespoons white chocolate chips
Equipment Needed

Making coconut fudge requires minimal kitchen equipment that most home cooks already have on hand. We recommend gathering these essential tools before starting to ensure smooth preparation and professional results.
Essential Equipment:
- Medium Saucepan – A heavy-bottomed saucepan works best for even heat distribution when combining ingredients over medium heat
- Rubber Spatula – Essential for stirring constantly and scraping the sides of the pan to prevent sticking and ensure uniform mixing
- 8×8 Inch Baking Dish – The standard size for setting coconut fudge to the proper thickness
- Parchment Paper – Line your baking dish to prevent sticking and make removal effortless
- Microwave-Safe Bowl – Useful for melting coconut oil or heating ingredients in some recipe variations
Additional Helpful Tools:
- Measuring Cups and Spoons – Accurate measurements ensure consistent results every time
- Sharp Knife – For cutting the set fudge into clean squares
- Mixing Bowls – Various sizes for preparing different components separately
- Wire Cooling Rack – Allows proper airflow for even cooling
The beauty of coconut fudge lies in its simplicity. We avoid complicated candy thermometers or specialized equipment that traditional fudge recipes often require. Most of these tools serve dual purposes in your kitchen, making this recipe accessible whether you’re a beginner or experienced baker.
Prep Work

Before we start making our coconut fudge, we need to complete a few essential preparation steps. These simple tasks will ensure our fudge sets properly and maintains the perfect texture.
Preparing Your Pan
We begin by selecting an 8×8 inch baking dish or square pan for our coconut fudge. Line the dish completely with parchment paper, allowing extra paper to hang over the edges for easy removal later. This overhang creates convenient handles that make lifting the finished fudge effortless.
For those using aluminum foil instead of parchment paper, we recommend lightly spraying the foil with non-stick cooking spray. This extra step prevents any sticking and ensures clean removal. The prepared pan should sit ready on our counter while we work with the other ingredients.
Measuring Ingredients
Accurate measurement becomes crucial for achieving the perfect fudge consistency. We start by measuring our sweetened condensed milk, which serves as the creamy base that binds all flavors together. This ingredient provides both sweetness and the smooth texture we desire.
Next, we measure our shredded coconut, choosing between sweetened or unsweetened varieties based on our preference. For enhanced flavor depth, we can toast our coconut flakes in a dry pan over medium heat, stirring frequently until they turn golden brown. This toasting process intensifies the coconut flavor and adds a subtle nutty note to our finished fudge.
We also prepare any chocolate components, whether using white chocolate chips for a milder taste or milk chocolate chips for richer flavor. Having our butter measured and at room temperature ensures smooth incorporation into the mixture. All ingredients should be measured and arranged within easy reach before we begin the cooking process.
Instructions

Now that we have our ingredients measured and equipment ready, we can create this irresistible coconut fudge in just a few simple steps. The process involves building a creamy base, incorporating coconut elements, and achieving the perfect texture through careful cooking.
Making the Fudge Base
We begin by combining sweetened condensed milk with our chosen sweetener in a medium saucepan. Pour the condensed milk first, then add honey or maple syrup while stirring gently to blend. Add the coconut oil and a pinch of salt to enhance the overall flavor profile.
For richer variations, we melt white chocolate chips in a microwave-safe bowl using 30-second intervals, stirring between each heating period until smooth. Once melted, we combine this with the condensed milk mixture to create a thicker and more luxurious base. The vanilla extract gets incorporated at this stage, providing aromatic depth to our foundation.
Adding Coconut
We fold the shredded coconut into our base mixture, ensuring even distribution throughout. The coconut cream adds richness and intensifies the tropical flavor, so we blend it thoroughly until no streaks remain.
Toasted coconut flakes can be reserved for sprinkling on top before the final setting process. We stir the mixture gently but consistently to maintain the coconut’s texture while achieving uniform incorporation. Any additional mix-ins like mini chocolate chips or chopped nuts get folded in during this step.
Cooking to Perfect Temperature
We place our saucepan over medium to medium-low heat and stir continuously to prevent burning. The mixture needs constant attention as we bring it to a gentle boil, then reduce heat to maintain a steady simmer.
Stirring becomes crucial as the mixture thickens and develops a glossy appearance. We test for doneness by observing whether the mixture pulls away from the bottom of the pan when stirred. This indicates our fudge has reached the proper consistency for setting.
Once achieved, we immediately pour the mixture into our prepared baking dish and spread evenly using a rubber spatula. The fudge requires refrigeration for at least 2 hours until firm enough to cut into clean squares.
Directions for Setting

Once we’ve achieved the perfect creamy consistency in our saucepan, we need to carefully transfer and set our coconut fudge for optimal results. These final steps ensure our fudge develops the ideal texture and cuts cleanly into beautiful squares.
Pouring and Smoothing
We begin by removing our prepared 8×8 inch baking dish lined with parchment paper from the counter. Pour the hot fudge mixture directly into the center of our lined pan, allowing it to flow naturally toward the edges. Using our rubber spatula, we gently spread the mixture evenly across the entire surface, ensuring consistent thickness throughout.
We smooth the top with long, even strokes of our spatula, creating a level surface that will produce uniform squares when cut. Tap the pan gently against the counter 2-3 times to release any trapped air bubbles that could create holes in our finished fudge. For an attractive presentation, we sprinkle reserved toasted coconut flakes evenly across the surface while the fudge remains warm and slightly sticky.
Cooling Process
We place our filled pan directly into the refrigerator without covering it initially, allowing the surface to set properly for the first 30 minutes. After this initial setting period, we can cover the pan with plastic wrap if desired to prevent the fudge from absorbing refrigerator odors.
Our coconut fudge requires a minimum of 2 hours of refrigeration time to achieve the proper firmness for cutting. For faster results, we can place the pan in the freezer for approximately 30 minutes, checking that the fudge feels firm to the touch. Before cutting, we remove the fudge from the refrigerator and allow it to come to room temperature for 5-10 minutes, which prevents cracking and ensures clean cuts.
We lift the set fudge from the pan using the parchment paper overhang, then transfer it to a cutting board for easy slicing into perfect squares.
Make-Ahead Instructions

We love how versatile coconut fudge becomes when planning ahead for special occasions or gatherings. This tropical treat actually improves in flavor when given time to develop its creamy texture and allows us to prepare desserts well in advance.
Our coconut fudge stores beautifully for extended periods when properly wrapped. We recommend cutting the fudge into squares first then wrapping individual pieces in wax paper or parchment for easy serving. Place wrapped pieces in an airtight container to maintain freshness and prevent the coconut from absorbing other flavors.
Storage Timeline Options:
| Storage Method | Duration | Temperature |
|---|---|---|
| Refrigerator | Up to 2 weeks | 35-40°F |
| Freezer | Up to 3 months | 0°F or below |
| Room temperature | 3-5 days | 65-70°F |
For optimal results we suggest making the fudge at least 24 hours before serving. This resting period allows the coconut flavors to meld together while the texture reaches its perfect consistency. The condensed milk base continues to firm up during this time creating an even more satisfying bite.
When freezing our coconut fudge we place parchment paper between layers to prevent sticking. Remove frozen pieces about 15 minutes before serving to allow them to soften slightly. The fudge maintains its creamy texture beautifully after thawing without becoming grainy or separated.
We often prepare multiple batches during holiday seasons since coconut fudge makes excellent gifts. Wrap individual squares in decorative paper or place them in small gift boxes for a thoughtful homemade present that recipients can enjoy for weeks.
Storage Tips

Proper storage ensures your coconut fudge maintains its creamy texture and tropical flavor for weeks. We recommend using airtight containers to prevent the fudge from drying out or absorbing unwanted odors from your refrigerator or pantry.
Room Temperature Storage
Store your coconut fudge at room temperature for up to two weeks when kept in an airtight container. This method works best in cool, dry environments where temperatures remain consistent. Layer pieces between wax paper or parchment paper to prevent sticking and maintain the fudge’s smooth surface.
Refrigerator Storage
For longer freshness, we suggest refrigerating coconut fudge in an airtight container for up to one week. Place wax paper between layers to create barriers that prevent moisture absorption and preserve the fudge’s distinctive texture. Cold storage helps maintain the firmness while keeping the coconut flavors vibrant.
Freezer Storage
Extend your coconut fudge’s shelf life by freezing it for up to two months. Wrap individual pieces in wax paper before placing them in airtight containers or freezer bags. This layering technique prevents freezer burn and makes it easy to remove single servings without thawing the entire batch.
| Storage Method | Duration | Container Type |
|---|---|---|
| Room Temperature | Up to 2 weeks | Airtight container |
| Refrigerator | Up to 1 week | Airtight container with wax paper |
| Freezer | Up to 2 months | Airtight container with wax paper layers |
Storage Best Practices
Always check your stored coconut fudge for signs of spoilage before consuming. Look for odd smells, visible mold, or changes in texture that indicate the fudge has deteriorated. Remove frozen pieces 15 minutes before serving to allow them to soften slightly and return to their optimal creamy consistency.
Cut your fudge into serving sizes before storage to avoid repeatedly handling the entire batch. This approach minimizes exposure to air and moisture while making it convenient to grab individual pieces when cravings strike.
Serving Suggestions

Our coconut fudge delivers maximum impact when presented thoughtfully to complement its rich tropical flavors. We recommend serving individual squares on small dessert plates alongside freshly brewed coffee or tea to create an elegant afternoon treat experience.
As a Standalone Dessert
The creamy texture and concentrated coconut flavor make our fudge perfect for enjoying on its own. We suggest cutting the fudge into bite-sized squares and arranging them on a decorative platter for gatherings or family dessert time.
Beverage Pairings
Coffee enthusiasts will appreciate how the tropical sweetness balances bold espresso flavors. We find that black tea and chai also complement the coconut notes beautifully. For non-caffeinated options, cold milk or coconut water enhance the overall coconut experience.
Event and Party Service
Bake sales and parties benefit from our coconut fudge’s impressive presentation and crowd-pleasing appeal. We recommend keeping the fudge chilled until serving time to prevent melting and maintain the ideal firm texture. Small paper cups or cupcake liners make individual portions easy to distribute at events.
Temperature Considerations
Room temperature serving allows the flavors to fully develop while maintaining the perfect chewy consistency. We suggest removing refrigerated fudge 15 minutes before serving to achieve optimal texture. During warm weather or outdoor events, keeping the fudge on ice prevents unwanted softening.
Portion Control
Each square provides intense flavor satisfaction, so smaller portions work well for most occasions. We typically cut our 8×8 inch batch into 16 generous squares or 25 smaller bite-sized pieces depending on the serving context.
Recipe Variations

We can transform our basic coconut fudge recipe into exciting new flavors by incorporating different ingredients and techniques. These variations maintain the same creamy base while adding distinct tropical twists that appeal to various taste preferences.
Chocolate Coconut Fudge
We create this decadent variation by melting 1 cup of white chocolate chips directly into our sweetened condensed milk mixture during the initial heating phase. The melted chocolate adds richness while maintaining the creamy texture that makes our fudge so appealing. We can also incorporate 2 tablespoons of unsweetened cocoa powder for a deeper chocolate flavor without compromising the fudge’s smooth consistency.
For the finishing touch we sprinkle additional shredded coconut on top before refrigerating. This creates a beautiful contrast between the rich chocolate base and the white coconut flakes. The combination provides both visual appeal and textural interest that elevates this variation beyond ordinary chocolate fudge.
Toasted Coconut Fudge
We enhance our coconut fudge by toasting 1 cup of coconut flakes in a dry skillet over medium heat for 3-4 minutes until golden brown. This toasting process intensifies the tropical flavor and adds a delightful crunch that contrasts beautifully with the smooth fudge base. We fold half of the toasted coconut into our mixture before pouring it into the baking dish.
The remaining toasted coconut serves as our topping creating layers of flavor and texture throughout each bite. We press the toasted flakes gently into the surface before refrigerating to ensure they adhere properly. This variation offers a more complex coconut experience with nutty undertones that develop during the toasting process.
Tropical Coconut Fudge
We transform our basic recipe into a tropical paradise by incorporating 1/4 cup of finely diced dried pineapple and 1 teaspoon of coconut extract along with our regular vanilla extract. The dried pineapple adds bursts of sweet tartness while the extra coconut extract intensifies the tropical flavor profile. We can enhance the visual appeal by adding 2-3 drops of yellow food coloring to create a sunny tropical appearance.
For an even more exotic twist we blend coconut cream with our sweetened condensed milk in equal parts creating an ultra creamy texture. We finish this variation by sprinkling toasted coconut flakes mixed with finely chopped macadamia nuts on top before setting. The combination of pineapple coconut and nuts creates a complex flavor reminiscent of tropical beaches and island getaways.
Troubleshooting Common Issues

Even experienced bakers encounter challenges when making coconut fudge. We’ve identified the most common problems and their answers to help you achieve perfect results every time.
Preventing Graininess and Hardness
Temperature control remains the most critical factor in achieving smooth coconut fudge. Overheating creates grainy textures that can ruin your batch. We recommend using a candy thermometer to monitor the mixture closely and ensure it reaches exactly 240°F.
When graininess occurs, reheating the mixture to the correct temperature often restores the smooth consistency. Coconut fudge shows particular sensitivity to temperature fluctuations due to coconut oil’s unique properties.
Solving Oil Separation Issues
Coconut oil separation creates oily or grainy textures that affect both appearance and taste. We monitor the cooking temperature continuously to prevent this common problem from developing.
Adding soy lecithin as a stabilizer helps maintain proper emulsion when separation occurs. This ingredient works effectively to bind the oils and create the creamy texture we desire in quality coconut fudge.
Fixing Texture Problems
| Issue | Temperature Range | Cooking Time Adjustment |
|---|---|---|
| Too Soft | Below 235°F | Cook 2-3 minutes longer |
| Perfect Consistency | 235°F to 240°F | Standard cooking time |
| Too Hard | Above 240°F | Add water and reheat |
Insufficient cooking time produces fudge that never properly sets. We cook our mixture until it reaches the soft-ball stage between 235°F and 240°F for optimal results.
Excessive cooking creates overly hard fudge that becomes difficult to cut. When this happens, we reheat the mixture with a small amount of water to restore the proper consistency.
Essential Temperature Management
Reliable candy thermometers prevent the overheating that causes most coconut fudge failures. We never rely on visual cues alone when working with temperature-sensitive coconut ingredients.
Slow cooling prevents sudden crystallization that creates unwanted texture changes. We allow our fudge to cool gradually at room temperature before refrigerating.
Additional Adjustments
Corn syrup helps adjust sweetness levels while improving texture consistency. We add vanilla extract or other flavorings after removing the mixture from heat to preserve their potency.
When reheating failed batches, we use low heat and constant stirring to prevent further damage to the mixture’s structure.
Conclusion
We’ve shown you that creating delicious coconut fudge at home doesn’t require professional skills or expensive equipment. This versatile treat offers endless possibilities for customization while delivering that perfect balance of creamy texture and tropical flavor.
Whether you’re preparing for a special occasion or simply craving something sweet our coconut fudge recipe delivers consistent results every time. The simple ingredients and straightforward process make it accessible for bakers of all skill levels.
With proper storage techniques and creative variations at your disposal you’ll have a go-to dessert that’s sure to impress family and friends. Give this recipe a try and discover why homemade coconut fudge has become such a beloved treat in kitchens everywhere.
Frequently Asked Questions
How long does it take to make coconut fudge?
Coconut fudge can be prepared in under 30 minutes of active cooking time. However, you’ll need to factor in at least 2 hours of refrigeration time for the fudge to set properly. For best results, allow the fudge to cool at room temperature for 30 minutes before refrigerating to achieve the perfect texture.
What ingredients do I need for homemade coconut fudge?
The basic ingredients include powdered sugar, coconut oil, coconut cream, shredded coconut, vanilla extract, salt, and a sweetener like honey or maple syrup. Optional mix-ins include mini chocolate chips, chopped nuts, dried pineapple, toasted coconut flakes, or white chocolate chips for customization.
Do I need special equipment to make coconut fudge?
No special equipment is required. You only need basic kitchen tools: a medium saucepan, rubber spatula, 8×8 inch baking dish, parchment paper, and a microwave-safe bowl. No candy thermometer or specialized equipment is necessary, making this recipe accessible for beginners.
How should I store coconut fudge?
Store coconut fudge in an airtight container at room temperature for up to 2 weeks, in the refrigerator for up to 1 week, or in the freezer for up to 2 months. Place parchment paper between layers to prevent sticking and maintain the creamy texture.
Can I make coconut fudge ahead of time?
Yes, coconut fudge is perfect for make-ahead preparation. The flavor actually improves when allowed to rest for at least 24 hours before serving. Cut into squares and wrap individual pieces in wax paper for easy serving and storage.
What are some popular variations of coconut fudge?
Popular variations include Chocolate Coconut Fudge (with melted white chocolate and cocoa powder), Toasted Coconut Fudge (with toasted coconut flakes), and Tropical Coconut Fudge (with dried pineapple and coconut extract). Each maintains the creamy base while offering unique flavor profiles.
How do I fix grainy or hard coconut fudge?
Graininess and hardness typically result from temperature issues. Use medium heat and stir continuously while cooking. If oil separation occurs, add a small amount of soy lecithin as a stabilizer. Monitor temperature closely and avoid overcooking to maintain the proper creamy texture.


