

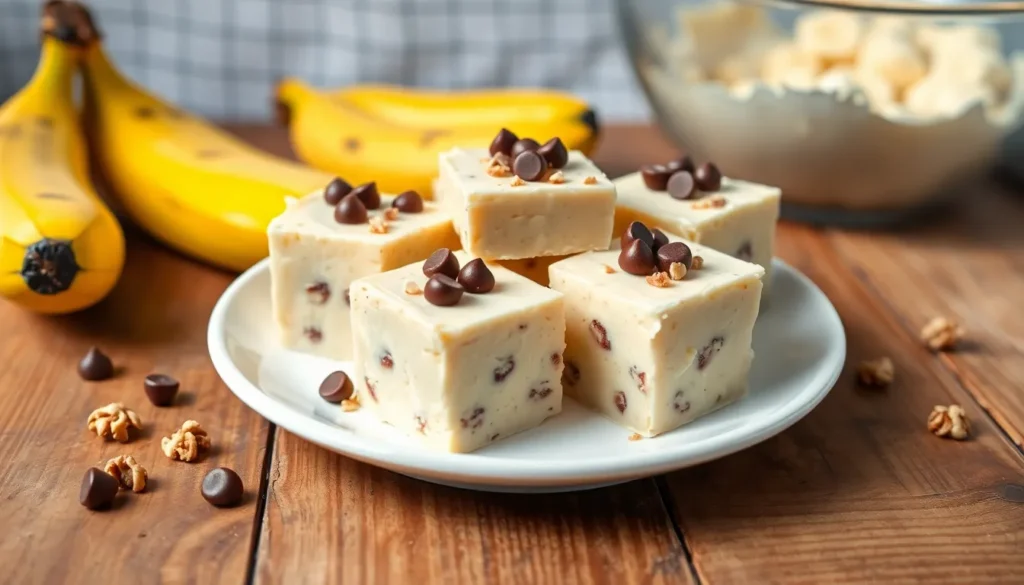
Creamy banana fudge transforms ordinary ripe bananas into an extraordinary dessert that’ll make your taste buds dance with joy. This no-bake treat combines the natural sweetness of bananas with rich, velvety fudge that melts perfectly in your mouth. We’ve discovered that using overripe bananas actually creates the most intense flavor – so don’t throw away those spotted beauties!
What makes our banana fudge recipe absolutely irresistible is its incredible simplicity. You’ll need just a handful of pantry staples and about 15 minutes of active prep time. The result? Silky smooth squares of pure indulgence that taste like they came from an upscale candy shop.
Whether you’re craving a quick dessert fix or planning to impress guests at your next gathering, this banana fudge delivers every time. We guarantee it’ll become your go-to recipe when you want something sweet that’s both easy to make and absolutely delicious.
Ingredients
We’ve carefully selected simple pantry staples that create the perfect banana fudge texture and flavor. These ingredients work together to transform your overripe bananas into a luxurious dessert that sets beautifully without any baking required.
For the Banana Fudge Base
- 3 large overripe bananas (about 1 cup mashed)
- 3 cups powdered sugar
- 1/2 cup unsalted butter (softened)
- 1/4 cup creamy peanut butter
- 1 teaspoon vanilla extract
- 1/4 teaspoon salt
- 2 tablespoons heavy cream
For the Topping (Optional)
- 1/4 cup mini chocolate chips
- 2 tablespoons chopped walnuts
- 1 tablespoon shredded coconut
- 1/4 teaspoon cinnamon powder


Equipment Needed

Creating our creamy banana fudge requires basic kitchen tools that most home cooks already have on hand. We recommend gathering all equipment before starting to ensure a smooth preparation process.
Essential Equipment:
- 8×8 inch baking pan – A square pan provides the perfect size for our fudge to set properly
- Parchment paper – Lines the pan for easy removal and prevents sticking
- Large mixing bowl – Accommodates all ingredients with room for thorough mixing
- Electric hand mixer or stand mixer – Creates the smooth, creamy texture we want
- Measuring cups and spoons – Ensures accurate ingredient proportions
- Rubber spatula – Scrapes bowl sides and spreads fudge evenly
- Fork or potato masher – Mashes bananas to the right consistency
Optional but Helpful Equipment:
- Kitchen scale – Provides precise measurements for consistent results
- Offset spatula – Smooths the fudge surface perfectly
- Sharp knife – Cuts clean squares once set
- Cutting board – Protects countertops during cutting
We find that having everything ready makes the process faster and more enjoyable. The electric mixer is particularly important since it transforms our ingredients into that signature smooth texture. Most home kitchens already contain these basic tools, making this recipe accessible to everyone without requiring special equipment purchases.


Instructions

Follow these straightforward steps to create our decadent banana fudge from start to finish. Each stage builds upon the previous one to achieve that perfect creamy texture and rich banana flavor.
Prep the Pan and Ingredients
Line your 8×8 inch baking pan with parchment paper, leaving some overhang for easy removal later. Grease the parchment lightly with butter to prevent sticking. Set all your ingredients on the counter at room temperature, ensuring the butter has softened completely for smooth mixing. This preparation step saves time and prevents the mixture from seizing during the cooking process.
Make the Banana Puree
Peel your overripe bananas and place them in the large mixing bowl. Mash them thoroughly with a fork or potato masher until completely smooth with no lumps remaining. The puree should be creamy and uniform in texture. Alternatively, blend the bananas in a food processor for an ultra smooth consistency that will create the silkiest fudge base.
Prepare the Fudge Mixture
Add the softened butter to your banana puree and mix with the electric mixer on medium speed until well combined. Gradually incorporate the powdered sugar one cup at a time, mixing thoroughly after each addition. Beat in the peanut butter, vanilla extract, and salt until the mixture becomes light and fluffy. Stream in the heavy cream while mixing to achieve the perfect consistency for our fudge base.
Cook the Fudge
Transfer the mixture to a heavy bottomed saucepan and cook over medium low heat, stirring constantly with a rubber spatula. The mixture will bubble gently as it heats through and thickens slightly. Continue stirring for 3 to 4 minutes until the fudge pulls away from the sides of the pan and coats the spatula. Remove from heat immediately to prevent overcooking.
Set and Cool
Pour the hot fudge mixture into your prepared pan, spreading it evenly with an offset spatula or the back of a spoon. Sprinkle any desired toppings like mini chocolate chips or chopped nuts over the surface while the fudge is still warm. Refrigerate for at least 3 hours or until completely set and firm to the touch. Lift the fudge from the pan using the parchment overhang and cut into 16 equal squares with a sharp knife.


Directions for Cutting and Serving

Our freshly made banana fudge needs proper setting time before we can achieve clean, professional cuts. We should allow the fudge to remain undisturbed in its pan for several hours or ideally overnight at room temperature. This setting period ensures the texture firms up completely and prevents the fudge from sticking to our knife during cutting.
Preparing for Perfect Cuts
We recommend chilling the set fudge in the refrigerator for approximately 30 minutes before cutting. This additional cooling step creates a firmer texture that allows for cleaner, more precise cuts without the fudge crumbling or sticking to our blade.
Once adequately chilled, we carefully invert the fudge onto our cutting board by lifting the parchment paper edges. A sharp kitchen knife works best for cutting through the dense texture. We should wipe the blade clean between cuts to maintain neat edges and prevent banana residue from building up.
Cutting Techniques
We cut the fudge into uniform squares using steady, downward pressure rather than sawing motions. Standard serving sizes measure approximately 1 to 1.5 inches square, though we can adjust dimensions based on preference. For special occasions, we might cut rectangular bars or use cookie cutters for decorative shapes.
Storage and Serving Options
Our banana fudge maintains optimal freshness when stored at room temperature in an airtight container for up to one week. Refrigerated storage extends the shelf life while preserving the fudge’s creamy consistency. For longer storage, we can freeze individual squares wrapped in parchment paper for up to three months.
When serving, we enhance the presentation by arranging pieces on a decorative platter. Fresh fruit slices, chopped nuts, or a dollop of whipped cream complement the rich banana flavor beautifully. The fudge pairs exceptionally well with coffee or milk, making it perfect for afternoon treats or dessert courses.


Storage Tips

Proper storage ensures our banana fudge maintains its creamy texture and rich flavor for maximum enjoyment. We can keep this delicious treat fresh using several storage methods depending on how long we plan to store it.
Room Temperature Storage
We can store our banana fudge at room temperature for immediate consumption. Place the fudge pieces in an airtight container and keep them in a cool dry place away from direct sunlight. This method keeps the fudge fresh for 3 to 4 days while maintaining its perfect texture.
| Storage Method | Duration | Temperature |
|---|---|---|
| Room Temperature | 3-4 days | Cool, dry place |
| Refrigerator | 6-7 days | Standard fridge temp |
| Extended Refrigeration | Up to 4 weeks | Properly sealed |
| Freezer | 1-2 months | Standard freezer temp |
Refrigerator Storage
Refrigeration extends our fudge’s freshness significantly. We recommend storing the fudge in an airtight container in the refrigerator where it stays fresh for 6 to 7 days. For longer refrigerator storage we can keep properly sealed banana fudge fresh for up to 4 weeks.
Freezer Storage
Long term storage requires freezing our banana fudge. We wrap individual pieces or whole blocks in plastic wrap followed by aluminum foil before placing them in freezer safe bags or containers. Freezing whole blocks prevents the fudge from drying out during storage. Our frozen banana fudge maintains quality for 1 to 2 months.
Essential Storage Guidelines
Direct sunlight exposure makes fudge mushy and sweaty so we always store it in shaded areas. Airtight containers prevent the fudge from drying out and absorbing unwanted flavors from surrounding foods. When stacking fudge pieces we place waxed paper between each layer to prevent sticking and maintain clean separation.
Make-Ahead Instructions

We love preparing banana fudge ahead of time because it keeps for weeks when stored properly and makes entertaining so much easier. Our recipe allows you to create this delicious treat well in advance without compromising flavor or texture.
Preparing for Storage
Line your baking dish with parchment paper before beginning the recipe. This simple step ensures easy removal once the fudge has set completely. We recommend allowing the fudge to rest at room temperature for at least four hours after cooking before transferring it to storage containers.
Storage Timeline
| Storage Method | Duration | Temperature |
|---|---|---|
| Room Temperature | 3-4 days | Store in airtight container |
| Refrigerated | Up to 4 weeks | Keep sealed and chilled |
| Frozen | 1-2 months | Wrap properly before freezing |
Setting and Chilling Process
Allow the banana fudge mixture to reach room temperature before placing it in the refrigerator. We find that rushing this step can cause condensation issues that affect the final texture. Once cooled, refrigerate the fudge for at least four hours until completely firm before cutting into squares.
Batch Preparation Tips
Make large batches by doubling or tripling our recipe since the process remains the same. Store different flavor variations separately to maintain distinct tastes. We suggest preparing banana fudge up to three weeks before special occasions or gatherings.
Handling and Reheating
If your fudge becomes too firm during storage, allow it to come to room temperature naturally rather than using heat. Should separation occur during the make ahead process, gently remix the ingredients before final chilling. These minimal handling techniques help preserve the smooth, creamy consistency that makes our banana fudge so irresistible.
Variations and Flavor Add-Ins

Transform our basic banana fudge recipe into exciting new flavors by incorporating different ingredients that complement the natural sweetness of bananas. These variations allow us to customize the fudge to match any preference or occasion.
Chocolate Banana Fudge
We create this decadent variation by adding rich chocolate elements that enhance both flavor and texture. Dark chocolate works particularly well as it balances the banana’s sweetness while adding depth to each bite. Melt 4 ounces of dark chocolate and fold it into our fudge mixture during the final cooking stage for a marbled effect.
Alternatively we can incorporate 1/2 cup of mini chocolate chips directly into the mixture before pouring it into the pan. For an extra indulgent touch we drizzle melted chocolate over the surface once the fudge has cooled slightly. The combination creates a sophisticated treat that rivals any upscale confection.
Nutty Banana Fudge
Nut butter additions transform our banana fudge into a protein-rich dessert with enhanced creaminess. We can substitute or supplement our peanut butter base with almond butter or cashew butter for different flavor profiles. Each nut butter brings its own unique characteristics to the final product.
Chopped nuts add textural contrast that elevates the eating experience. We fold in 1/2 cup of chopped walnuts pecans or almonds during the final mixing stage. Toasted nuts provide even more intense flavor so we recommend lightly toasting them in a dry skillet for 2-3 minutes before adding them to our mixture.
Tropical Banana Fudge
We transport our fudge to warmer climates by incorporating coconut and tropical flavors. Substitute 2 tablespoons of coconut oil for part of our butter to add subtle coconut notes throughout the fudge. Shredded coconut mixed into the base provides both flavor and interesting texture.
Dried pineapple pieces create bursts of tropical sweetness when folded into our mixture. We use 1/3 cup of finely chopped dried pineapple for optimal distribution. A drizzle of honey instead of vanilla extract enhances the tropical profile while maintaining our fudge’s smooth consistency. These additions create a vacation-worthy treat that brightens any dessert table.


Troubleshooting Common Issues

Even the most experienced cooks encounter challenges when making banana fudge. We’ve compiled answers to the most common problems to help you achieve perfect results every time.
Fudge Not Setting Properly
The most frequent issue occurs when our fudge remains too soft or refuses to firm up completely. Temperature control plays a crucial role in achieving the proper consistency. We need to ensure the mixture reaches the correct temperature during cooking and maintains steady medium-low heat throughout the process. Insufficient cooking time often prevents the fudge from developing the right texture. Allow the mixture to thicken properly before removing it from heat.
Ingredient ratios significantly impact setting success. Too much liquid from overripe bananas can create excess moisture that prevents proper firming. We recommend draining any excess liquid from mashed bananas before incorporating them into the mixture. Adding an extra tablespoon of powdered sugar can help absorb excess moisture when needed.
Grainy or Lumpy Texture Issues
Texture problems typically stem from improper mixing techniques or ingredient temperature differences. We must ensure all ingredients reach room temperature before combining them. Cold butter or cream creates lumps that resist smooth blending.
Overmixing the fudge can introduce air bubbles and create an undesirable grainy texture. We recommend mixing just until ingredients combine smoothly. Using a rubber spatula for gentle folding motions produces better results than aggressive stirring.
Undissolved powdered sugar creates grittiness in the final product. We suggest sifting the powdered sugar before adding it to eliminate any clumps. Gradually incorporating the sugar while mixing helps achieve complete dissolution.
Preventing Common Mistakes
| Issue | Cause | Solution |
|---|---|---|
| Fudge too soft | Insufficient cooking time | Cook mixture 2-3 minutes longer |
| Grainy texture | Cold ingredients | Bring all ingredients to room temperature |
| Won’t set | Excess moisture | Drain banana liquid before mixing |
| Cracking surface | Rapid temperature change | Cool gradually at room temperature |
Cracking often occurs when we move the fudge from hot to cold environments too quickly. Allow the mixture to cool slightly before refrigerating. Covering the pan with plastic wrap during cooling prevents surface drying that leads to cracks.
Separation issues arise when fat separates from other ingredients during cooling. This happens most often when we use ingredients at different temperatures or cook the mixture too rapidly. Maintaining consistent medium-low heat and ensuring ingredient temperature uniformity prevents separation problems.
We can salvage separated fudge by gently reheating it and whisking until smooth again. Adding a tablespoon of warm cream often helps re-emulsify the mixture successfully.


Conclusion
We’ve shown you how simple it can be to transform overripe bananas into a luxurious dessert that’ll impress anyone who tries it. This no-bake banana fudge proves that you don’t need complicated techniques or expensive ingredients to create something truly special.
The beauty of this recipe lies in its flexibility and foolproof nature. Whether you’re making it for a last-minute gathering or preparing batches ahead of time the results are consistently delicious.
With our storage tips troubleshooting guidance and creative variations you’re equipped to make this treat your own. We’re confident that once you try this creamy banana fudge it’ll become a regular feature in your dessert rotation.
Frequently Asked Questions
What makes overripe bananas the best choice for banana fudge?
Overripe bananas are ideal for banana fudge because they contain higher sugar content and natural sweetness. The brown spots indicate peak ripeness, which creates a more intense banana flavor and smoother texture. These bananas also mash more easily, resulting in a creamier fudge consistency that rivals professional candy shop quality.
How long does it take to make no-bake banana fudge?
No-bake banana fudge requires approximately 15 minutes of active preparation time. However, the fudge needs to set for at least 4 hours at room temperature, or ideally overnight. For firmer cutting, chill in the refrigerator for 30 minutes before slicing into squares.
Can I make banana fudge without peanut butter?
Yes, you can substitute peanut butter with other nut butters like almond butter, cashew butter, or sunflower seed butter for allergies. You can also omit it entirely and add an extra 2 tablespoons of softened butter. The texture may be slightly different, but the fudge will still be delicious.
How should I store banana fudge to maintain freshness?
Store banana fudge in an airtight container at room temperature for 3-4 days, or refrigerate for up to 4 weeks. For longer storage, wrap pieces in plastic wrap and aluminum foil, then freeze for 1-2 months. Always use waxed paper between layers to prevent sticking.
Why is my banana fudge not setting properly?
Fudge may not set due to insufficient cooking time, excess moisture from bananas, or incorrect ingredient ratios. Ensure you cook the mixture over medium-low heat until it thickens properly. Drain any excess liquid from mashed bananas and use room temperature ingredients for best results.
What optional toppings work best with banana fudge?
Popular toppings include mini chocolate chips, chopped walnuts, shredded coconut, and cinnamon powder. These add texture and complementary flavors. Press toppings gently into the surface before the fudge sets completely to ensure they adhere properly without sinking.
Can I double or triple the banana fudge recipe?
Yes, you can easily scale the recipe for larger batches. Use proportionally larger pans or multiple 8×8 inch pans. Keep cooking time consistent but monitor the mixture closely. Store different flavor variations separately in labeled containers to maintain distinct tastes.
How do I achieve clean, professional-looking cuts?
Use a sharp knife and wipe the blade clean between each cut. Chill the fudge for 30 minutes before cutting for firmer texture. Remove from the pan using parchment paper, place on a cutting board, and cut with steady, downward motions for neat, uniform squares.


