There’s something magical about transforming simple lemons into liquid sunshine that captures the essence of Italy’s Amalfi Coast. Homemade limoncello brings authentic Italian tradition right to your kitchen while saving you money compared to store-bought versions.
This beloved Italian liqueur isn’t just a drink – it’s a celebration in a bottle. We’ll show you how to create this golden elixir using just four ingredients and a little patience. The process is surprisingly simple yet yields results that rival the finest Italian bottles.
What makes homemade limoncello special is the control you have over every element. You’ll choose the perfect lemons and adjust the sweetness to your taste. The slow infusion process creates smooth complex flavors that commercial versions simply can’t match. Plus there’s incredible satisfaction in serving guests something you’ve crafted with your own hands.
Ready to bring a taste of Italy home? Let’s jump into this time-honored recipe that’ll have you saying “salute” with every sip.
Ingredients
Creating homemade limoncello requires just four simple ingredients that work together to produce this beloved Italian liqueur. We focus on quality over quantity to ensure our limoncello captures the authentic taste of the Amalfi Coast.
For the Lemon Infusion:
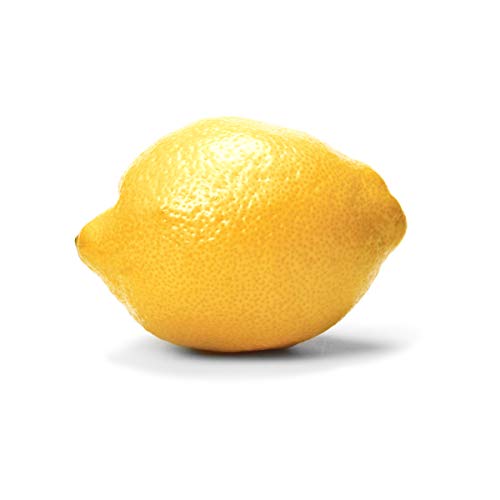
- 10-12 large organic lemons (preferably Meyer or Sorrento lemons)
- 750ml high-proof vodka (100 proof or 50% alcohol by volume)
For the Simple Syrup:
- 2 cups granulated sugar
- 2 cups filtered water
We recommend selecting organic lemons to avoid pesticide residue on the peels since we use only the zest in our recipe. The lemon variety makes a important difference in flavor profile. Meyer lemons provide a sweeter more floral taste while traditional Eureka lemons offer the classic tart limoncello flavor.
High-proof vodka serves as our neutral base spirit. We choose vodka with at least 100 proof to properly extract the essential oils from the lemon peels. Lower proof spirits will not extract the oils effectively and may result in a weaker flavored limoncello.
Filtered water eliminates any chlorine or mineral taste that could interfere with the delicate lemon flavors. We use granulated sugar rather than superfine sugar because it dissolves completely when heated and creates the perfect sweetness balance for our limoncello.
Quality ingredients form the foundation of exceptional homemade limoncello. We ensure each component meets our standards before beginning the infusion process.

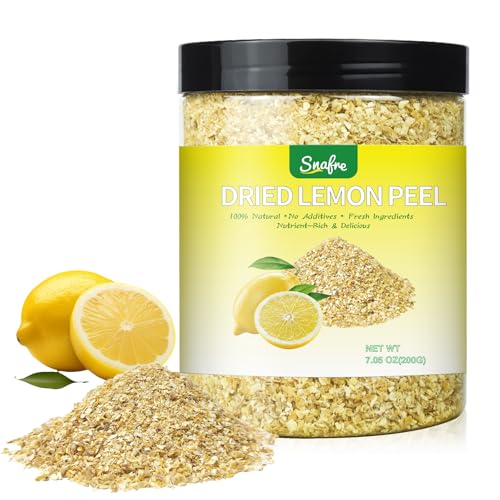
LEMON PEEL - great lemony flavor with fresh granulated lemon peel.

PREMIUM QUALITY GRANULATED LEMON PEEL: Spices Village has dried, granulated sparkling lemon peel. It is also known as lemon rind or citrus fruit zest alongside grapefruits, limes or orange, and is used for cooking, baking and tea. Organically used in desserts, beverages, herbal teas, sauces, seasoning blends, dressings chicken and meat dishes.

Naturally Bright Lemon Zest: Enhance your baking, tea, or spice blends with our dried lemon zest, crafted from real lemon peel. Add a bright citrus flavor that elevates every recipe
Equipment Needed

Creating our homemade limoncello requires exact equipment to ensure the steeping process extracts maximum flavor from those precious lemon peels. We’ll need several essential tools to transform our quality ingredients into liquid sunshine.
Mason jars or large containers serve as our primary vessels for the initial steeping process. These containers must be large enough to hold our lemon peels and alcohol while allowing room for gentle swirling during the infusion period. Glass containers work best since they won’t absorb flavors or odors that could compromise our limoncello’s purity.
A vegetable peeler becomes our precision tool for removing lemon zest without the bitter white pith. Sharp peelers create thin strips that release oils more effectively than thick chunks. We recommend using a high-quality peeler that glides smoothly across the lemon’s surface.
Grolsch bottles provide the perfect final storage solution for our finished limoncello. These swing-top bottles create an airtight seal that preserves flavor and prevents evaporation. The classic design also adds an authentic touch to our homemade creation.
Strainer or cheesecloth filters out lemon peel particles and any sediment from our mixture. Fine-mesh strainers work well for larger particles while cheesecloth catches the smallest bits. We often use both for crystal-clear results.
A funnel simplifies the bottling process and prevents spills when transferring our precious limoncello. Wide-mouth funnels accommodate the thick consistency better than narrow versions. Stainless steel or glass funnels won’t retain flavors between uses.
Each piece of equipment plays a crucial role in achieving professional results from our home kitchen. Quality tools make the difference between good limoncello and exceptional limoncello that rivals any Italian import.

Proof & tralle hydrometer/alcoholmeter - proof scale 0-200, tralle scale 0-100

NON ALCOHOLIC VODKA: Inspired by the rugged beauty of Nordic landscapes, award-winning made-to-mix USKO Citrus boasts the aroma and flavor of high-quality single grain vodka – without the liquor. Trust your instincts.
Instructions

Creating homemade limoncello requires patience and precision to extract the essential oils properly from the lemon zest. We’ll guide you through each step to ensure your limoncello achieves that authentic Italian taste.
Selected and stored fresh


Intensely Brewed Meyer Lemon Syrup: Craft sparkling lemon treats, warm herbal teas, lemon drop cocktails, and more with our intensely brewed Meyer Lemon Syrup. Capturing the peak seasonal flavors of fresh Meyer Lemons and Lemon Pureé, it's a flavor powerhouse that will leave your guests lost for words.
Prep the Lemons
We begin by washing 8–10 large organic lemons thoroughly under running water and drying them completely with a clean towel. Using a vegetable peeler, we carefully strip off only the bright yellow zest while avoiding the bitter white pith beneath the surface. The key to exceptional limoncello lies in collecting only the outermost layer of the peel where the essential oils concentrate. We place these fresh lemon peels directly into a clean, lidded jar for the next step.
Create the Alcohol Infusion
We transfer the lemon peels to a 2-quart lidded glass jar and pour 1 liter of food-grade alcohol over them. High-proof options like Everclear or premium vodka work best for extracting maximum flavor from the citrus oils. The peels must be completely submerged in the alcohol to prevent oxidation and ensure even extraction. We seal the jar tightly and allow it to steep at room temperature for 3–4 days, letting the alcohol draw out those precious lemon essences.
Make the Simple Syrup
In a separate saucepan, we combine 4 cups of water with 3 cups of superfine sugar for our simple syrup base. We bring the water to a brief boil before removing it from heat and stirring in the sugar until it dissolves completely. Once the mixture cools to room temperature, we have our perfectly balanced syrup ready for blending. Alternatively, we can combine the water and superfine sugar directly in a 3-quart jar and shake vigorously until the sugar integrates fully.
Combine and Blend
We strain the infused alcohol through a fine mesh strainer to remove all lemon peels, pouring the golden liquid directly into our cooled simple syrup. Using a clean spoon, we stir the mixture thoroughly to achieve complete homogenization of flavors. For the smoothest final product, we can strain the limoncello once more through cheesecloth-lined funnel before bottling. The finished limoncello gets poured into sterilized bottles and stored in a cool, dark place or freezer for up to 3 months.
Directions for Aging

Aging transforms our limoncello from a simple infusion into a smooth and refined Italian liqueur. We divide the aging process into two distinct phases that allow flavors to develop and meld together perfectly.

ELIMINATE MESS: This simple and sleek porcelain grease jar is a clean and efficient way to store grease that's both easy to look at and easily accessible for when you need it to cook!

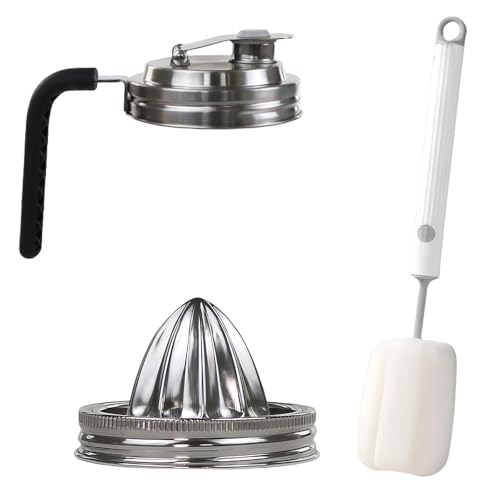
EASY TO USE: This stainless steel lemon juicer lid turns the jar into your favorite, can be used in spherical canning jars, turns your mason jar into a new handy hand juicer, just crush fruit on it, Strainer filters out pulp and seeds, leaving fresh juice in a container, perfect for drinking or storage

This Stainless Steel Lemon Juicing Lid turns your Mason jar into a new convenient hand juicer, simply crush the fruit on top and the filter strains out the pulp and seeds, leaving the container with fresh juice, perfect for drinking or storing
First Infusion Phase
We begin the first infusion by storing our sealed jar in a cool dark location for 40 days. During this extended period the alcohol extracts maximum flavor from the lemon peels while developing depth and complexity. Room temperature storage works best as excessive heat can create bitter notes while cold temperatures slow the extraction process.
Daily agitation helps accelerate flavor development during the first week. We gently shake the jar once per day to encourage the alcohol to penetrate deeper into the lemon oils. After the initial week we can leave the mixture undisturbed for the remaining infusion period.
Second Aging Phase
Following the initial 40-day period we strain out the lemon peels and combine our infused alcohol with the cooled simple syrup. This mixture requires an additional 40 days of aging to achieve proper integration between the alcohol and sugar components.
We store the blended limoncello in the same cool dark environment during the second phase. The extended aging allows harsh alcohol notes to mellow while the sugar balances the intense citrus flavors. Temperature consistency remains crucial throughout this phase to prevent crystallization or separation.
Monitoring Development
Visual changes indicate proper aging progression throughout both phases. Initially our infusion appears pale yellow but gradually deepens to a rich golden color. The liquid develops clarity as sediment settles and flavors stabilize.
Taste testing after each phase helps us track flavor development. We sample small amounts to assess balance between sweetness alcohol strength and citrus intensity. Properly aged limoncello should taste smooth without harsh alcohol burn or overpowering sweetness.
Storage Timeline
| Aging Phase | Duration | Storage Method | Temperature |
|---|---|---|---|
| First Infusion | 40 days | Cool dark place | 60-70°F |
| Second Aging | 40 days | Cool dark place | 60-70°F |
| Final Storage | Up to 3 months | Freezer | 0°F |
Our patience during the 80-day aging process creates limoncello with exceptional smoothness and authentic Italian character. Rushing either phase compromises the final product quality and prevents proper flavor integration.
Straining and Filtering

After our limoncello has completed its aging process we need to transform the cloudy infused liquid into crystal-clear perfection. The straining and filtering stage determines the final appearance and smoothness of our homemade Italian liqueur.
We begin by removing the lemon peels from our infused alcohol mixture. Careful extraction prevents the peels from breaking into smaller pieces which would complicate our filtering process later. Our goal is to eliminate every solid particle while preserving the essential oils that give limoncello its distinctive flavor.
Coffee filters become our primary tool for achieving professional clarity. We place #4 coffee filters into a large funnel and slowly pour our limoncello through this setup. The liquid passes through gradually as the filters capture remaining solids and clarify the mixture. Patience proves essential during this step since rushing can cause filters to tear or overflow.
| Filtering Challenge | Solution |
|---|---|
| Clogged filters | Replace filters frequently during large batches |
| Slow filtering process | Use multiple filter setups simultaneously |
| Residual cloudiness | Repeat filtering process over several days |
Filter replacement becomes necessary as the coffee filters clog during the process. We recommend having extra #4 filters on hand especially when processing larger quantities. Each filter can only handle a certain volume before becoming saturated with particles.
Fine mesh sieves lined with coffee filters provide an additional filtering stage for those seeking exceptional clarity. We strain our limoncello again through this setup to remove any microscopic particles that escaped the initial filtering. This double filtering technique ensures restaurant quality results.
Multiple filtering sessions over several days can further improve our limoncello’s appearance. We filter the liquid once then allow it to settle for 24 hours before repeating the process. This approach allows gravity to help separate any remaining particles while continuously improving clarity.
Large clean glass containers help manage the filtering process more efficiently. We use these vessels to collect our filtered limoncello and provide workspace for multiple filtering stages. The transparent glass allows us to monitor our progress and identify when additional filtering might be beneficial.
Our filtered limoncello should appear bright and clear with no visible particles floating in the liquid. The transformation from cloudy infusion to crystal clear liqueur marks the successful completion of our straining and filtering process.

Real Ingredients - We make our cocktail simple syrup with non-gmo ingredients you can actually pronounce. We use natural cane sugar and filtered water to make a vegan cocktail syrup we're proud of

COCKTAIL SIMPLE SYRUP FOR DRINKS - Collins Simple Syrup for cocktails is an American classic and bar staple. Bring professional-quality drinks to your home bar and impress guests with your mixology skills. Playing bartender’s never been so easy!

🍋 Intensely Brewed Meyer Lemon Syrup: Craft sparkling lemon treats, warm herbal teas, lemon drop cocktails, and more with our intensely brewed Meyer Lemon Syrup. Capturing the peak seasonal flavors of fresh Meyer Lemons and Lemon Pureé, it's a flavor powerhouse that will leave your guests lost for words.
Bottling Your Homemade Limoncello

After weeks of patient aging and careful filtering, we reach the final stage of our limoncello journey. The bright yellow liquid we’ve crafted now needs proper bottling to preserve its quality and prepare it for serving.
Premium Dried Lemon Peel – Made from carefully selected ripe lemons and gently dried to preserve their natural lemon flavor and fresh citrus aroma. Ideal for a wide range of everyday cooking and baking applications.

Organic And Pure: Frontier Co-op lemon peel granules are made from pure lemon zest derived from high-quality organic lemons and are free from additives, ensuring a pure citrus taste you can trust.
100% Pure & Natural Lemon Peel Powder – Made from finely ground dried lemon peel, preserving its natural aroma and citrusy flavor.
Selecting the Right Bottles
Glass bottles work best for storing limoncello since they won’t absorb flavors or odors. We recommend using swing-top bottles like Grolsch bottles for their airtight seal and attractive presentation. Small 250ml to 500ml bottles make perfect gifts and allow us to portion our batch appropriately.
Clean bottles thoroughly with hot soapy water before use. Rinse them with a small amount of vodka to sanitize and remove any soap residue that might affect the taste.
The Bottling Process
Use a funnel to divide the limoncello among glass bottles without spills or waste. Pour slowly to avoid creating air bubbles that can affect the final product’s appearance. Fill each bottle leaving about an inch of headspace at the top.
Filter the limoncello again during bottling if we notice any remaining particles. A coffee filter placed in the funnel catches any sediment that escaped previous filtering steps.
Final Storage Preparation
Store the bottles in the freezer until serving for the authentic Italian experience. Limoncello tastes best when served ice cold at around 10°F. The high alcohol content prevents freezing while the cold temperature enhances the smooth texture.
Label each bottle with the production date and batch number if we’re making multiple versions. This helps us track aging progress and identify our favorite recipes for future batches.
Our homemade limoncello will maintain peak quality for up to one year when stored properly in the freezer. The careful bottling process ensures every sip delivers the bright lemon flavor we’ve worked so hard to create.
Storage Instructions

Now that we’ve bottled our homemade limoncello we need to store it properly to maintain its bright flavor and quality. Proper storage techniques ensure our carefully crafted liqueur retains its zesty character for months to come.
Unopened Bottles
We should store unopened bottles in a cool dark place away from sunlight and heat sources. A cupboard or pantry works perfectly for this purpose. Temperature fluctuations can affect the delicate balance of flavors we’ve worked so hard to achieve so consistency is key.
Opened Bottles
Once we open a bottle we recommend storing it in the refrigerator or freezer to maintain optimal flavor and prevent degradation. The exposure to air begins the oxidation process which can diminish the bright lemon essence over time.
Refrigeration Storage
We can store tightly sealed bottles in the refrigerator for up to one to two years. The high alcohol and sugar content naturally help preserve our limoncello during this extended period. Refrigeration proves ideal for regular sipping while maintaining the fresh flavor profile we’ve created.
Freezer Storage
Our limoncello can be stored in the freezer without actually freezing due to its high alcohol content. This storage method keeps the liqueur perfectly chilled while maintaining quality for up to one year. Freezing temperatures slow down oxidation allowing our limoncello to retain its zesty flavor much longer than room temperature storage.
Understanding Shelf Life
| Storage Method | Duration | Notes |
|---|---|---|
| Unopened (pantry) | 2 years | Cool dark location required |
| Refrigerated | 1-2 years | Tightly sealed bottles |
| Frozen | 1 year | Slows oxidation process |
Homemade limoncello typically has a shorter shelf life compared to commercial versions which contain additional preservatives. We should generally consume our homemade batch within two years for optimal flavor experience.
Signs of Spoilage
We need to check for signs that indicate our limoncello may be past its prime. Changes in smell taste or color signal potential degradation. If our limoncello smells different from its original bright citrus aroma or tastes flat and muted it may have exceeded its optimal drinking window.
Essential Storage Tips
We must avoid storing limoncello in hot or sunny areas as heat quickly degrades both flavor and aroma. Always keep bottles tightly sealed to prevent contamination and oxidation from affecting our precious homemade creation. These simple precautions ensure every glass delivers the exceptional taste we’ve invested time and care in developing.
Serving Suggestions

Our homemade limoncello deserves to be enjoyed in all its golden glory. We recommend serving this Italian treasure ice cold to fully appreciate its bright citrus flavor and smooth finish.

Selected and stored fresh

[Infusing Flavor] Our own pure cane Simple Syrup is infused with fresh California Meyer Lemon juice and peel, creating an authentic luscious sweet Meyer Lemon flavor like no other to smoothly blend into your citrus recipes.
Traditional Chilled Service
We always serve limoncello straight from the freezer in chilled shot glasses or small liqueur glasses. The traditional Italian approach involves keeping both the bottle and glasses in the freezer until the moment of service. Pour approximately 1-2 ounces per serving to create the perfect digestif experience.
Cocktail Applications
Our limoncello transforms ordinary cocktails into extraordinary Italian-inspired drinks. We love creating a Limoncello Collins by combining 2 ounces of our homemade limoncello with 1 ounce of fresh lemon juice and 4 ounces of sparkling water over ice. The Sparkling Limoncello Spritz offers another delightful option by mixing equal parts limoncello and prosecco with a splash of soda water.
Dessert Enhancement
We find that our limoncello elevates desserts with its concentrated lemon essence. Drizzle it over vanilla gelato or panna cotta for an authentic Italian finish. Our favorite application involves incorporating 2-3 tablespoons into lemon tarts, tiramisu, or pound cakes to infuse them with that distinctive Amalfi Coast flavor.
Seasonal Serving Ideas
During warmer months we create refreshing limoncello slushies by blending our liqueur with ice and fresh lemon juice. Winter evenings call for adding a splash to hot tea or creating warm limoncello toddies with honey and hot water.
| Serving Method | Temperature | Glass Type | Serving Size |
|---|---|---|---|
| Traditional Shot | Freezer Cold | Small liqueur glass | 1-2 oz |
| Cocktail Base | Chilled | Highball glass | 2 oz |
| Dessert Drizzle | Room temperature | N/A | 1-2 tbsp |
| Slushy Blend | Frozen | Rocks glass | 3-4 oz |
We always keep extra bottles chilled for unexpected guests since our homemade limoncello makes an impressive after dinner treat that showcases the care and patience we invested in its creation.
Tips for Best Results

We’ve discovered through countless batches that selecting organic lemons makes all the difference in achieving that authentic Amalfi Coast flavor. Pesticide residues from conventionally grown lemons can create unwanted bitter notes that overshadow the bright citrus essence we’re after. Meyer lemons and Sorrento varieties offer the most concentrated oils in their peels, producing a more vibrant and aromatic final product.
Temperature control throughout the infusion process cannot be overstated in its importance. We recommend maintaining a consistent environment between 65-70°F for optimal oil extraction without developing harsh flavors. Fluctuating temperatures can cause the alcohol to expand and contract, potentially affecting the delicate balance of flavors we’ve worked so hard to achieve.
Quality of your base spirit directly impacts the smoothness of your finished limoncello. High-proof vodka extracts essential oils more effectively than lower-proof alternatives, while neutral grain spirits provide the cleanest flavor profile. We avoid flavored vodkas or spirits with added sugars, as these interfere with the pure lemon essence.
Storage conditions play a crucial role in maintaining peak flavor throughout the aging process. Dark environments prevent UV degradation of the delicate citrus oils, while consistent cool temperatures preserve the bright lemon characteristics. We store our infusion jars in basement pantries or interior closets where temperature remains stable.
Patience during the straining process rewards us with crystal clear limoncello that rivals professional Italian distilleries. Multiple filtration stages using coffee filters may seem tedious, but this extra effort removes microscopic particles that could cause cloudiness over time. We typically filter three times to achieve that pristine clarity.
Proper bottle selection enhances both storage life and presentation quality. Glass containers prevent flavor absorption that plastic bottles can cause, while swing-top mechanisms create airtight seals that preserve freshness. We sterilize all bottles with boiling water before filling to eliminate any bacteria that might compromise our carefully crafted liqueur.
Serving temperature dramatically affects the drinking experience we provide our guests. Freezer storage brings out the smooth, syrupy texture that makes limoncello so distinctive, while room temperature serving can make the alcohol more prominent. We keep dedicated limoncello glasses in the freezer alongside our bottles for the ultimate presentation.

Allows you to transform your jars into your new favorite on-the-go, fruit infusion drinkware! The lid snaps open and closed for a drip-free seal. Cover! Sip! Go!

FITS WIDE MOUTH JARS - This stainless steel citrus lemon sqeezer juicer lid fits wide mouth mason jars or similar size canning jars. Wide mouth mason jars are 3" internal diameter. Fits ball, kerr, bernardin, and many others.
Stainless Steel Lid with Non-Slip Handle: Crafted from 304 stainless steel, this airtight lid features a rubber-coated handle for secure grip. Simply screw it onto wide-mouth Mason jars to store beverages, dry goods, or coffee beans. Dishwasher-safe and rust-resistant
Conclusion
We’ve walked you through every step of creating authentic homemade limoncello that captures the essence of Italy’s Amalfi Coast. From selecting the perfect organic lemons to mastering the art of patient aging this journey rewards you with a premium liqueur that rivals any store-bought version.
The beauty of homemade limoncello lies in its simplicity and the personal touch you bring to each batch. With just four quality ingredients and the right techniques you’ll create something truly special that reflects your dedication to create.
Whether you’re planning to impress dinner guests or simply want to enjoy a taste of Italian tradition at home your homemade limoncello will deliver that bright citrusy perfection every time. The investment in time and attention to detail pays off with every chilled sip you serve.

PREMIUM INGREDIENTS: Made from 100% cane sugar

10.9 OZ CANDIED PRESERVED LEMONS IN A JAR – Keep a jar of premium candied lemon twists on hand so you can craft cocktails with a gorgeous garnish at a moment’s notice. These candied lemon peels are a delicious and easy way to finish cocktails.

Ready-to-Use Liquid Sweetener – Dissolves instantly in hot or cold beverages for smooth, consistent sweetness without stirring granulated sugar.
Frequently Asked Questions
What ingredients do I need to make homemade limoncello?
You need only four simple ingredients: 10-12 large organic lemons (preferably Meyer or Sorrento varieties), 750ml of high-proof vodka, 2 cups of granulated sugar, and 2 cups of filtered water. Using organic lemons is essential to avoid pesticide residue, while high-proof vodka effectively extracts essential oils from the lemon peels for authentic flavor.
How long does it take to make limoncello at home?
The complete limoncello-making process takes approximately 80-84 days. This includes 3-4 days for initial lemon peel infusion in alcohol, followed by an 80-day aging period divided into two phases. While the process requires patience, the active preparation time is minimal, involving simple steps like zesting, mixing, and straining.
What equipment is essential for making limoncello?
Key equipment includes mason jars for steeping, a high-quality vegetable peeler for zesting lemons, Grolsch swing-top bottles for storage, fine mesh strainers or cheesecloth for filtering, and a funnel for easy bottling. Each tool plays a crucial role in maximizing flavor extraction and achieving professional-quality results that rival Italian imports.
How should I store homemade limoncello?
Store unopened bottles in a cool, dark place. Once opened, keep limoncello refrigerated or frozen to prevent oxidation. For optimal serving, store bottles in the freezer as limoncello is best enjoyed ice cold. Properly stored homemade limoncello maintains peak quality for up to one year, with refrigerated versions lasting 1-2 years.
What’s the best way to serve limoncello?
Serve limoncello ice cold in chilled shot glasses or small liqueur glasses for the traditional Italian experience. Keep both the liqueur and glasses in the freezer before serving. Limoncello also works excellently in cocktails like Limoncello Collins or Sparkling Limoncello Spritz, and can enhance desserts like gelato and lemon tarts.
Why is the filtering process important for limoncello?
Filtering is crucial for achieving crystal-clear limoncello by removing lemon peels and solid particles while preserving essential oils. Use coffee filters and fine mesh sieves for multiple filtration stages. Proper filtering ensures a bright, clear appearance and smooth texture, transforming your homemade creation into a professional-quality liqueur worthy of any Italian import.
How can I tell if my limoncello has gone bad?
Signs of spoilage include changes in smell, taste, or color from the original bright lemon characteristics. Fresh limoncello should maintain its vibrant yellow color and crisp lemon aroma. If you notice any off-odors, unusual tastes, or significant color changes, it’s best to discard the bottle and start fresh with a new batch.