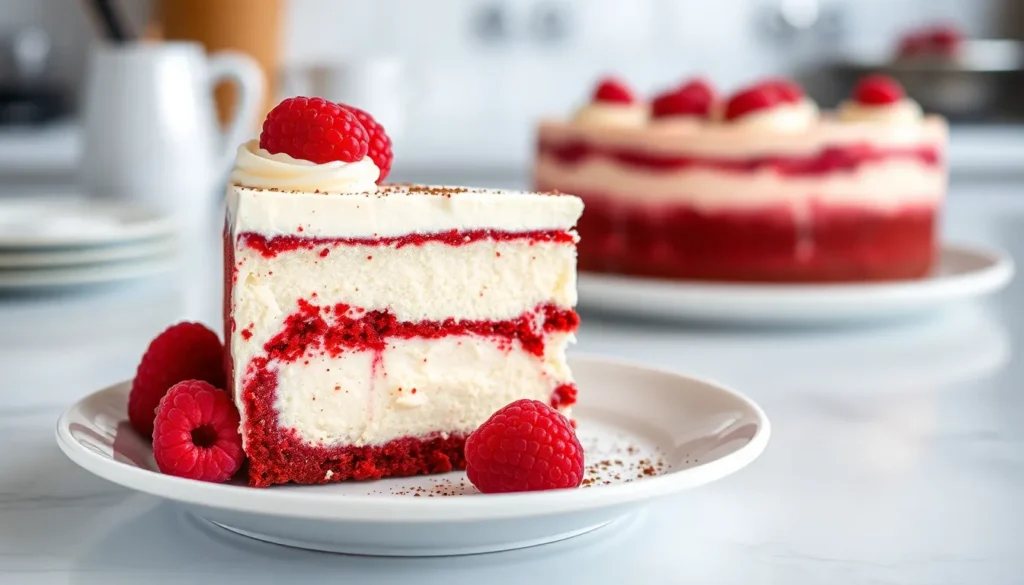
We’ve discovered the ultimate dessert fusion that’ll make your taste buds sing with joy. Red velvet cheesecake combines the rich chocolate undertones and stunning crimson color of classic red velvet cake with the smooth creamy luxury of traditional New York-style cheesecake.
This show-stopping dessert brings together two beloved American classics into one irresistible treat. The velvety cream cheese filling sits perfectly atop a buttery red velvet cake base creating layers of pure indulgence. Whether you’re planning a romantic dinner anniversary celebration or simply want to impress your dinner guests this dessert delivers both visual appeal and incredible flavor.
What makes our red velvet cheesecake truly special is how the tangy cream cheese perfectly balances the subtle cocoa notes while that signature red color creates an Instagram-worthy presentation. We’ll guide you through every step to create this bakery-quality masterpiece right in your own kitchen.
Ingredients
We’ve carefully selected premium ingredients that create the perfect balance between rich red velvet flavor and creamy cheesecake texture. Our ingredient list is organized by component to make your baking process seamless and efficient.
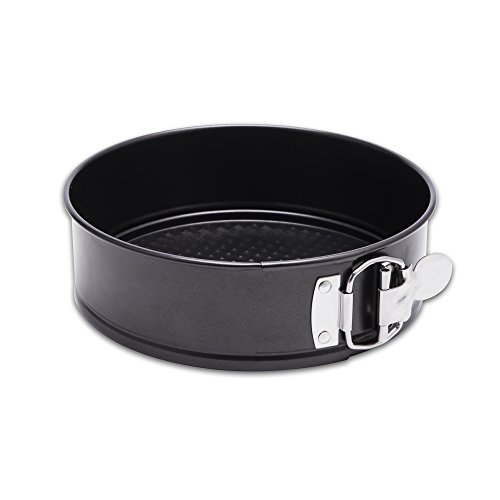
HEALTHY COATING: Our Non-stick coating is a food grade safety coating with no harsh chemicals or hazardous substances. The true double layer coating allows the cake be easily removed without damage. Avoid making it difficult to clean the cake because it sticks to the pan or leaves a lot of cake residue.

BUILT TO LAST: This springform pan’s heavy-duty construction resists warping and heats evenly to brown beautifully and help reduce hot spots

This 9 inch springform pan accommodates standard size recipes
For the Red Velvet Crust
- 2 cups red velvet cake crumbs (about 8 store-bought red velvet cupcakes, crumbled)
- 1/4 cup unsalted butter, melted
- 2 tablespoons granulated sugar
- 1/4 teaspoon vanilla extract
- Pinch of salt
For the Cheesecake Filling
- 32 ounces cream cheese, softened to room temperature
- 1 cup granulated sugar
- 4 large eggs, room temperature
- 1/2 cup sour cream
- 1/4 cup heavy cream
- 2 tablespoons all-purpose flour
- 1 tablespoon red food coloring (gel preferred)
- 2 teaspoons vanilla extract
- 1 tablespoon unsweetened cocoa powder
- 1 teaspoon white vinegar
- 1/2 teaspoon salt
For the Cream Cheese Frosting
- 8 ounces cream cheese, softened
- 1/2 cup unsalted butter, softened
- 3 cups powdered sugar, sifted
- 2 teaspoons vanilla extract
- 2 tablespoons heavy cream
- Red food coloring (optional, for tinting)
Equipment Needed

Creating our spectacular red velvet cheesecake requires exact tools that ensure professional results. A 9-inch springform pan stands as the cornerstone of our equipment list, allowing for easy removal of the delicate cheesecake without damaging its smooth surface. We recommend investing in a high-quality springform pan with a tight seal to prevent any batter leakage during baking.
Our mixing arsenal centers around a stand mixer, which provides the consistent power needed to achieve perfectly smooth cream cheese filling. Two large mixing bowls accommodate the separate preparation of our cheesecake filling and frosting components. A rubber spatula proves essential for scraping bowl sides and folding ingredients without deflating our carefully mixed batter.
Measuring accuracy determines our dessert’s success, making a complete set of measuring cups and spoons non-negotiable. We rely on both dry and liquid measuring cups to ensure precise ingredient ratios. A kitchen scale offers additional precision for professional-level results.
Temperature control plays a crucial role in cheesecake perfection. An instant-read thermometer helps us monitor our cheesecake’s doneness, while an oven thermometer ensures accurate baking temperatures. A wire cooling rack prevents condensation buildup underneath our finished cheesecake.
Additional tools streamline our baking process significantly. A fine-mesh sieve creates lump-free powdered sugar for our frosting, while a bench scraper helps achieve clean, professional edges. Parchment paper lines our pan bottom for foolproof release, and aluminum foil wraps our springform pan during water bath baking to prevent moisture infiltration.

Includes two 2 lb. bags of Cream Cheese pie and pastry filling

THE ULTIMATE STAND MIXER ACCESSORY: wipe your stand mixer whisk and bowl in seconds

THE ULTIMATE STAND MIXER ACCESSORY: wipe your stand mixer whisk and bowl in seconds
Instructions

We’ll guide you through each step to create this stunning red velvet cheesecake that combines the best of both desserts. Follow our detailed process to achieve professional results every time.

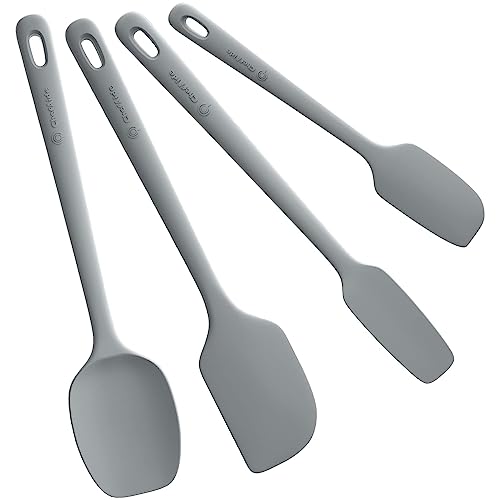
🥞Premium 100% Food Grade Silicone🍲 The silicone spatula set is made of healthy and friendly material, resistant to high temperatures up to 428 °F. No more melting, cracking and non-stick surface, whether cooking, baking, decorating or mixing use spatula, which are are safe, good for your health.
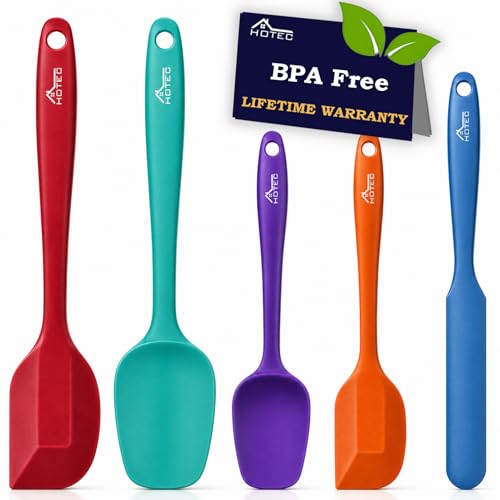
[ HIGH QUALITY ] : 100% made of Food Grade Silicone Material. Low Carbon and Environmentally Friendly Non-toxic, lead free Odourless. Smooth flexible thin edges, No scratches, No damage for your pots and pans , Climate Pledge Friendly !

【Versatile Spatula 5-Piece 】:Silicone spatulas heat resistant:1 x large spoon spatula; 1 x large spatula; 1 x medium spatula/knife; 1 x small spatula; 1 x small spoon spatula.
Prep the Crust
Preheat your oven to 325°F and line a 9-inch springform pan with parchment paper. Grease the sides thoroughly to prevent sticking. Combine the red velvet cake crumbs with melted butter sugar vanilla extract and salt in a large bowl. Mix until the crumbs hold together when pressed. Press this mixture firmly into the bottom and halfway up the sides of your prepared springform pan. Bake for 10 minutes until lightly set. Remove from oven and let cool completely while you prepare the filling.
Make the Cheesecake Filling
Beat 24 oz of softened cream cheese with 1 cup of sugar using your stand mixer until completely smooth and fluffy. Scrape down the bowl frequently to ensure even mixing. Add 3 tablespoons of cocoa powder and beat until incorporated. Add 3 large eggs one at a time beating well after each addition. Mix in 1 cup of sour cream 1 teaspoon of vanilla extract and a pinch of salt until just combined. Add your red food coloring gradually until you achieve the desired deep red velvet color. Pour this filling over your prepared crust and tap the pan gently to release air bubbles.
Bake the Cheesecake
Wrap the bottom and sides of your springform pan tightly with aluminum foil to prevent water from seeping in. Place the wrapped pan in a large roasting pan and fill with hot water halfway up the sides of the springform pan. Bake at 320°F for about 45 minutes or until the center is almost set but still slightly jiggly. Turn off the oven and crack the door open leaving the cheesecake inside for 30 minutes. Remove from water bath and transfer to a wire rack to cool completely. Once cooled refrigerate for at least 4 hours or freeze until solid for easier handling.
Prepare the Frosting
Beat 8 oz of softened cream cheese with 1/2 cup of butter until light and fluffy using your stand mixer. Gradually add 2 cups of powdered sugar beating until smooth and creamy. Mix in 1 teaspoon of vanilla extract and a splash of heavy cream if needed for desired consistency. Add a few drops of red food coloring if you want to tint the frosting to match your red velvet theme.
Assemble and Chill
Remove your cheesecake from the springform pan and place on your serving platter. Spread the cream cheese frosting evenly over the top and sides using an offset spatula or bench scraper for smooth results. Create decorative swirls or patterns as desired. Chill in the refrigerator for at least 30 minutes before serving to allow the frosting to set. Store covered in the refrigerator for up to 5 days.
Make-Ahead Instructions

Planning ahead transforms this impressive dessert from a last-minute stress into an organized baking success. We strongly recommend preparing our red velvet cheesecake components in advance to achieve the best texture and flavor development.

VIBRANT GEL FOOD COLORING - Experience the power of vibrant colors with our high-impact gel food colors. Elevate your treats to new levels of visual appeal and impress with the most attractive creations. Say goodbye to monotonous baking and hello to stunning, show-stopping creations.
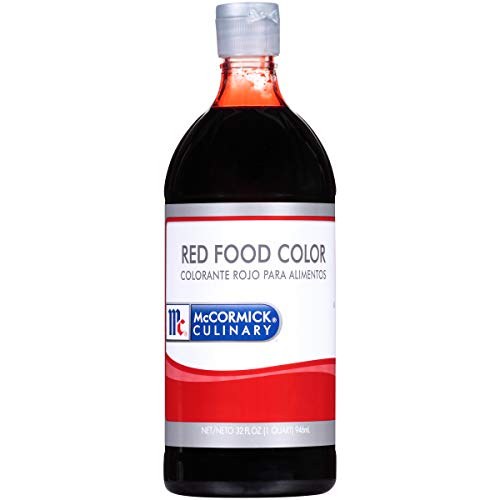
VIBRANT COLOR: McCormick Culinary Red Food Coloring is tasteless and adds a vibrant red color to any sweet indulgence

Eye-Catching Color Premium blends add vivid, rich, fade-resistant, true-to-shade colors that are made specially for your baking and cake decorating. Our assortment of soft gel food coloring includes a rainbow of hues from neon, pastel, primary, and more. Mix our gels for a seemingly limitless color palette!
Baking Components in Advance
Our cheesecake layer can be baked up to 2 days before assembly. After cooling completely, we wrap it tightly in plastic wrap and refrigerate until ready to use. The cream cheese filling actually improves in flavor when given time to set properly.
Red velvet cake layers also benefit from advance preparation and can be baked up to 2 days ahead. We cool these layers completely before wrapping them individually in plastic wrap to maintain moisture. Store wrapped layers at room temperature if using within 24 hours or refrigerate for up to 2 days.
Extended Storage Options
Freezing offers us even more flexibility for planning special occasions. Our cheesecake layer freezes beautifully for longer storage periods. We wrap the cooled cheesecake in plastic wrap, then aluminum foil, before freezing for up to one month. Thaw overnight in the refrigerator before assembly.
Assembly Timeline
Assembly timing plays a crucial role in achieving perfect results. We recommend assembling and frosting our red velvet cheesecake at least one day before serving. This resting period allows the flavors to meld together beautifully while making clean slicing significantly easier.
Our fully assembled cheesecake can be made up to 3 days in advance when stored properly in the refrigerator. The flavors continue developing during this time, creating an even more delicious final result.
| Component | Advance Prep Time | Storage Method |
|---|---|---|
| Cheesecake Layer | Up to 2 days | Refrigerated, wrapped |
| Red Velvet Layers | Up to 2 days | Room temp or refrigerated |
| Assembled Cheesecake | Up to 3 days | Refrigerated |
| Frozen Cheesecake Layer | Up to 1 month | Freezer, double wrapped |
Store our completed cheesecake covered in the refrigerator until serving time. This advance preparation method ensures we can enjoy our gathering without spending the entire day in the kitchen.
Storage Tips

Proper storage ensures our red velvet cheesecake maintains its optimal flavor and texture for days after preparation.

[Multiple Sizes]: Including 5 Measuring cups (1/8, 1/4, 1/3 , 1/2 , 1 cup), 5 Measuring spoons (1/4, 1/2 , 1 tsp, 1/2, 1 tbsp). Meet All Your Needs On Cooking And Baking.
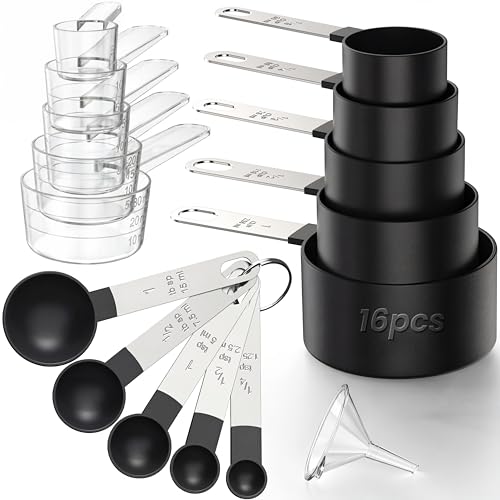
16PCS SET: Including multiple sizes, including 1cup, 1/2cup, 1/3cup, 1/4cup, 1/8cup, 30ml, 20ml, 15ml, 10ml, 5ml, 1tbsp, 1/2tbsp, 1tsp, 1/2tsp, 1/4tsp, and 1 funnel

[Multiple Sizes]: Including 4 Measuring cups ( 1/4, 1/3, 1/2, 1 cup), 6 Measuring spoons (1/8, 1/4, 1/2 , 1 tsp, 1/2, 1 tbsp). Meet All Your Needs On Cooking And Baking
Refrigeration Guidelines
We recommend storing the finished cheesecake in an airtight container to preserve freshness and prevent absorption of refrigerator odors. Plastic wrap provides an excellent alternative for covering the entire cheesecake surface.
| Storage Method | Duration | Temperature |
|---|---|---|
| Refrigerated (covered) | 4-7 days | 35-40°F |
| Room temperature before serving | 20-30 minutes | 68-72°F |
Our cheesecake stays fresh in the refrigerator for up to 4 to 7 days depending on storage conditions and recipe variations. Before serving, we allow the cheesecake to sit at room temperature for 20 to 30 minutes to achieve the perfect creamy texture.
Freezing Options
Long-term storage becomes simple when we wrap the entire cheesecake tightly in plastic wrap followed by aluminum foil. This double-wrapping method prevents freezer burn and maintains quality for up to 1 to 3 months.
| Freezing Method | Duration | Thawing Time |
|---|---|---|
| Whole cheesecake | 1-3 months | Overnight in refrigerator |
| Individual slices | Up to 2 months | 1 hour at room temperature or overnight refrigerated |
Individual slice freezing offers convenient portion control. We place slices in airtight containers where they remain fresh for up to 2 months. Thawing requires either overnight refrigeration or about one hour at room temperature.
Make-Ahead Storage Strategy
Strategic advance preparation maximizes our baking efficiency. The cheesecake layer freezes beautifully for up to 3 months while maintaining its creamy consistency. Our cream cheese frosting stores in the refrigerator for up to 2 days before assembly.
We assemble and chill the complete cheesecake for at least 4 hours or overnight before serving. This resting period allows flavors to meld and ensures the perfect slice presentation every time.
Serving Suggestions

Red velvet cheesecake transforms any gathering into a memorable celebration. We recommend serving this stunning dessert chilled directly from the refrigerator for the best texture and flavor experience.
Valentine’s Day presents the perfect occasion for this romantic dessert. The rich red color creates an ideal centerpiece for intimate dinners or date nights at home. We suggest garnishing each slice with fresh raspberries or strawberries to enhance the visual appeal and complement the cream cheese flavors.
Special occasions call for elegant presentation techniques. Dust each plate lightly with cocoa powder before placing the slice. We like to add a dollop of freshly whipped cream alongside each serving to balance the richness of the cheesecake layers.
Room temperature serving works beautifully for brief periods during dinner parties. Allow the cheesecake to sit out for 15 to 20 minutes before slicing to achieve cleaner cuts. The texture becomes slightly softer while maintaining the structural integrity of the layers.
Portion control becomes effortless with bite-sized versions. We recommend cutting the full cheesecake into smaller squares or triangles for buffet-style events. These red velvet cheesecake bites offer guests easier handling while providing perfect portion sizes for large gatherings.
Garnishing options elevate the final presentation significantly. Sprinkle red velvet cake crumbs around the plate’s edge for a professional bakery appearance. We often pipe additional cream cheese frosting rosettes on top of each slice for an extra touch of elegance.
Beverage pairings enhance the overall dessert experience. Serve alongside freshly brewed coffee or espresso to cut through the richness. We also recommend pairing with champagne or dessert wines for formal celebrations.

Premium Cheesecake Pan: The Wilton Platinum Non-Stick Spring Form Pan is a heavy-duty bakeware essential with even-heat distribution and quick-release performance; it measures 9 inches in diameter and 2.7 inches deep

Durable Springform Pan 9 Inch Nonstick - The nonstick springform pan set include 1pcs nonstick 9 inch springform pan, 1pcs silicone protector and 50pcs parchment paper liners. The spring form pan for cheesecake can be used to make all kinds of cakes, such as cheese cake, wedding cake, pizzas, quiches, ice cream cakes, lasagnas and more, springform pan 9 inch nonstick can also serve as a cheesecake pan for water bath.

Leak-Resistant Design for Reliable Baking: RFAQK 9 inch Springform Pan features a secure stainless steel buckle and tight seal to prevent leaks with thick cake batters like cheesecake. While not fully watertight for thin liquids or water baths, it delivers dependable performance for everyday baking.
Troubleshooting Tips

Creating the perfect red velvet cheesecake requires attention to detail and understanding common pitfalls that can affect our final result. We’ve compiled essential answers to help you navigate potential challenges and achieve bakery-quality results every time.

Make delicious cream cheese icing...without the cream cheese! Significantly less expensive than using real cream cheese, plus your iced cakes and cupcakes do not require refrigeration. Ideal for home-based baking businesses that are restricted by Cottage Food Laws from selling baked goods with frosting that needs to be refrigerated. This flavor is great in candies & chocolates too. Appropriate for use in chocolates and coatings (typical use is ¼ to ½ teaspoon per pound)

THE ULTIMATE STAND MIXER ACCESSORY: wipe your stand mixer whisk and bowl in seconds

1 - 2 Pound tube of By The Cup Cream Cheese Pie & Pastry Filling
Preventing Cracks in Our Cheesecake
Cracking remains the most frequent issue when baking cheesecake. We must avoid overbaking by removing the cheesecake when the center still appears slightly jiggly. Cooling the cheesecake too rapidly causes thermal shock that leads to unsightly cracks across the surface.
Our cooling process should happen gradually in three stages. First we turn off the oven and leave the cheesecake inside for one hour with the door slightly ajar. Next we move it to room temperature for several hours before transferring to the refrigerator overnight. This method prevents the dramatic temperature changes that cause cracking.
Avoiding Pan Sticking Issues
Inadequate preparation of our springform pan creates removal difficulties that can ruin our presentation. We need to thoroughly butter every surface of the pan including the sides and bottom. Overbaking also contributes to sticking as the cheesecake becomes too firm and adheres to the pan walls.
When our cheesecake does stick we can wrap a warm damp towel around the outside of the pan for several minutes. This gentle heat helps loosen the cheesecake from the sides and facilitates easier removal.
Creating Smooth Cream Cheese Filling
Cream cheese clumps destroy the silky texture we want in our cheesecake filling. We must beat the cream cheese at high speed for exactly 2 minutes before adding other ingredients. Room temperature dairy ingredients blend more easily and prevent lumpy textures.
All our dairy components including cream cheese sour cream and heavy cream should sit at room temperature for at least one hour before mixing. Cold ingredients resist incorporation and create an uneven texture throughout our cheesecake.
Managing Mixing Techniques
Overmixing the batter after adding eggs incorporates excessive air that expands during baking and contracts during cooling. We should mix on low speed once the eggs join our mixture and stop as soon as ingredients combine.
Air bubbles trapped in our batter create texture issues and potential cracking. We gently tap the mixing bowl on the counter several times to release trapped air before pouring the filling into our prepared crust.
Professional Finishing Techniques
Using a cake leveler helps us achieve perfectly even layers and makes removal from the pan significantly easier. This tool creates uniform surfaces that stack beautifully and present professionally.
Decorating the top with our cream cheese frosting serves a dual purpose beyond flavor enhancement. The frosting covers any minor imperfections or small cracks that might appear during baking giving us a flawless final presentation.
| Common Problem | Primary Cause | Solution |
|---|---|---|
| Cracking | Overbaking or rapid cooling | Remove when center is jiggly; cool gradually |
| Pan sticking | Insufficient buttering | Butter thoroughly; use warm towel technique |
| Cream cheese clumps | Cold ingredients | Beat 2 minutes; use room temperature dairy |
| Air bubbles | Overmixing | Mix on low speed; tap bowl to release air |
Conclusion
We’ve walked you through every step needed to create this show-stopping red velvet cheesecake that’ll have your guests asking for the recipe. From selecting premium ingredients to mastering professional techniques this dessert combines the best of both worlds in one unforgettable treat.
The beauty of this recipe lies in its flexibility – you can prepare components ahead of time making it perfect for stress-free entertaining. Whether you’re celebrating Valentine’s Day hosting a dinner party or simply craving something extraordinary this cheesecake delivers on both taste and visual impact.
With proper storage techniques and our troubleshooting tips you’ll achieve bakery-quality results every time. Your red velvet cheesecake will become the centerpiece that transforms any ordinary gathering into a memorable celebration.
Premium 100% Food Grade Silicone: The silicone spatula set is made of healthy and friendly material, resistant to high temperatures; No more melting, cracking and worrying

PACKAGE INCLUDES: 2 Silicone Rubber Spatulas (with scraper shaped heads); With the head part made of premium food-grade silicone rubber, and the handle made of nylon plastic, this spatula set is nontoxic, BPA-free & very durable. Both the head blade and the handle are 100% safe for direct food contact.

Safe & Food Grade : Large Size Spatula with More versatile ! high quality food grade silicone, 100% BPA-free. Heat resistant up to 600°F, No worry about it melting into your food.
Frequently Asked Questions

One 1 fluid ounce bottle of Red Food Coloring

Eye-Catching Color Premium blends add vivid, rich, fade-resistant, true-to-shade colors that are made specially for your baking and cake decorating. Our assortment of soft gel food coloring includes a rainbow of hues from neon, pastel, primary, and more. Mix our gels for a seemingly limitless color palette!

Eye-Catching Color Premium blends add vivid, rich, fade-resistant, true-to-shade colors that are made specially for your baking and cake decorating. Our assortment of soft gel food coloring includes a rainbow of hues from neon, pastel, primary, and more. Mix our gels for a seemingly limitless color palette!
What makes red velvet cheesecake different from regular cheesecake?
Red velvet cheesecake combines the tangy cream cheese filling of New York-style cheesecake with subtle cocoa notes and the signature red color of red velvet cake. It features a red velvet cake crust instead of traditional graham crackers, creating a unique flavor profile that balances rich creaminess with mild chocolate undertones and an eye-catching presentation.
Can I make red velvet cheesecake ahead of time?
Yes! Red velvet cheesecake is perfect for make-ahead preparation. The cheesecake layer can be baked up to 2 days in advance and refrigerated, or frozen for up to one month. For best results, assemble and frost the cheesecake at least one day before serving to allow flavors to meld properly.
How long does red velvet cheesecake last in the refrigerator?
A properly stored red velvet cheesecake will last 4-7 days in the refrigerator when covered with plastic wrap or stored in an airtight container. The completed cheesecake maintains optimal flavor and texture for up to 3 days after assembly, making it ideal for planned gatherings and special occasions.
What equipment do I need to make red velvet cheesecake?
Essential equipment includes a 9-inch springform pan for easy removal, a stand mixer for smooth filling, mixing bowls, measuring tools, and a kitchen scale. Additional helpful items include an instant-read thermometer, wire cooling rack, fine-mesh sieve, parchment paper, and aluminum foil for the water bath during baking.
How do I prevent my red velvet cheesecake from cracking?
Prevent cracks by avoiding overbaking and cooling the cheesecake gradually. Use room temperature ingredients for a smooth filling, don’t overmix to avoid air bubbles, and bake in a water bath for even heat distribution. Let the cheesecake cool completely in the oven with the door slightly open before refrigerating.
Can I freeze red velvet cheesecake?
Yes, red velvet cheesecake freezes well for long-term storage. Wrap the whole cheesecake properly and freeze for 1-3 months. Individual slices can be frozen for up to 2 months. The cheesecake layer alone can be frozen for up to 3 months before assembly and frosting.
What are the best serving suggestions for red velvet cheesecake?
Serve chilled for optimal texture and flavor. Garnish with fresh berries like raspberries or strawberries, dust plates with cocoa powder, and add whipped cream for elegant presentation. Pair with coffee, espresso, champagne, or dessert wines. For large gatherings, consider making bite-sized portions for easier handling.
Do I need special ingredients for red velvet cheesecake?
The recipe uses premium but accessible ingredients including cream cheese, red food coloring, cocoa powder, and red velvet cake crumbs for the crust. Most ingredients are common baking staples, with red food coloring being the most specialized item needed to achieve the signature color.