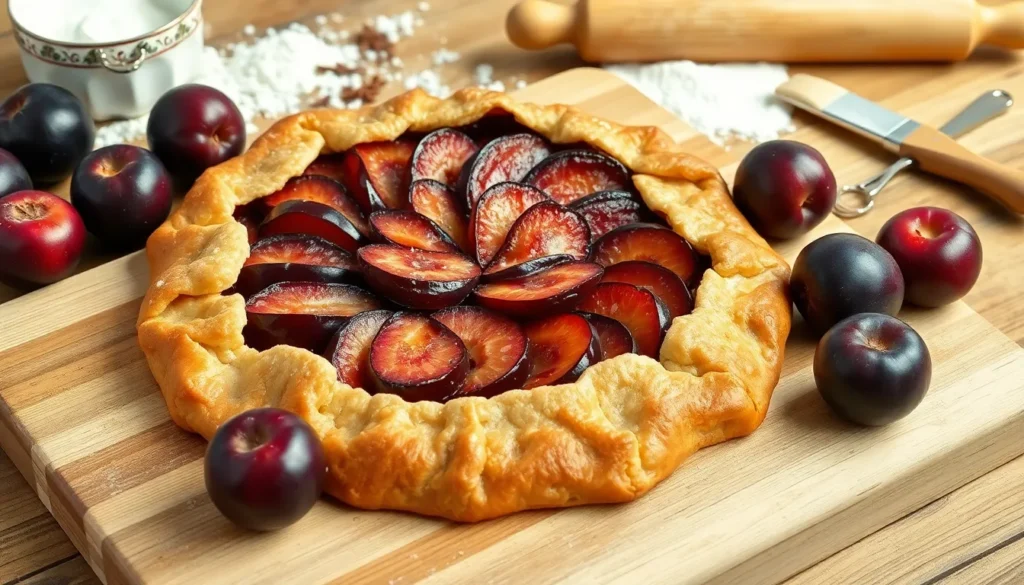
We’ve discovered the perfect way to showcase summer’s juiciest plums in this rustic plum galette that’ll have your kitchen smelling like a French countryside bakery. This free-form tart combines buttery pastry with sweet-tart plums in a dessert that’s surprisingly simple yet impressively elegant.
Unlike traditional pies that require perfect crimping and lattice work, galettes embrace imperfection beautifully. We love how the rustic edges fold naturally around the fruit, creating golden pleats that look effortlessly chic. The best part? You don’t need any special pans or fancy techniques.
What makes this plum galette irresistible is how the fruit’s natural juices mingle with a touch of sugar and warm spices, creating a jammy filling that contrasts perfectly with the crisp, flaky crust. Whether you’re using sweet Italian plums or tart Santa Rosas, this versatile recipe adapts beautifully to whatever variety you’ve got on hand.
Ingredients
We’ve organized these ingredients to match our preparation order, making the galette assembly process smooth and effortless. Each component builds upon the others to create this rustic French pastry masterpiece.

ALL EXCLUSIVE SET - 2 Pack packaging Madeleine Pan enables you to enjoy making at home better. Classic French shell-shaped Madeleine Pan with traditional 12 cups capacity. It's just a right size for your french tea cakes.
Perfect for delicious French madeleines that bake evenly and taste great; heavy gauge aluminized steel that is commercial grade

Safe and Health - Food-grade Silicone coating, non-Teflon, no harmful substance release in high temperature ,PTFE & PFOA FREE
For the Pastry Dough
- 1¼ cups all-purpose flour
- ½ teaspoon kosher salt
- 1 tablespoon granulated sugar
- 8 tablespoons cold unsalted butter, cubed
- 3-4 tablespoons ice water
- 1 teaspoon apple cider vinegar
For the Plum Filling
- 2 pounds ripe plums, pitted and sliced into ¼-inch wedges
- ⅓ cup granulated sugar (adjust based on plum sweetness)
- 2 tablespoons cornstarch
- 1 teaspoon vanilla extract
- ½ teaspoon ground cinnamon
- ¼ teaspoon ground ginger
- Pinch of nutmeg
- 1 tablespoon fresh lemon juice
- 1 tablespoon unsalted butter, cut into small pieces
For the Egg Wash and Finishing
- 1 large egg, beaten
- 1 tablespoon heavy cream or milk
- 2 tablespoons coarse sugar or turbinado sugar
- 1 tablespoon sliced almonds (optional)
Equipment Needed

Creating the perfect plum galette requires the right kitchen tools to ensure smooth preparation and professional results. We recommend having these essential pieces of equipment ready before starting your baking adventure.
A stand mixer or food processor serves as the foundation for creating our buttery pastry dough. These powerful appliances efficiently cut cold butter into flour without overworking the mixture. Food processors work particularly well for achieving the perfect crumbly texture that makes galette pastry so tender.
Your rolling pin becomes crucial for shaping the dough into a rustic circle. We prefer using a wooden or marble rolling pin for even pressure distribution. The goal is creating a roughly 12-inch circle that embraces the imperfect aesthetic of this French pastry.
A baking sheet lined with parchment paper provides the perfect foundation for our galette. Parchment paper prevents sticking while allowing easy transfer from counter to oven. We recommend using a heavy-duty baking sheet that distributes heat evenly throughout the baking process.
The pastry brush ensures our egg wash creates that golden, glossy finish on the crust edges. Silicone brushes work exceptionally well as they distribute the wash evenly without leaving streaks. This tool transforms the rustic appearance into a bakery-worthy presentation.
Additional helpful tools include mixing bowls for combining ingredients, a sharp knife for slicing plums uniformly, and measuring cups for accurate ingredient portions. Having these tools organized and within reach streamlines the entire galette-making process from start to finish.

Solid Wood Construction: This rolling pin is made from solid Walnut wood for required durability and long-lasting use. This rolling pin is suitable to sustain every day, heavy-duty use in the home, as well as restaurants.

🎯 Precision Control, Professional Results Tapered French design allows better feel and control when rolling dough—ideal for pizza, pie crusts, cookies, pasta, and more.

MEASURES 20-1/2-Inch by 1-1/2-Inch, J K Adams French Dowel Maple Rolling Pin
Instructions

We’ll guide you through each step to create this rustic French pastry with its golden crust and jammy plum filling. Follow these detailed instructions for a perfectly baked galette that captures the essence of traditional French baking.

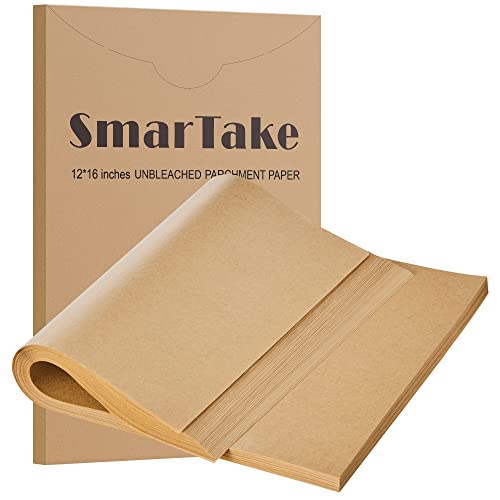
Package Includes: One (1) Reynolds Kitchens Unbleached Parchment Paper Roll measuring 45 feet long by 12 inches wide (45 square feet total)

Natural, Unbleached Parchment Paper: Made from natural wood pulp, our parchment paper baking sheet is completely free from fluorescent agents, chlorine, and other harmful chemicals. It's food-grade, waterproof and BPA-FREE. Also the paper sheets is biodegradable, eco-friendly.

Package Includes—Four (4) 25ct packs of Reynolds Kitchens Cookie Baking Sheets measuring 12 inches long by 16 inches wide (100 Total Sheets)
Prepare the Pastry Dough
We start by combining 1 1/4 cups all-purpose flour with 1/4 teaspoon kosher salt and 1 teaspoon granulated sugar in a large mixing bowl. Add 8 tablespoons of cold unsalted butter cut into small cubes to the flour mixture. Using a pastry blender or our fingers we work the cold butter into the flour until the mixture resembles coarse crumbs with some larger butter pieces remaining.
We gradually drizzle 3 tablespoons of ice water and 1 teaspoon apple cider vinegar over the flour mixture. Using a fork we gently mix until the dough begins to come together without overworking it. The dough should hold together when squeezed but still look slightly shaggy.
We shape the dough into a disk and wrap it tightly in plastic wrap. Refrigerate the wrapped dough for at least 1 hour or up to 2 days before rolling.
Prepare the Plums
We slice 2 pounds of ripe plums into 1/4-inch thick wedges removing the pits as we work. In a large mixing bowl we combine the sliced plums with 1/3 cup granulated sugar 2 tablespoons cornstarch 1 teaspoon vanilla extract 1/2 teaspoon ground cinnamon 1/4 teaspoon ground ginger and a pinch of nutmeg.
We add 1 tablespoon fresh lemon juice to the plum mixture and gently toss everything together until the fruit is evenly coated. The cornstarch will help thicken the natural juices during baking preventing a soggy bottom crust.
We let the seasoned plums sit for 10 minutes allowing the sugar to draw out some of the fruit’s natural juices and create a syrupy coating.
Assemble the Galette
We remove the chilled dough from the refrigerator and let it sit at room temperature for 5 minutes to soften slightly. On a lightly floured surface we roll the dough into a 13-inch circle about 1/8 inch thick keeping the edges rustic and imperfect.
We carefully transfer the rolled dough to a parchment paper lined baking sheet. Using our hands we gently press out any air bubbles and ensure the dough lies flat against the parchment.
We arrange the seasoned plum slices in overlapping circles within the center of the dough leaving a 2-inch border around the edges. The plums should be packed snugly but not overcrowded. We dot the fruit with 2 tablespoons of cold unsalted butter cut into small pieces.
We fold the border of dough up and over the outer edge of the plums creating rustic pleats as we work around the galette. The center remains open showcasing the beautiful plum arrangement.
Bake the Galette
We preheat our oven to 375°F and position the rack in the center. In a small bowl we whisk together 1 beaten egg with 1 tablespoon heavy cream or milk to create an egg wash.
Using a pastry brush we apply the egg wash to the exposed pastry border for a golden finish. We sprinkle the crust with coarse sugar and optional sliced almonds for added texture and flavor.
We bake the galette for 50-60 minutes until the crust turns golden brown and the plums are tender and bubbling. The fruit should appear jammy and the pastry should sound hollow when tapped.
We remove the galette from the oven and let it cool on the baking sheet for at least 15 minutes before serving. If juices have leaked during baking we use a knife to gently loosen the galette from the parchment paper while still warm.
Make-Ahead Instructions

Planning ahead transforms your plum galette experience from rushed to relaxed. We recommend preparing components in advance to ensure smooth assembly and exceptional results.
Prepare the Dough Early
Start with the pastry dough at least one hour before you plan to assemble your galette. We wrap the formed disk tightly in plastic wrap and refrigerate it for 30 minutes to one hour before rolling. This chilling period allows the butter to firm up while the gluten relaxes, creating our ideal flaky texture.
Ready Your Plum Filling
Slice your plums into thin wedges shortly before assembly time. We mix the sliced plums with granulated sugar and let them sit for several minutes to release their natural juices. This brief resting period creates a syrupy base that prevents the galette from becoming soggy during baking.
Assembly Timeline Strategy
We recommend assembling your galette within 30 minutes of the planned baking time for optimal results. Place the seasoned plum mixture in the center of your rolled dough, leaving adequate border space around the edges. Fold the pastry edges over the fruit filling carefully to avoid creating cracks that could leak during baking.
Storage Considerations
Your completed unbaked galette can rest at room temperature for up to 2 hours before baking. We suggest covering it loosely with plastic wrap if you need to delay baking beyond this timeframe. Once baked, the galette maintains its best quality when stored at room temperature for several days under loose covering.

Versatile Baking: Perfect 1:1 substitute for wheat flour in non-yeasted recipes, ideal for gluten-free cookies, cakes, muffins, and pancakes. Simplify your gluten-free baking with this all-purpose flour alternative.

King Arthur Baking Company Non-GMO Project Verified, Certified Kosher Unbleached All Purpose Flour, 32 Oz Bag

DURABLE STAINLESS STEEL : This all purpose scraper is constructed of brushed stainless steel and a comfortable Black TPE handle.
Serving Suggestions

We love serving this rustic plum galette while it’s still slightly warm from the oven. The contrast between the hot pastry and cool accompaniments creates an irresistible combination that showcases the galette’s natural flavors.
Classic pairings elevate this French-inspired dessert to restaurant quality. We recommend spooning vanilla ice cream alongside each slice, allowing it to slowly melt into the jammy plum juices. Freshly whipped cream offers another traditional option that complements the galette’s buttery crust without overwhelming the delicate fruit flavors.
Elegant presentations transform our homemade galette into a sophisticated dessert. We drizzle honey over warm slices to enhance the natural sweetness of the plums. Dusting with powdered sugar through a fine-mesh sieve creates an attractive finish that photographs beautifully for special occasions.
Refreshing alternatives provide lighter options for health-conscious guests. We often serve Greek yogurt on the side, which adds protein while balancing the galette’s richness. The tangy yogurt creates a pleasant contrast against the sweet plums and creates a more balanced dessert experience.
Gourmet pairings complete the French bakery experience we’re trying to recreate. We suggest serving dessert wine alongside the galette, particularly late-harvest Riesling or Moscato that echoes the stone fruit flavors. The wine’s sweetness harmonizes with the plums while its acidity cuts through the buttery pastry.
Temperature plays a crucial role in serving this galette properly. We find that allowing the galette to cool for 15-20 minutes after baking prevents the filling from being too hot while maintaining the crust’s crispness. Room temperature slices work well for casual serving, though we prefer the warmth that brings out the spices and fruit aromas.

HIGH HEAT RESISTANT:These silicone madeleine pans are designed with high heat resistance, working well in temperature range from -30℃ to +230℃ (-22℉ to 446℉).

【Carbon steel material】Made with premium quality carbon steel material, durable and steady to use, makes your cake more beautiful and delicious.
LIGHT, BUTTERY MADELAINES, FROM … YOU! Imagine… your favorite beautiful French tea cakes, on demand. These scrumptious shell-shaped madeleines brighten any room they enter and go with any hot beverage (and any social media) or alone as a special, savvy treat.
Storage Tips

We can store our freshly baked plum galette several ways to maintain its delicious flavor and texture. The storage method we choose depends on how quickly we plan to enjoy our rustic dessert.

Solid Wood Construction: This rolling pin is made from solid rubber wood for required durability and long-lasting use. This rolling pin is suitable to sustain every day, heavy-duty use in the home, as well as restaurants.

**Solid & Durable Beechwood Core:** Our wooden rolling pins made from premium natural beechwood, natural beechwood known for its hardness and fine grain, ensuring enduring strength to easily meet frequent use in both home and professional kitchens.this wood rolling pin has been subjected to multiple fine polishings,the surface is smooth ,It prevents flour from sticking to the surface.
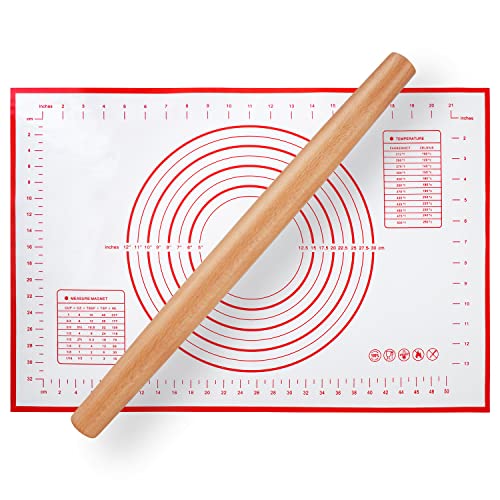
FRENCH ROLLING PIN: This wood rolling pin has a classic, timeless and original European design. It works excellent with non-stick silicone baking mats and granite or marble countertops. The tapered design enables better control as you roll the dough. You will be able to roll more easily and with minimum effort.
Room Temperature Storage
At room temperature, our plum galette stays fresh for up to 2 days when loosely covered. We recommend using a clean kitchen towel or placing it under a cake dome to protect the surface while allowing air circulation. This method works perfectly when we plan to serve the galette within a day or two of baking.
Refrigerator Storage
For longer storage, we wrap our galette tightly in plastic wrap or aluminum foil before placing it in the refrigerator. Properly stored galettes maintain their quality for 2 to 5 days depending on the juiciness of our plums and how well we’ve sealed the wrapping. We find that firmer plum varieties tend to hold up better during extended refrigeration.
| Storage Method | Duration | Temperature | Covering Required |
|---|---|---|---|
| Room Temperature | Up to 2 days | 68-72°F | Loose covering |
| Refrigerated | 2-5 days | 35-40°F | Tight wrapping |
| Frozen (unbaked) | Up to 2 months | 0°F | Freezer-safe bag |
Freezing Options
We achieve the best results by freezing our galette before baking. After assembling the galette completely, we wrap it well in plastic wrap and place it inside a freezer-safe bag. Our unbaked galette maintains excellent quality for up to 2 months in the freezer. When we’re ready to bake, we thaw it overnight in the refrigerator before proceeding with our original baking instructions.
Reheating Instructions
To restore warmth and crispness to our stored galette, we preheat the oven to 350°F. We place the galette on a baking sheet and warm it for 10 to 15 minutes until heated through. This gentle reheating method revives the flaky pastry texture while warming the jammy plum filling to perfection.
Conclusion
We’ve shown you how this rustic plum galette brings bakery-quality dessert to your home kitchen with minimal fuss. The forgiving nature of this free-form tart makes it perfect for both novice and experienced bakers looking to create something special.
This versatile recipe adapts beautifully to whatever plums you have on hand while delivering consistently delicious results. The combination of buttery pastry and jammy fruit filling creates a dessert that’s equally at home at casual family dinners or elegant dinner parties.
With our make-ahead tips and storage guidelines you’ll find this galette fits seamlessly into your baking routine. Whether you’re planning ahead or need a last-minute dessert this plum galette delivers impressive results every time.
Pre-cut Baking Parchment Paper Sheets: Are you tired of cutting curly parchment paper? Our pre-cut parchment sheets can let you get rid of cutting parchment anymore. The sheets lay flat on the baking tray and will not curl

EXTRA THICKENED: Each of these 200 pieces of parchment is extra thick, and our parchment paper is 45gsm. more durable and less brittle, so you can easily pick up the food on the baking sheet by lifting parchment paper without any breaking. MOREOVER, IT IS MORE COST-EFFECTIVE

【Heavy Duty】: Crafted from high strength thick paper and silicone coating, these parchment baking sheets are highly heat-resistant up to 450℉, they won’t be torn or damaged during the cooking process.
Frequently Asked Questions

32 ounces of organic whole wheat pastry flour

HOME BAKERS REJOICE: Now available in the USA, this gourmet French flour offers home bakers a premium product to transform home baking. Crafted by the century-old French milling company Grands Moulins de Paris together with renowned chef Dominique Ansel, this refined T55 flour delivers professional-grade quality right to your kitchen.

What is a plum galette and how is it different from a traditional pie?
A plum galette is a rustic, free-form French pastry featuring a buttery crust filled with sweet-tart plums. Unlike traditional pies, galettes embrace an imperfect, casual aesthetic with no pie pan required. The pastry is simply rolled out, filled with fruit, and the edges are folded over to create rustic pleats, making it much easier to prepare than conventional pies.
What ingredients do I need to make a plum galette?
You’ll need all-purpose flour, kosher salt, granulated sugar, cold unsalted butter, ice water, and apple cider vinegar for the pastry. For the filling: ripe plums, sugar, cornstarch, vanilla extract, cinnamon, ginger, nutmeg, lemon juice, and butter. You’ll also need a beaten egg and heavy cream for the egg wash, plus optional coarse sugar and sliced almonds for finishing.
What equipment is essential for making a plum galette?
Essential equipment includes a stand mixer or food processor for cutting butter into flour, a wooden or marble rolling pin for shaping dough, and a heavy-duty baking sheet lined with parchment paper. You’ll also need a pastry brush for egg wash, mixing bowls, a sharp knife for slicing plums, and measuring cups to streamline the process.
Can I make the galette dough ahead of time?
Yes, you can prepare the pastry dough at least one hour in advance and refrigerate it for ideal flaky texture. The dough should be shaped into a disk and chilled before rolling. However, slice and mix the plum filling shortly before assembly to prevent sogginess, and assemble the galette within 30 minutes of baking for optimal results.
How should I store a baked plum galette?
At room temperature, store the galette loosely covered for up to 2 days. For longer storage, wrap tightly and refrigerate for 2-5 days depending on plum juiciness. You can freeze an unbaked galette wrapped in a freezer-safe bag for up to 2 months. Thaw overnight in the refrigerator before baking.
What are the best serving suggestions for plum galette?
Serve the galette warm with vanilla ice cream or freshly whipped cream. For elegant presentation, drizzle with honey or dust with powdered sugar. Greek yogurt offers a lighter accompaniment. Pair with dessert wines like late-harvest Riesling or Moscato. Allow the galette to cool for 15-20 minutes after baking for the best texture and flavor.
How do I reheat a plum galette?
Reheat the galette in a preheated 350°F oven for 10-15 minutes to restore its flaky texture and warm the filling perfectly. This method is much better than using a microwave, which can make the pastry soggy. The gentle oven heat will revive the galette’s original texture and enhance the fruit flavors.